

Configure a custom domain for your application
It is easy to change your application's subdomains by changing its global settings but it'll always be followed by the domain eu.dataplatform.ovh.net such
Objective
Why would you want to create your own domain? Now, let's imagine that you have a project with a new application that is accessible from the following URL:
It is easy to change your application's subdomains by changing its global settings but it'll always be followed by the domain eu.dataplatform.ovh.net such as for instance:
What if you would like to get rid of the eu.dataplatform.ovh.net domain entirely?. You would like to completely white label the final product you are building. Your application URL could look like anything you fancy as long as its available, such as:
Let's check-out how to do this with the following steps:
- Generate a private Key and .csr file
- Obtaining .pem file using your private key
- Register your domain name at organization level
- Register your new application domain name
Requirements
To attempt following the steps indicated in this article, we highly recommend that you already know about:
- How to install & use OpenSSL tools
- How to generate a valid SSL Certificate
- How to add a hostname to your domain
Please note that the following steps also assumes that you own an existing Domain. If that's not the case, make sure to first create your own domain so you can use it to for your application.
If you do not have an existing domain, check out online to learn how to do so, there are many available options such as the Google Domains tool.
If you fulfill all the above criteria, we'll need to go through one last step before setting up our application's custom domain, that is generate a private key and CSR file. See the following section to do that.
Generate a Private Key and a CSR file
Required Information
To generate a CSR (Certificate Signed Request), you will need to provide following informations:
Open a simple text editor and create a new my-app.txt file with the following structure:
Obviously replace the parameters as described in the table above with your own information.
Creating files using OpenSSL
In your personal command line environment execute the following bash commands:
That will create 2 separate files:
- my-app.csr that you will be need to provide to SSL Certification Authority
- my-app.key that is your personal private key which you should keep securely and not communicate
If you are new to creating custom domain, make sure to keep the application key secret! Read-more about OpenSSL Essentials in this article from Digital Ocean.
Obtaining a CRT & PEM file
Now that we have the .csr file, we will be able to use it to obtain a Certificate (CRT) & Privacy Enhanced Mail (PEM) file. To do that, you should simply provide the my-app.csr file to your favorite SSL Certification Authority which will provide you a valid .crt & .pem file.
Before using the .pemfile let's make sure that it's valid. To do that you can run the following commands which should all yield the same output.
Register the new domain to your organization & application
To use the new domain we'll first need to register it at the Organization level so every project or applications inside the project can leverage it. We will then need to head to the applications themselves to set-it up individually.
Register domain for your organization
Head over to the Organization information, access the Settings section and navigate to the Infrastructure tab.
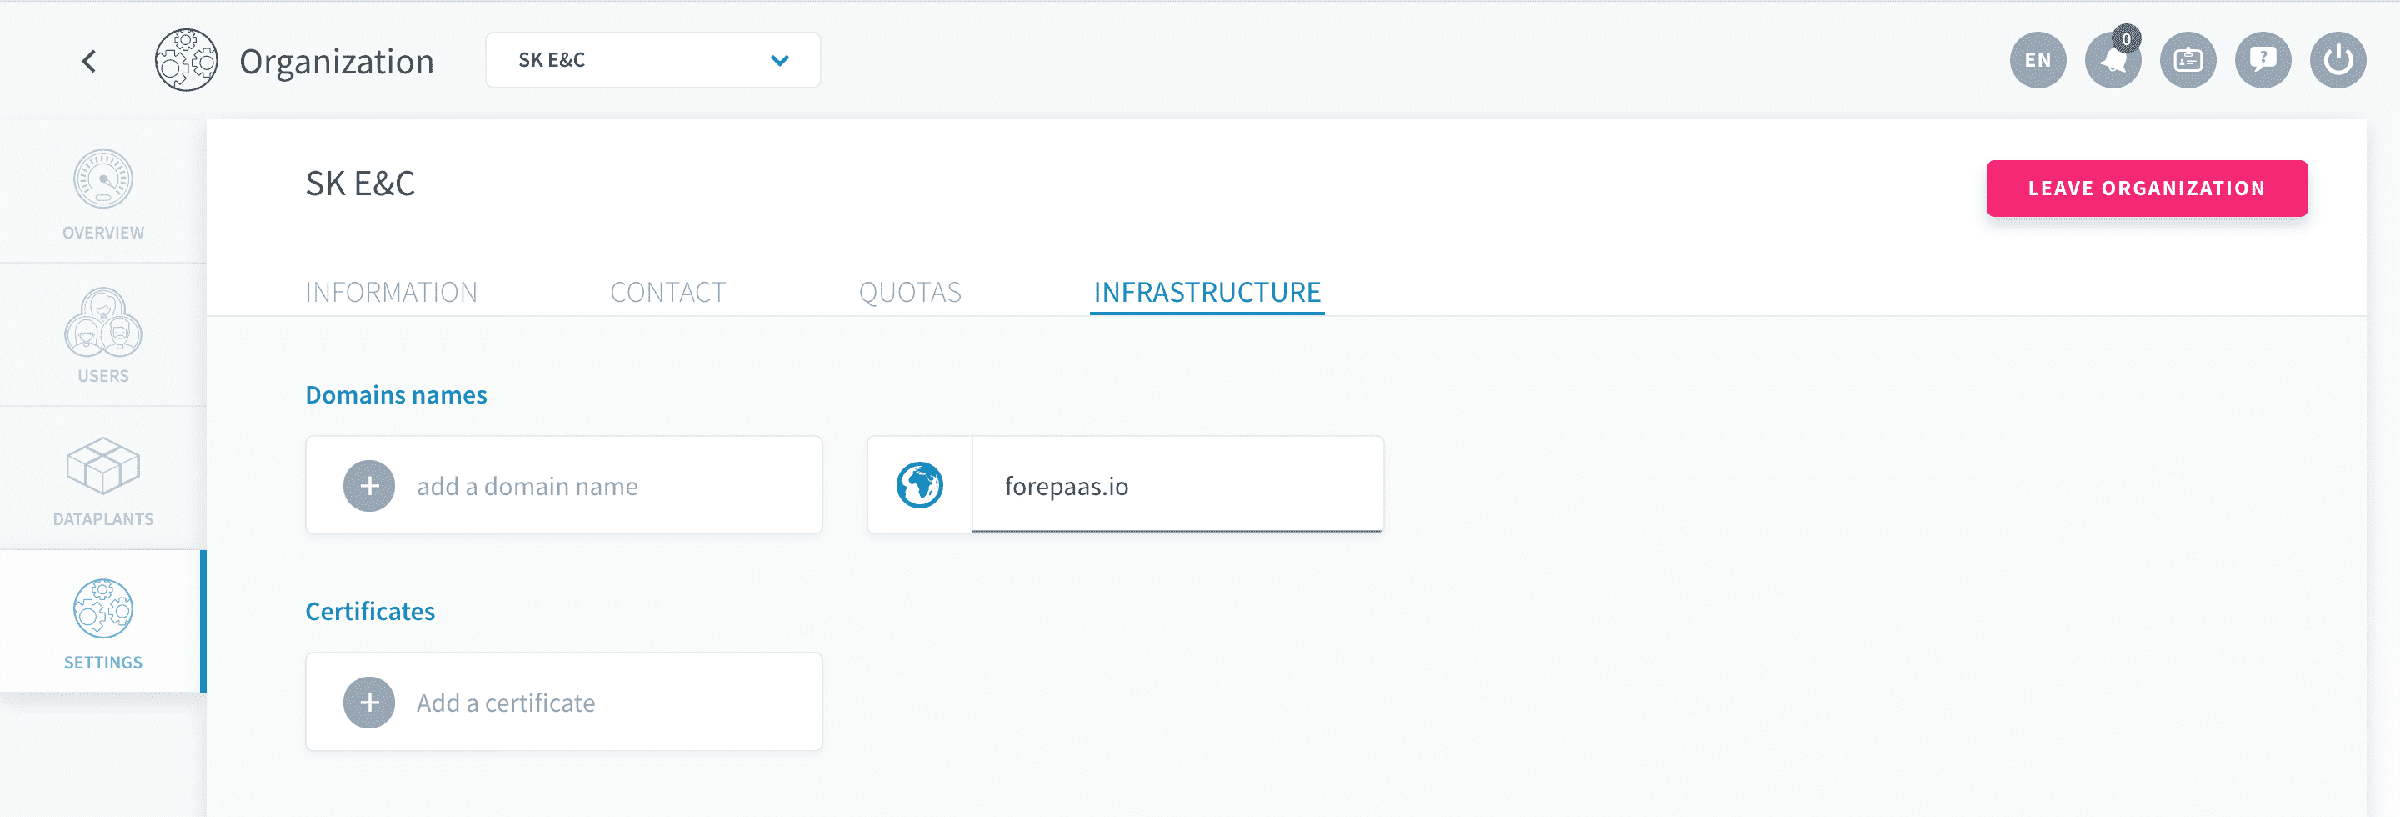
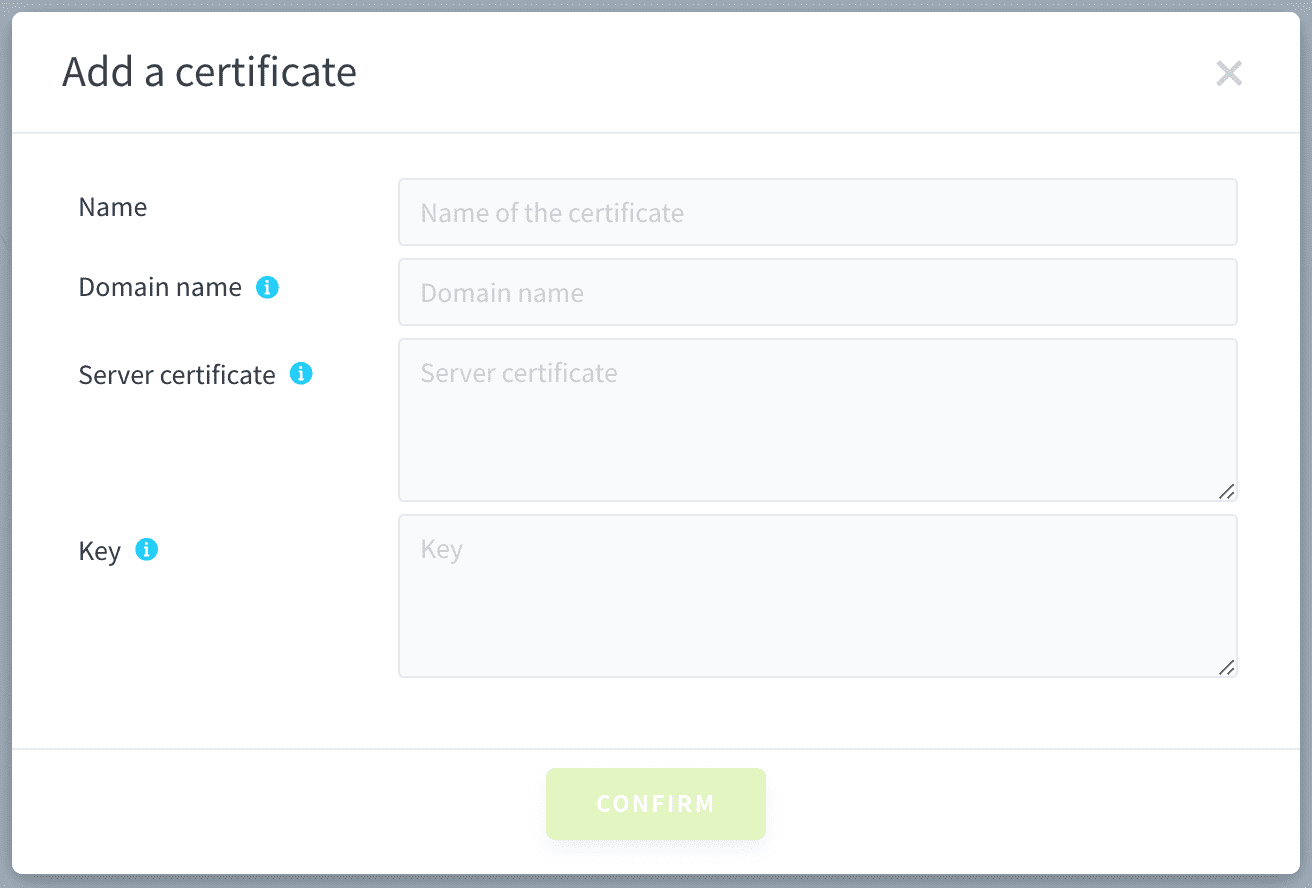
Click on Add a Certificate. In the new certification window, enter your information:
- Name: a descriptive name for your own usage (has no incidence on the actual certificate name)
- Domain name: the hostname associates with the SSL certificate that you generated
- Server certificate: copy the content of the
.pemfile provided by your SSL Certification Authority - Key: copy the content of the
.keyfile that you created using OpenSSL
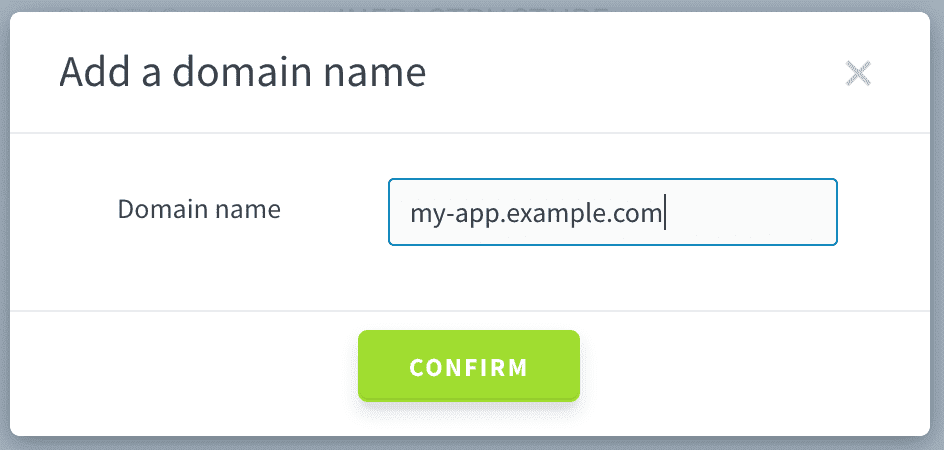
Confirm the creation of your name certificate and then click on Add a Domain. In the new domain window, make sure to give the same domain as the one for your certificate.
That's it! You're good to go. Your SSL certificate is now set up for your organization. All your projects and applications deployed within can use this new domain. Let's head to the application settings to set-up this custom DNS.
Register domain for your application
Navigate to the project and edit the application that you would like to change the DNS for. Head to the Settings tab and go the Domain Name System section.
Following our example, create a DNS entry for my-app.example.com as a CNAME to my-project.eu.dataplatform.ovh.net, where:
my-app.example.comis the hostname you provided an SSL certificate formy-project.eu.dataplatform.ovh.netis the project's main URL
Your application is now available at your own URL, for example https://my-app.example.com/.

Struggling to set it up by yourself?
That's fine, tell us how we can help. Get in touch via the OVHcloud Help Centre.
Send your questions on the support portal❓
Go further
If you need training or technical assistance to implement our solutions, contact your sales representative or click on this link to get a quote and ask our Professional Services experts for a custom analysis of your project.
Ask questions, give your feedback and interact directly with the team building the Data Platform on the dedicated Discord channel.
If you need support with your OVHcloud services, create a request in our Help Centre.
Join our community of users.