

OVHcloud API: Billing Data Analysis Configuration
This guide provides step-by-step instructions on configuring multiple endpoints for the OVHcloud Billing API
Objective
This guide provides step-by-step instructions on configuring multiple endpoints for the OVHcloud Billing API. You'll learn how to retrieve billing data and integrate it into your applications for accurate and streamlined financial tracking.
Overview
The OVHcloud API supports multiple endpoint configurations, allowing you to fetch and integrate data from interconnected resources. This guide provides a comprehensive walkthrough for configuring and utilizing the OVHcloud Billing API endpoints. By following these steps, you'll be able to programmatically retrieve, process, and analyze your billing information efficiently.
Requirements
Before beginning, ensure you have:
- An active OVHcloud account with billing access
- API credentials, specifically:
- Application Key (App Key)
- Application Secret (App Secret)
- Consumer Key
- Access to the OVHcloud API Developer Portal
- Basic understanding of API endpoint interactions
Step-by-Step Billing Endpoint Configuration
1. Initialize API Connection
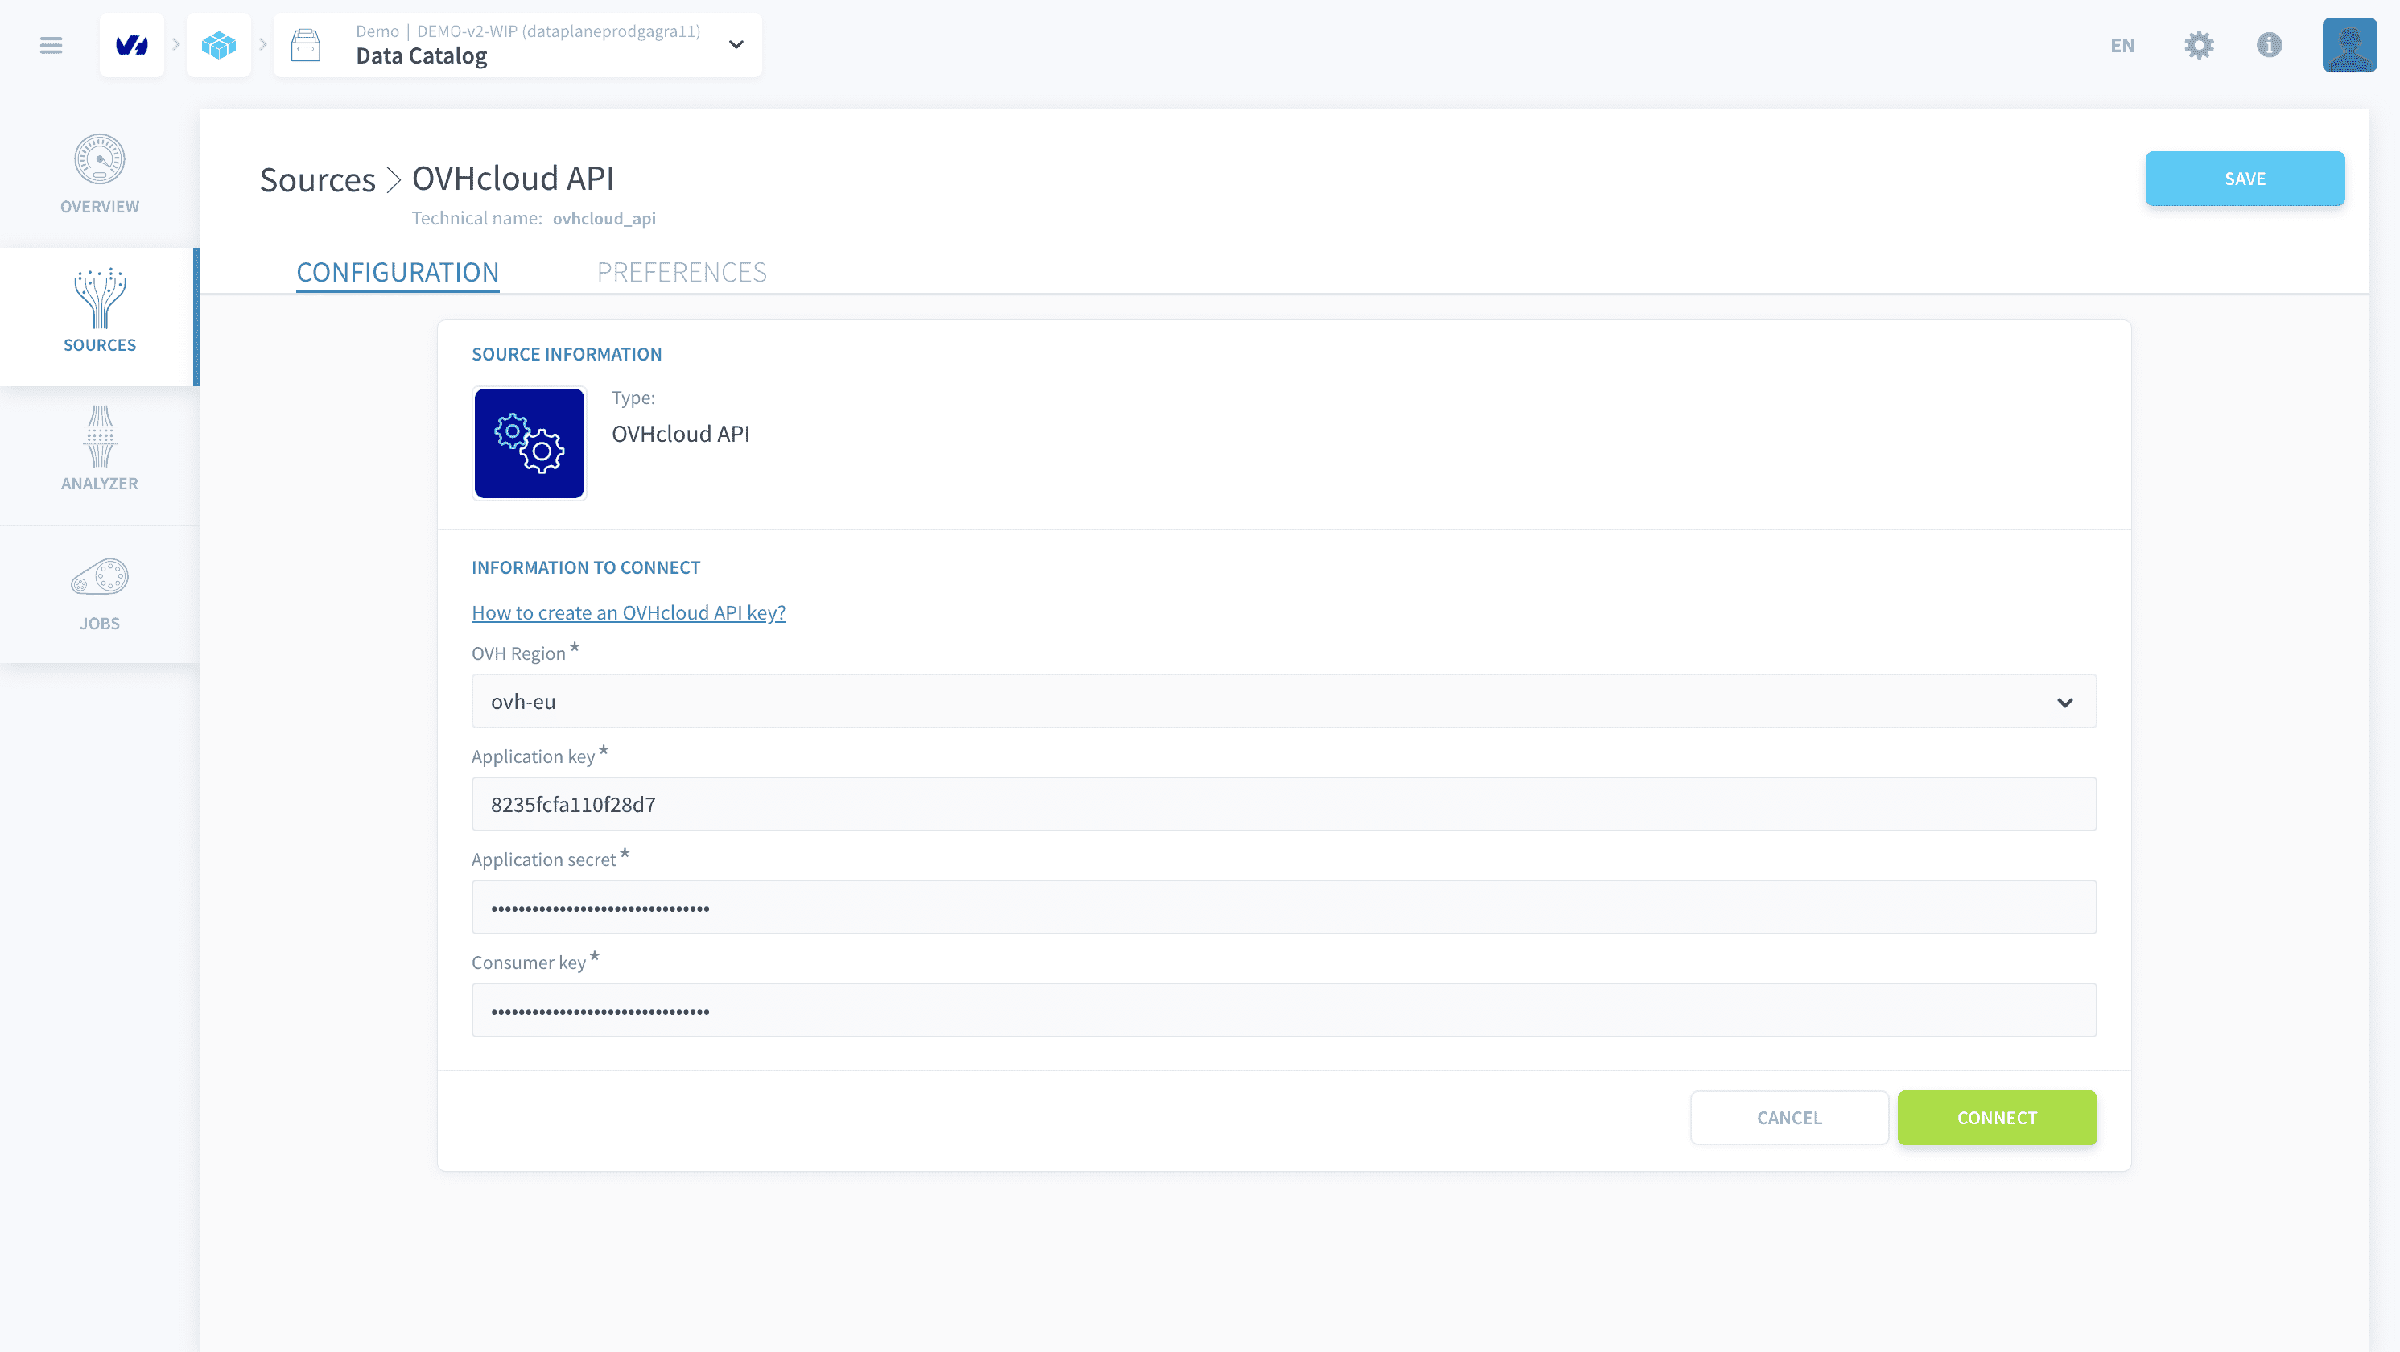
Configure your OVHcloud API connection by following the authentication setup process detailed in the OVHcloud API Connector Documentation. This involves obtaining and securely inputting your Application Key, Application Secret, and Consumer Key through the connector's user interface. For comprehensive instructions on acquiring and setting up these credentials, consult the API Connection Details section in the connector documentation.
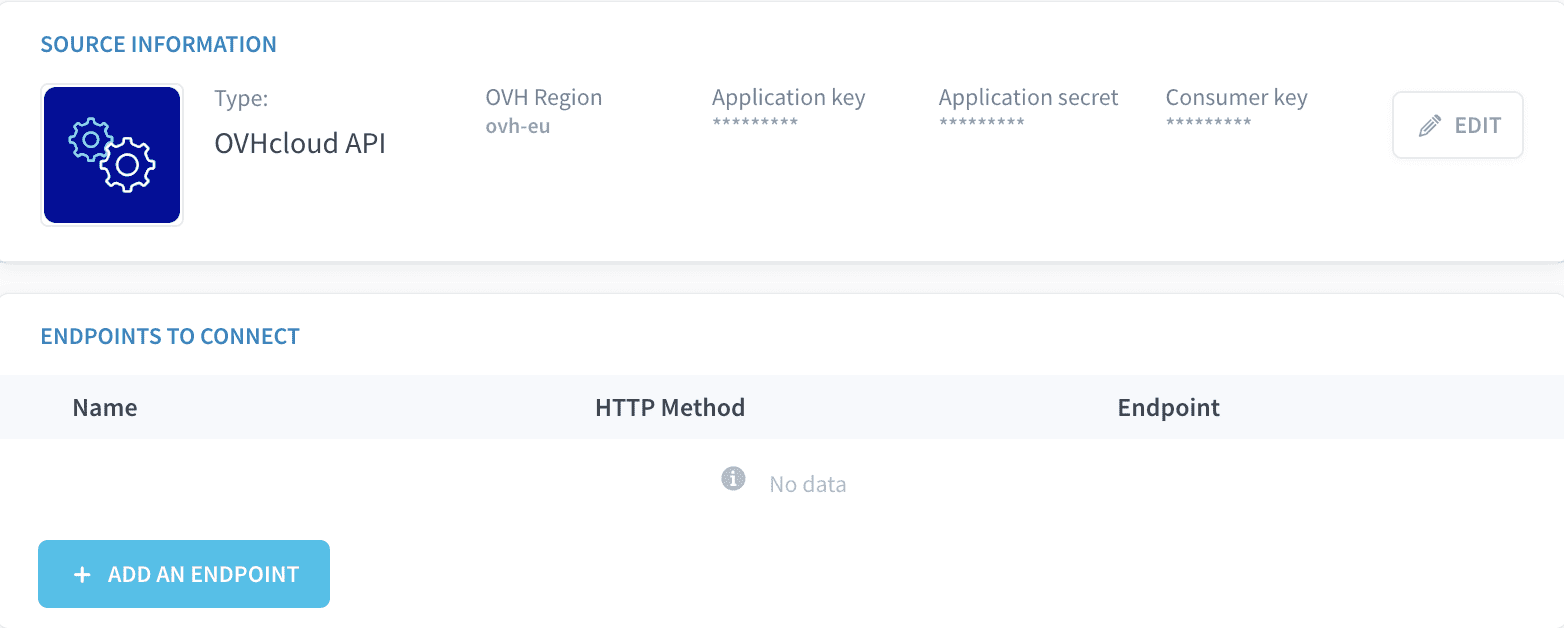
2. Define the billing endpoints
2.1. Retrieve Account Bills IDs
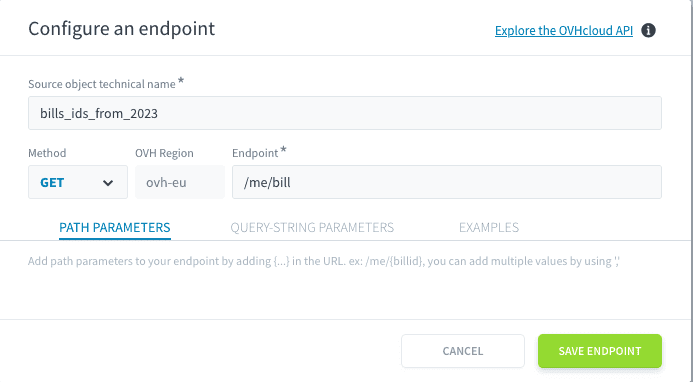
- Endpoint:
/me/bill - Purpose: Fetch a list of all bills IDs for your account
Steps:
- Select "Add New Endpoint" in the connector
- Enter
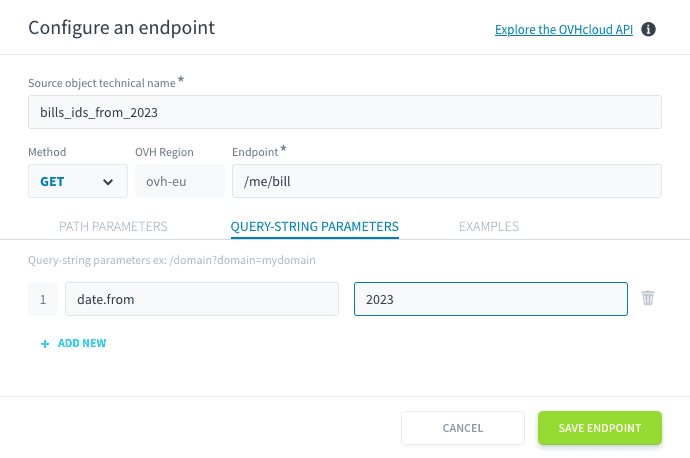
/me/billas the endpoint path - Configure query parameters (e.g., filtering by year) - for this example we have used key:
date.fromand value:2023, to get the records from the year 2023. - Make sure that endpoint has a unique name
bills_ids_from_2023 - Click "Confirm" and "Save"
We can include an additional step to confirm whether the connected endpoint is correct. While this step is not mandatory, it can be helpful the first time to get an idea of the data you are looking for.
Validate Endpoint Data
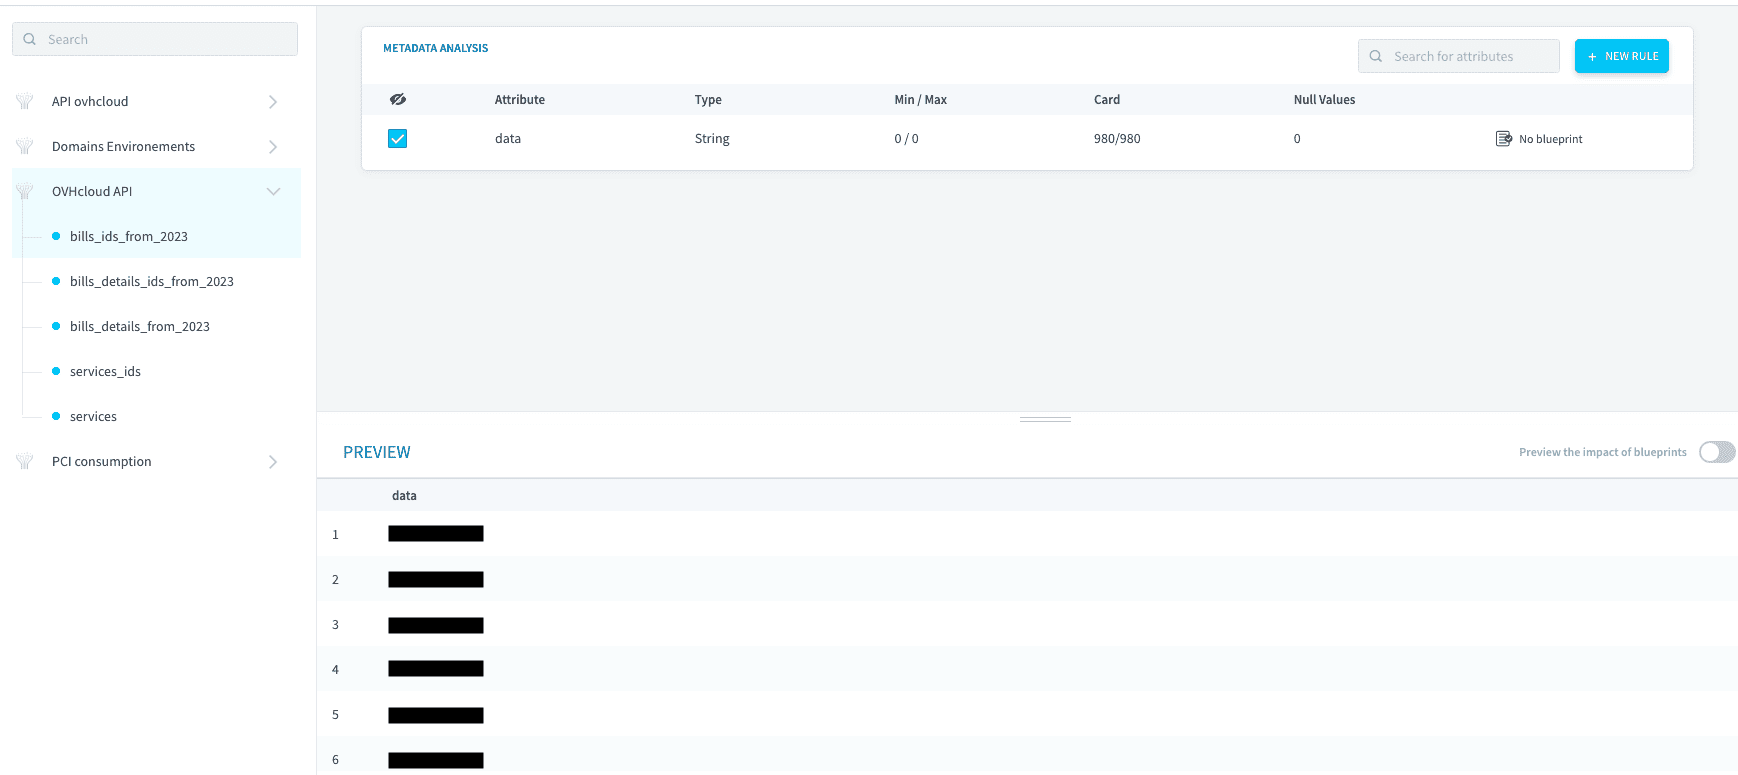
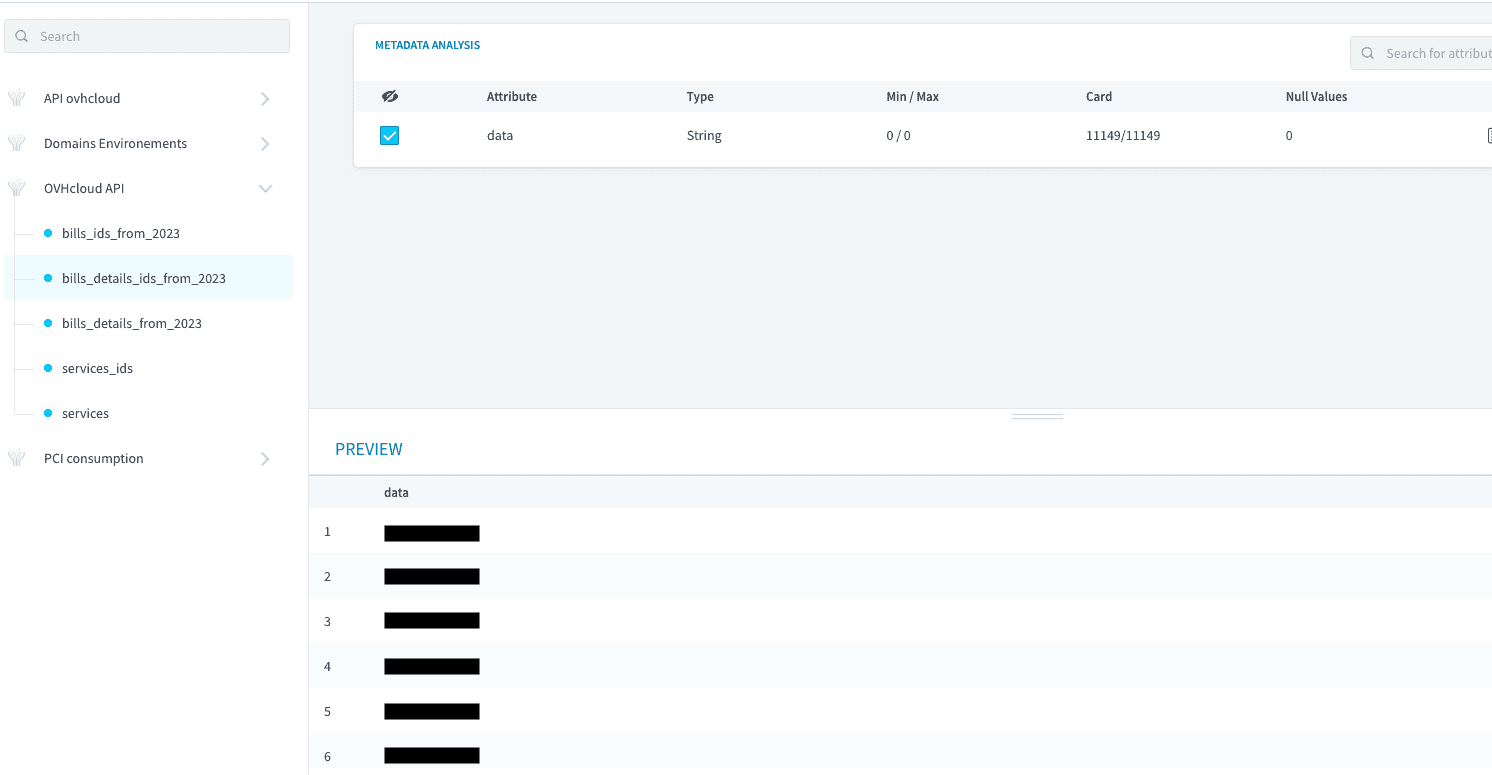
- Navigate to the Analyzer tab
- Extract metadata for the new endpoint
- Verify bill records are correctly retrieved
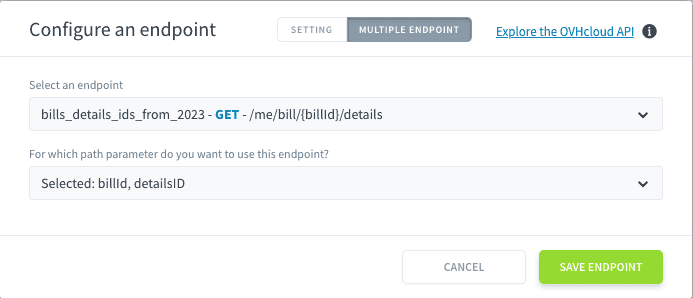
2.2. Retrieve Account Bills Details IDs
- Endpoint:
/me/bill/{billId}/details - Purpose: Fetch the list of IDs for each invoice line details
Steps:
- Click "Add Endpoint"
- Enter
/me/bill/{billId}/detailsas the endpoint path - Configure multiple endpoint selection
- Link to the previous bills endpoint
- Select
{billId}as the path parameter - Make sure that endpoint has a unique name
bills_details_ids_from_2023 - Save the configuration
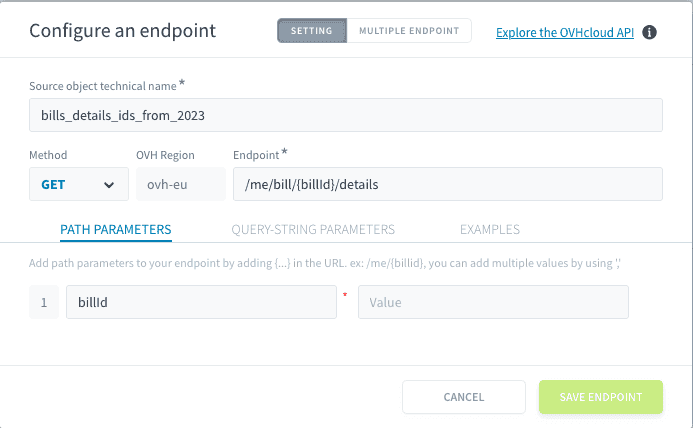
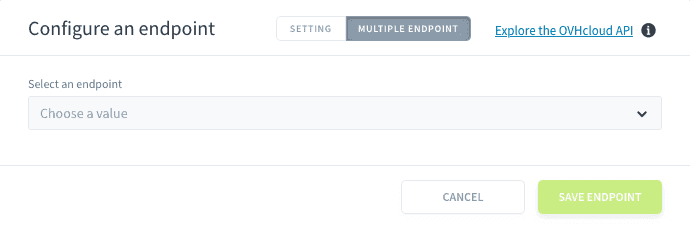
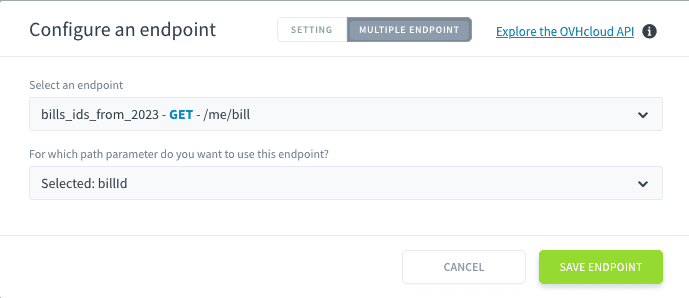
Use unique endpoint names to simplify source management. This will be useful for step 4. Import your data in the lakehouse.
Note: Currently, only one path parameter can be dynamically selected. Manual entry might be required for complex endpoints with multiple path parameters.
Returning to the main modal by clicking on the Settings tab, you'll notice that the path parameter and endpoint fields are now non-editable. This is because their values are being derived from another endpoint. If you need to make changes, simply go back to the multiple endpoints section and select 'No multiple endpoint' from the endpoint selection dropdown.
2.3. Retrieve Account Bills Details
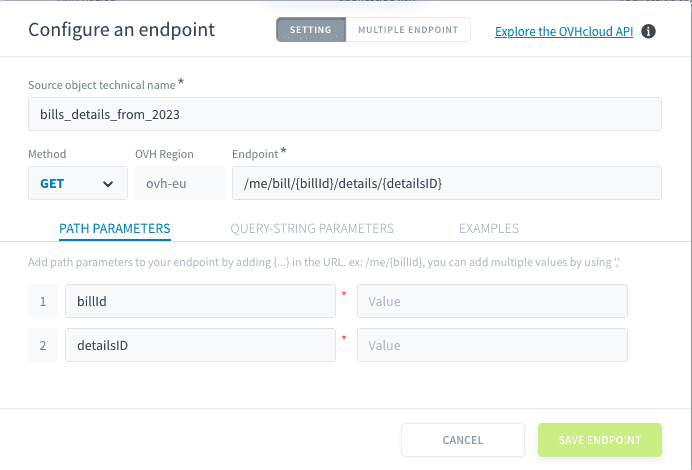
- Endpoint:
/me/bill/{billId}/details/{detailsID} - Purpose: Fetch the details of each invoice line
Steps:
- Click "Add Endpoint"
- Enter
/me/bill/{billId}/details/{detailsID}as the endpoint path - Configure multiple endpoint selection
- Link to the previous bills details ID endpoint
- Select
{billId}and{detailsID}as the path parameter - Make sure that endpoint has a unique name
bills_details_from_2023 - Save the configuration
2.4. Retrieve services IDs
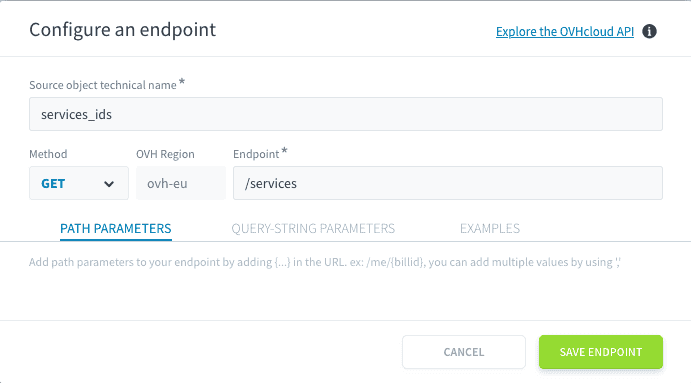
- Endpoint:
/services - Purpose: Fetch the IDs of all the services of your accounts
Steps:
- Click "Add Endpoint"
- Enter
/servicesas the endpoint path - Make sure that endpoint has a unique name
services_ids - Save the configuration
2.5. Retrieve services information
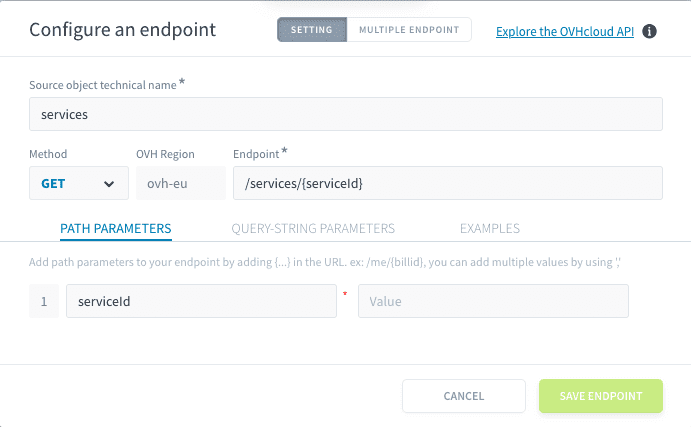
- Endpoint:
/services/{serviceId} - Purpose: Fetch information about your services to enrich the data in the pipeline
Steps:
- Click "Add Endpoint"
- Enter
/services/{serviceId}as the endpoint path - Configure multiple endpoint selection
- Link to the previous service IDs endpoint
- Select
{serviceId}as the path parameter - Make sure that endpoint has a unique name
services - Save the configuration
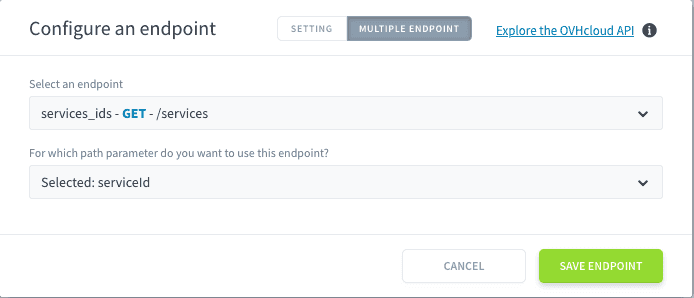
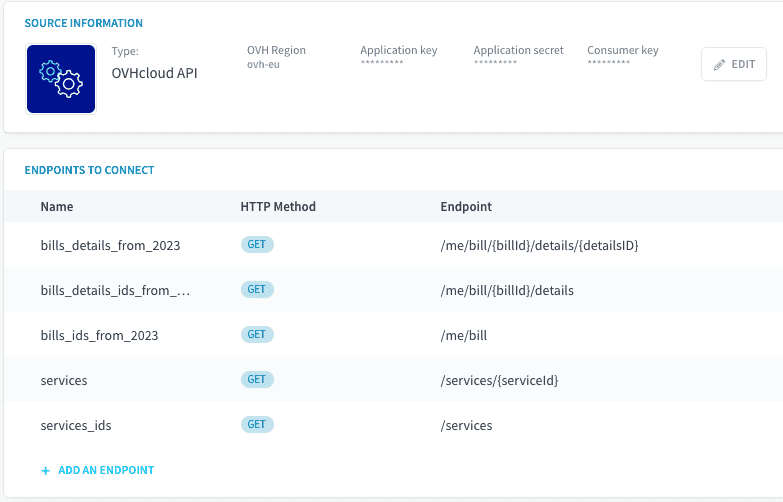
The configuration of the endpoints is now over, you should see the following:
3. Metadata extraction
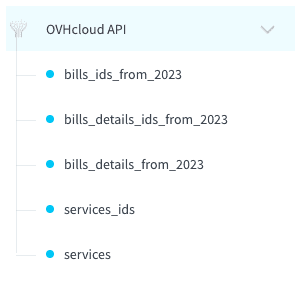
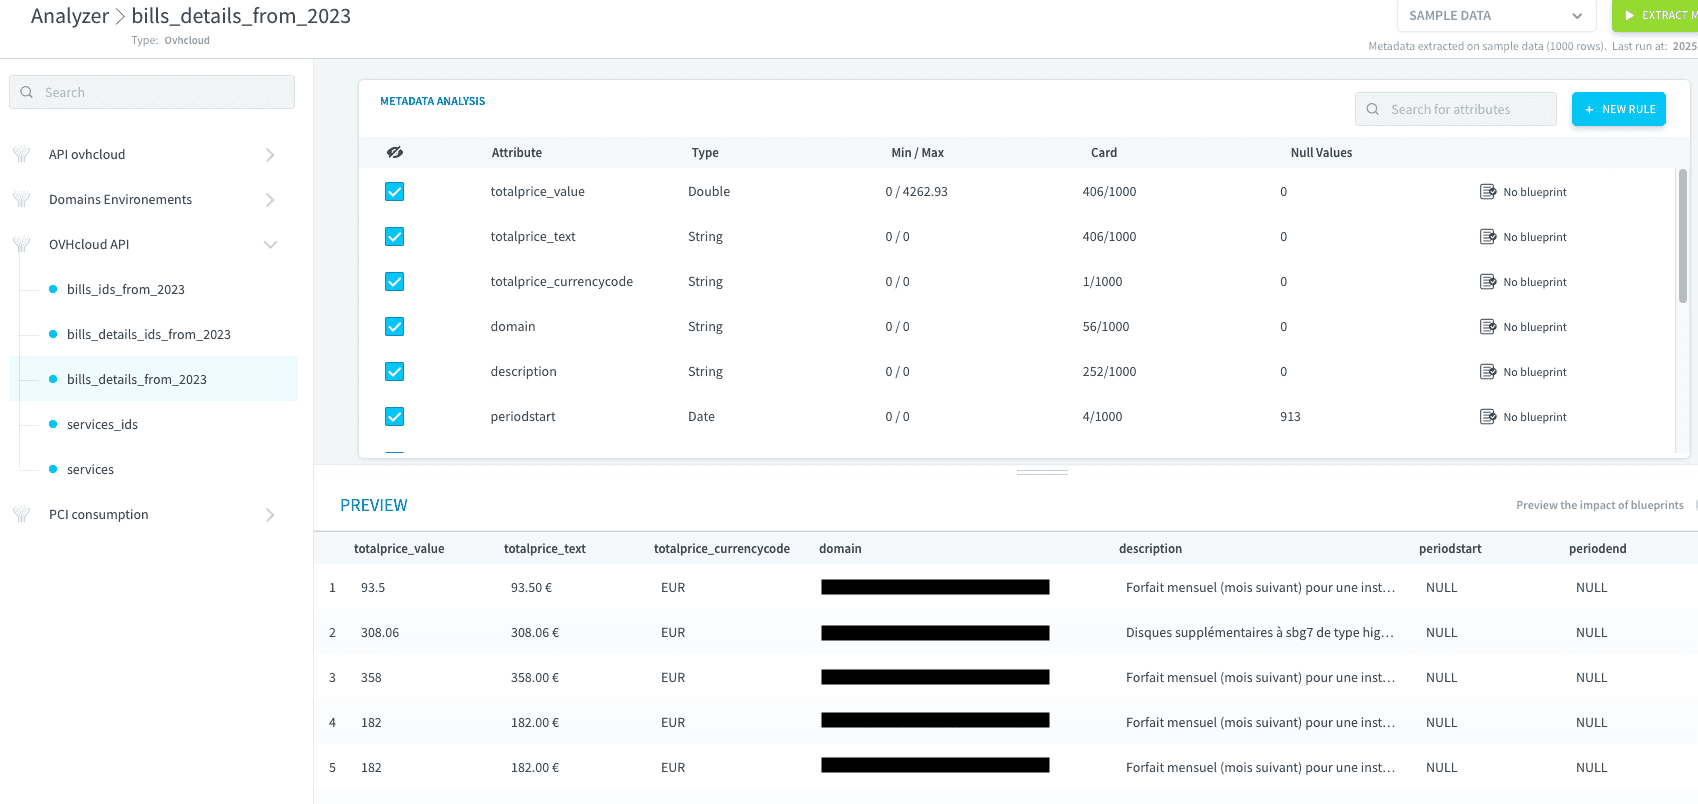
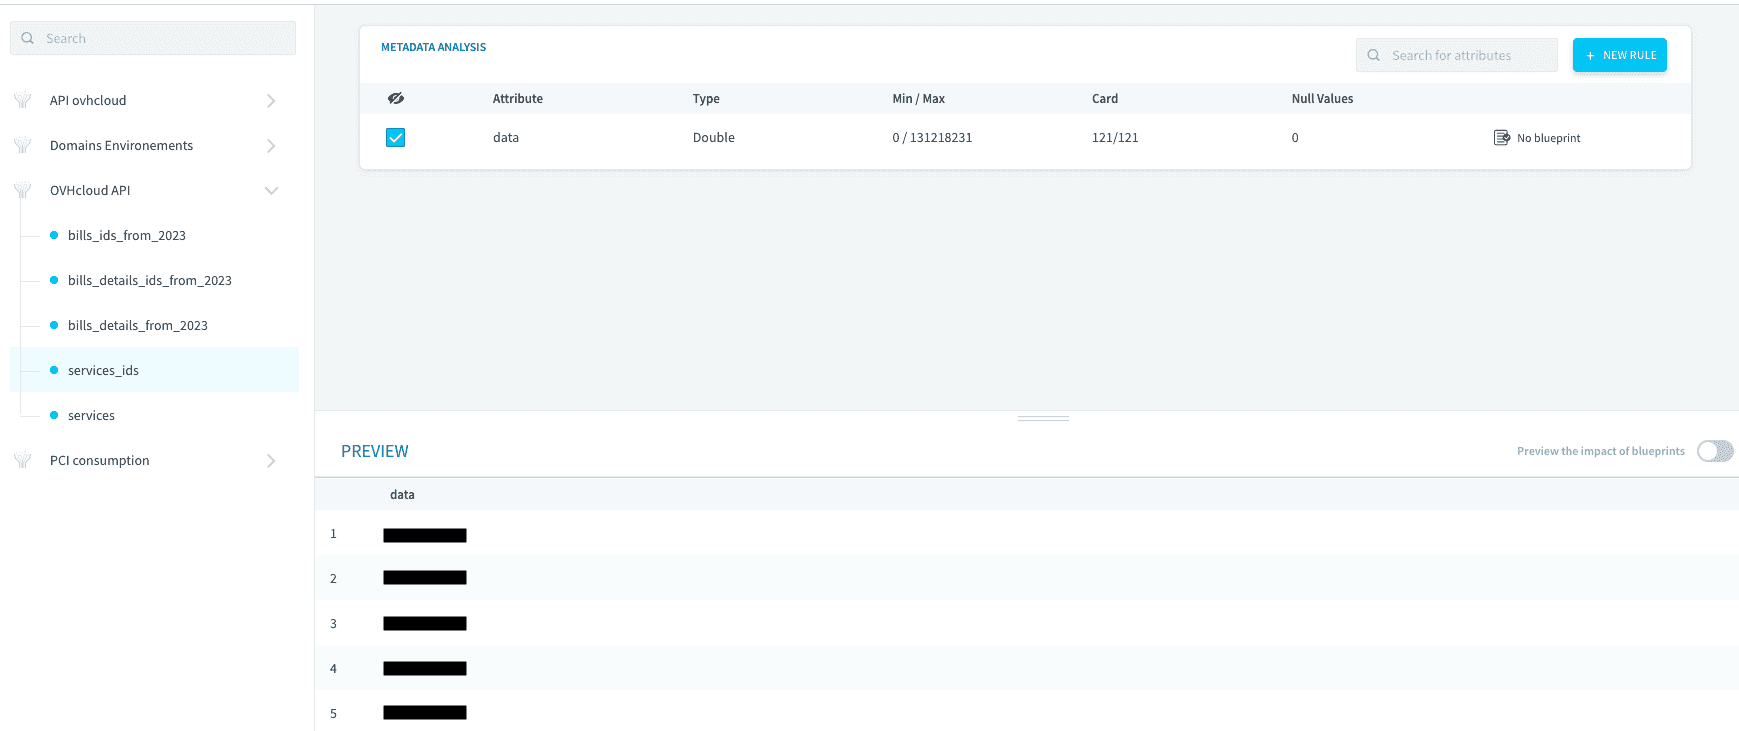
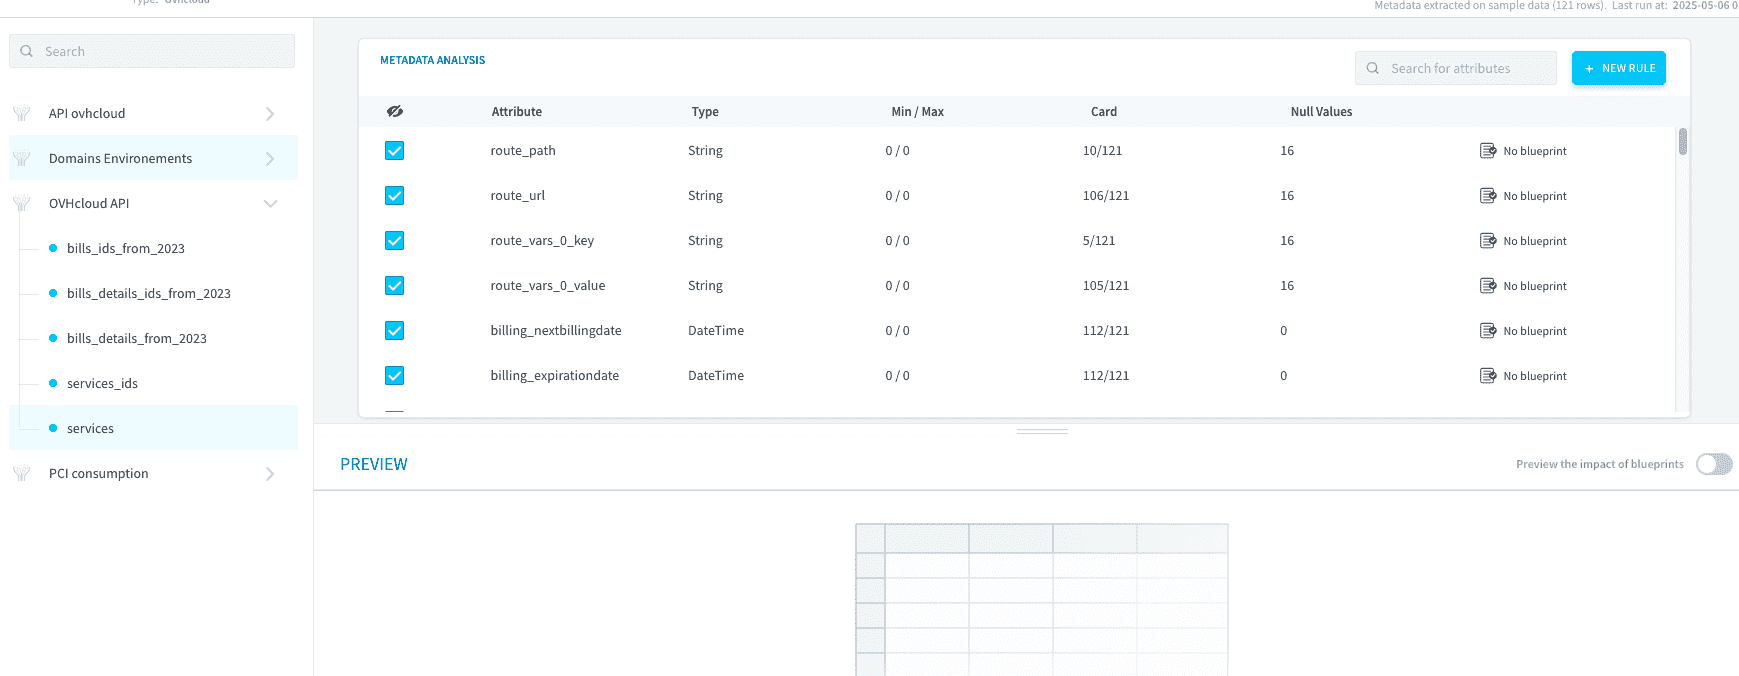
With the endpoints now established, navigate to the analyzer tool within the Connectors. Once there, select the endpoints you have recently configured. Allow some time for the system to initiate and complete the processing jobs associated with these endpoints.
The duration of this process may vary depending on the complexity of the tasks and the volume of data being processed.
3.1. Reformat data
The data extracted from the sources can be modified to match the exact format we want, or to bucketize it through the blueprints. This is what we are going to do for 2 endpoints:
bills_details_from_2023services
3.1.1. Reformat bills details
The field periodstart from the API is a value with the format YYYY-MM-DD, with the DD that can be any day of the month, depending on the day you purchased the service. We are going to use a blueprint to override this day to be set on the first of each month.
Click on top right of the data analysis on New Rule, then select Date format.
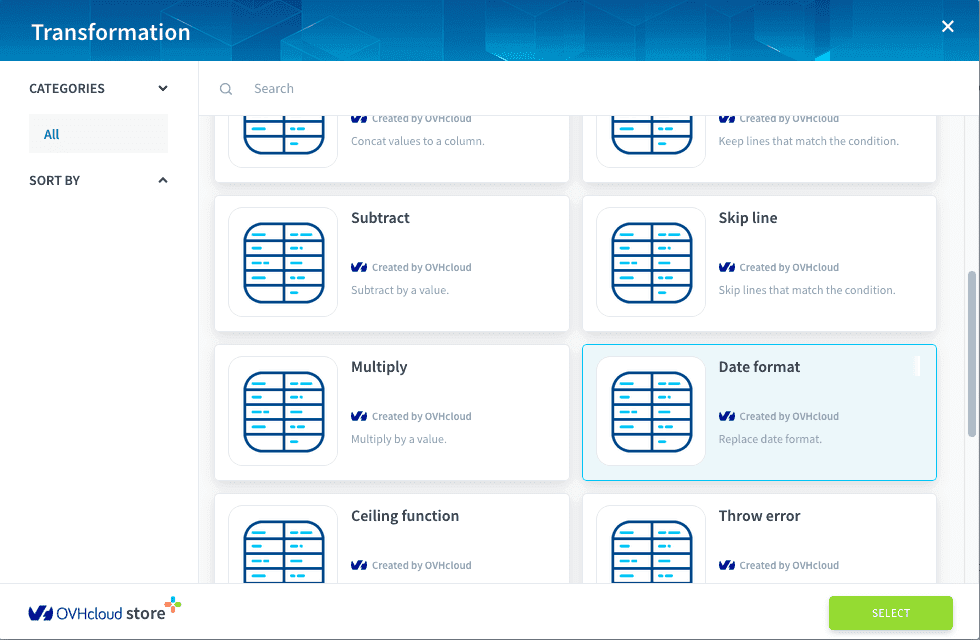
You are now on the configuration of the blueprint, please fill as the following:
- Attribute:
periodstart - Current Date Format:
%Y-%m-%d - Replace by:
%Y-%m-01 - Condition:
Is not null
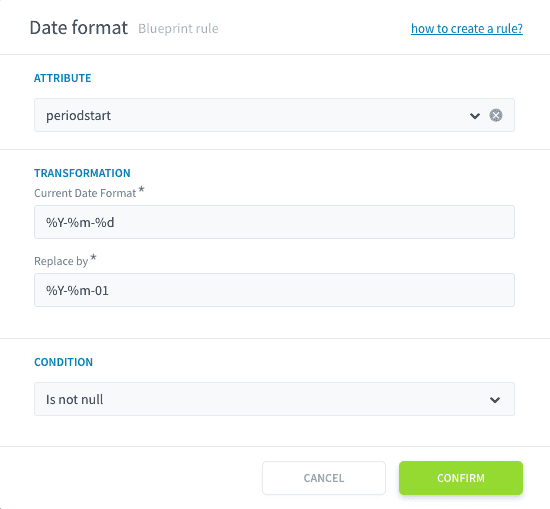
Click on confirm, you can now see the periodstart has 1 blueprint.

3.1.2. Reformat services
Many datetime fields from the services endpoint contains the timezone information. We want to remove this timezone information from the datetime, so we will reformat all the dates with the Date Format blue print, as seen previously.
Go to the services endpoint, click New rule, select Date format.
You are now on the configuration of the blueprint, please fill as the following:
- Attribute:
billing_next_billingdate - Current Date Format:
%Y-%m-%dT%H:%M:%S%z - Replace by:
%Y-%m-%dT%H:%M:%S - Condition:
All
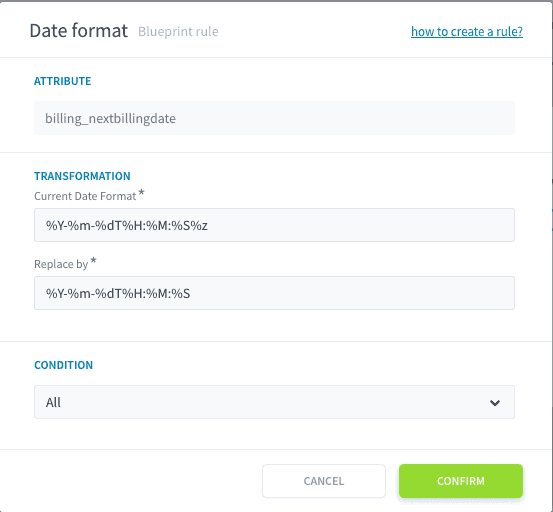
You can repeat the operation for the following attributes:
billing_expirationdatebilling_lifecycle_current_terminationdatebilling_lifecycle_current_creationdatebilling_renew_current_nextdate
4. Import your data in the lakehouse
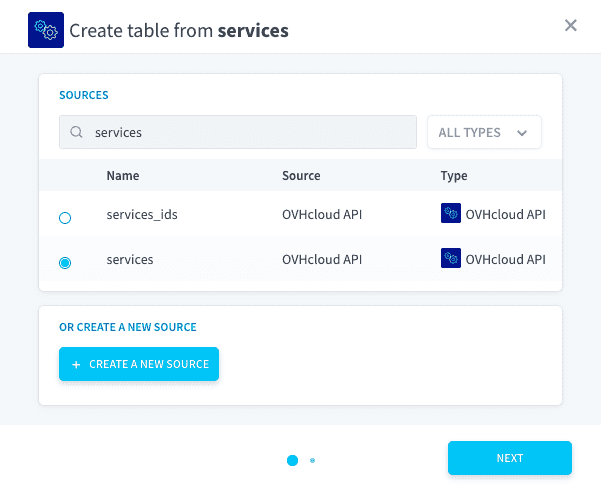
With the data sources now configured, we can proceed to construct the tables. You can go into the Lakehouse Manager, and the Tables section. Click on the + and Create from a Connectors source.
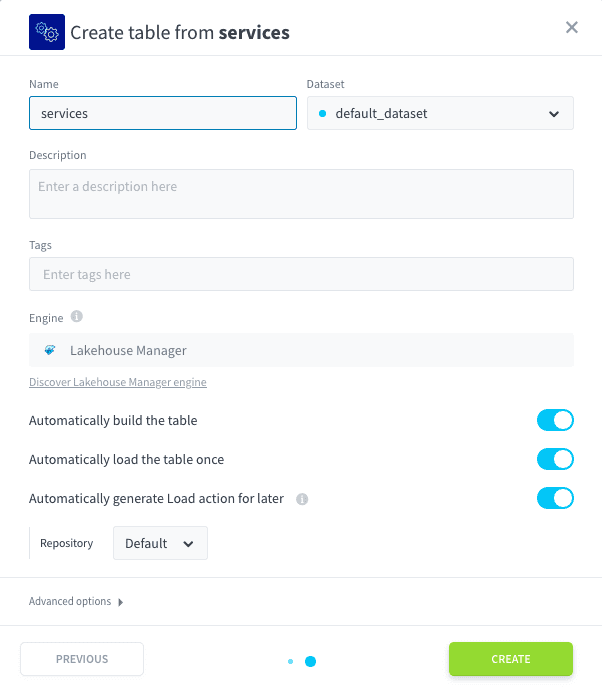
The first table will be populated using the bill_details_from_2023 data source. You can rename the table after clicking on next for raw_bills_details, and then click on create.
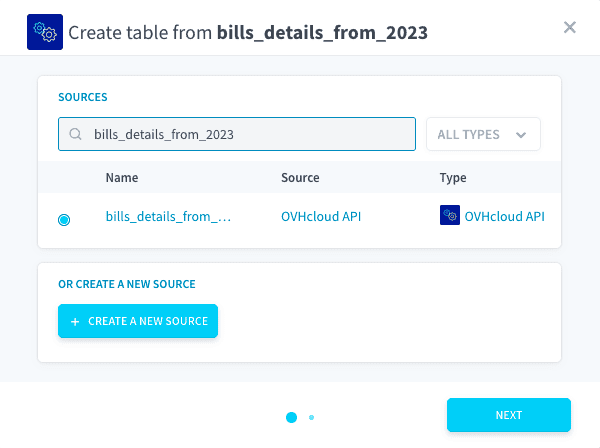
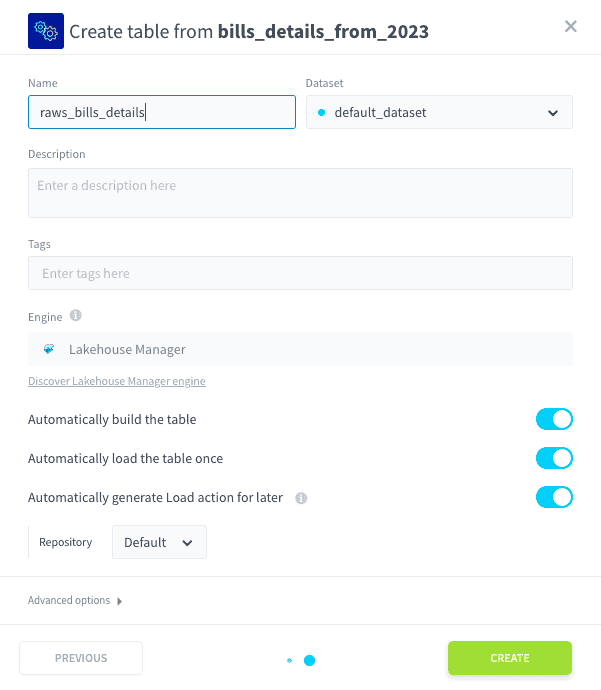
You can now also import the services into a dedicated table:
5. Add a tag on services
In order to categorize the expenses, we want to categorize the services with tags, that can represent either your technical environments (e.g. production, dev) or your company's departments or even your customers.
In order to extract the first list of services to categorize, you can go into the Explorer section inside the Lakehouse Manager.
In the Data, select the domain, click on select and replace by select_distinct and then click on RUN.
You should have a result like the following:

You can now click on Download and As a CSV. You will now have a first CSV file with all the resources to tag. You can open it, rename the column select_distinct_domain by domain, and then add a second column tag and for each domain you want to tag, add the value that you want. You should end up with a CSV file like the following:

It is now time to add a new datasource in the Connectors with this CSV file, and create a table in the lakehouse out of it. You can go into Connectors -> sources -> New Source -> File Upload. You can name your new source Domains Tagged and Add the CSV file and hit the create button.


You can new go to the analyzer to check the data is well evaluated, and also add a blueprint on the tags, so we will replace the empty values by unknown. Click on new rule, Replace By. Fill the form as follow:
- Attribute:
tag - Replace by:
unknown - Condition:
Equal - Equal: leave empty
Confirm the blue print.


You can now return to the Lakehouse Managerand Tables section, and create a table from this new source. Be careful to name the table domains_tags.


6. Create an aggregation table
Now we have a lot of information about our services, theirs bills and also tags. We are going to build an aggregation table to link all the information together.
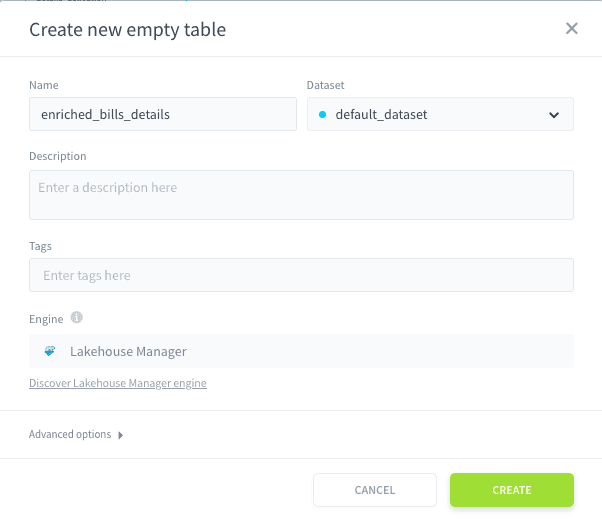
Inside the Lakehouse Managerand Tables section, click on the + and Create a new empty table. Name it: enriched_bills_details.
You should now have the following tables in your lakehouse:
servicesdomains_tagsraw_bills_detailsenriched_bills_details
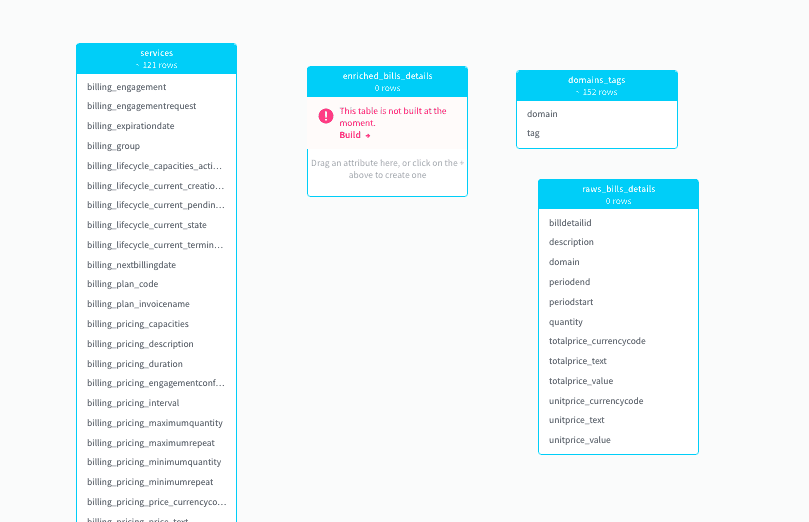
We are going to drag some fields from the tables we created from sources, and drop them into the enriched_bills_details. The fields to drag and drop are:
- From
raws_bills_details:domainperiodstarttotalprice_value
- From
domains_tags:tag
- From
services:resource_displaynameresource_product_nameresource_product_description
Your enriched_bills_details table should now look like:
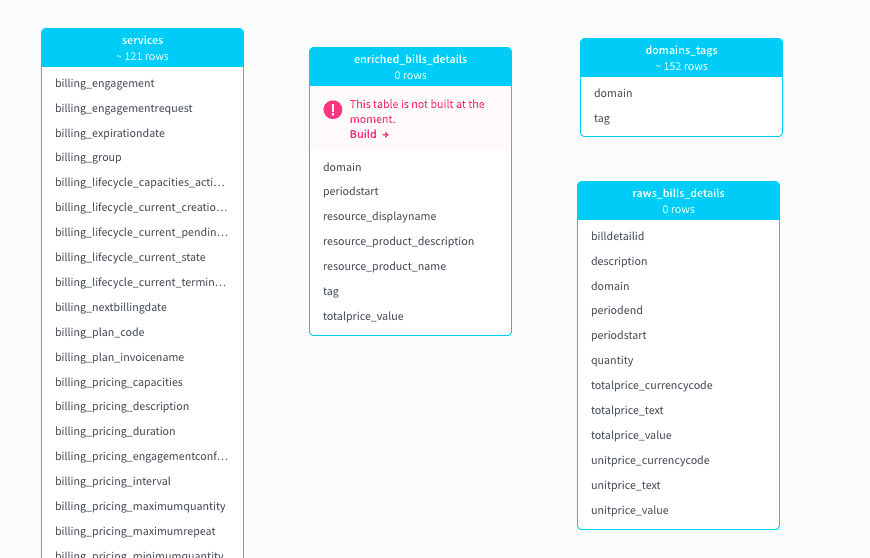
You can now click on Build to build this new table.
Now we have the structure of this new table, we are going to create a job to extract the data from the previous 3 tables and load it into this new table. We need to go now inside the Data Processing Engine and Actions section. Click on New Action and select Aggregate.
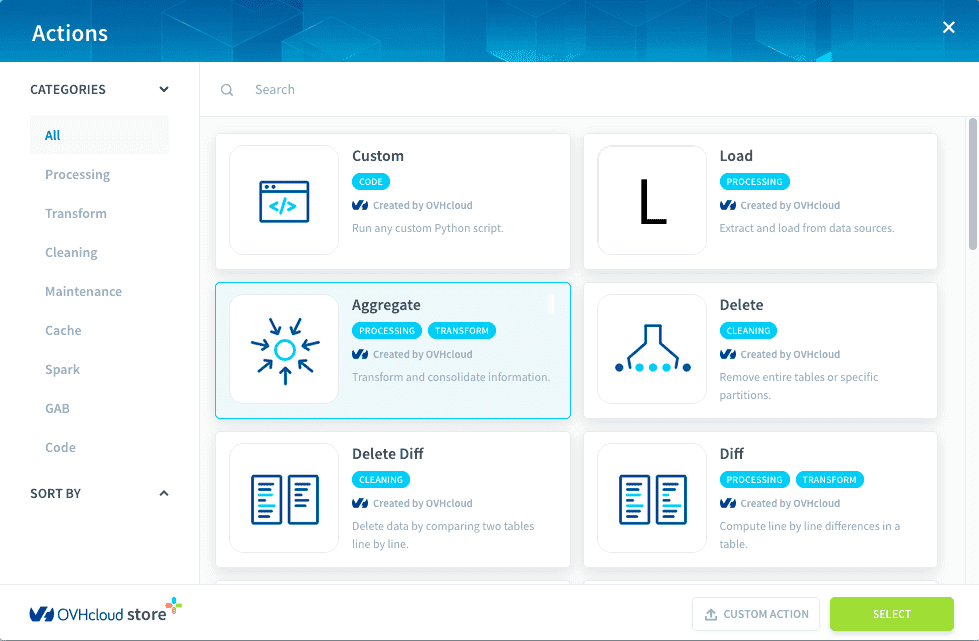
We are now going to map fields from different table into the enriched_bills_details, for that, you need first to select the sources and destination:
- Sources:
raws_bills_detailsservicesdomains_tags
- Destination:
enriched_bills_details
For the sources, we need to explain how the data from the 3 tables are linked together through the SQL JOIN syntax. We are going to add then the following joins:
- Between
raws_bills_detailsandservices:
- Between
raws_bills_detailsanddomains_tags:
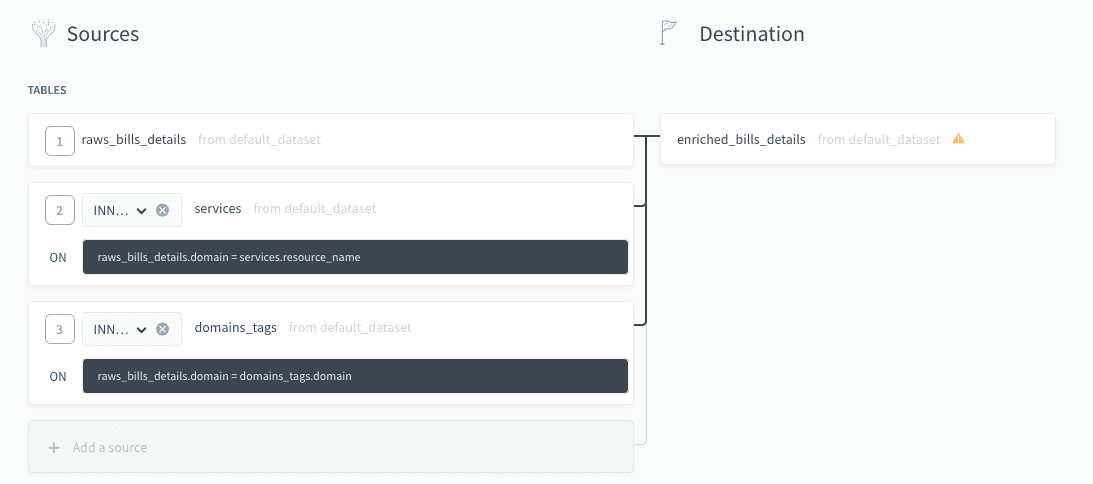
To finish the aggregate, we need to configure how to select and group attributes of the tables into enriched_bills_details. Map the attributes as shown in the screenshot below.
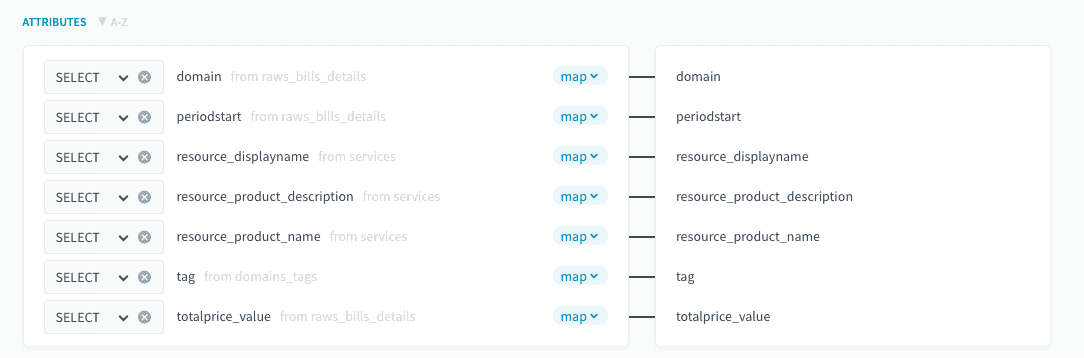
You can now create the aggregate, and run the action.
7. Prepare the queries and build the Dashboard
Now we have all the data ready to be exploited, we can go into the Analytics Manager and Queries.
Let's create some queries.
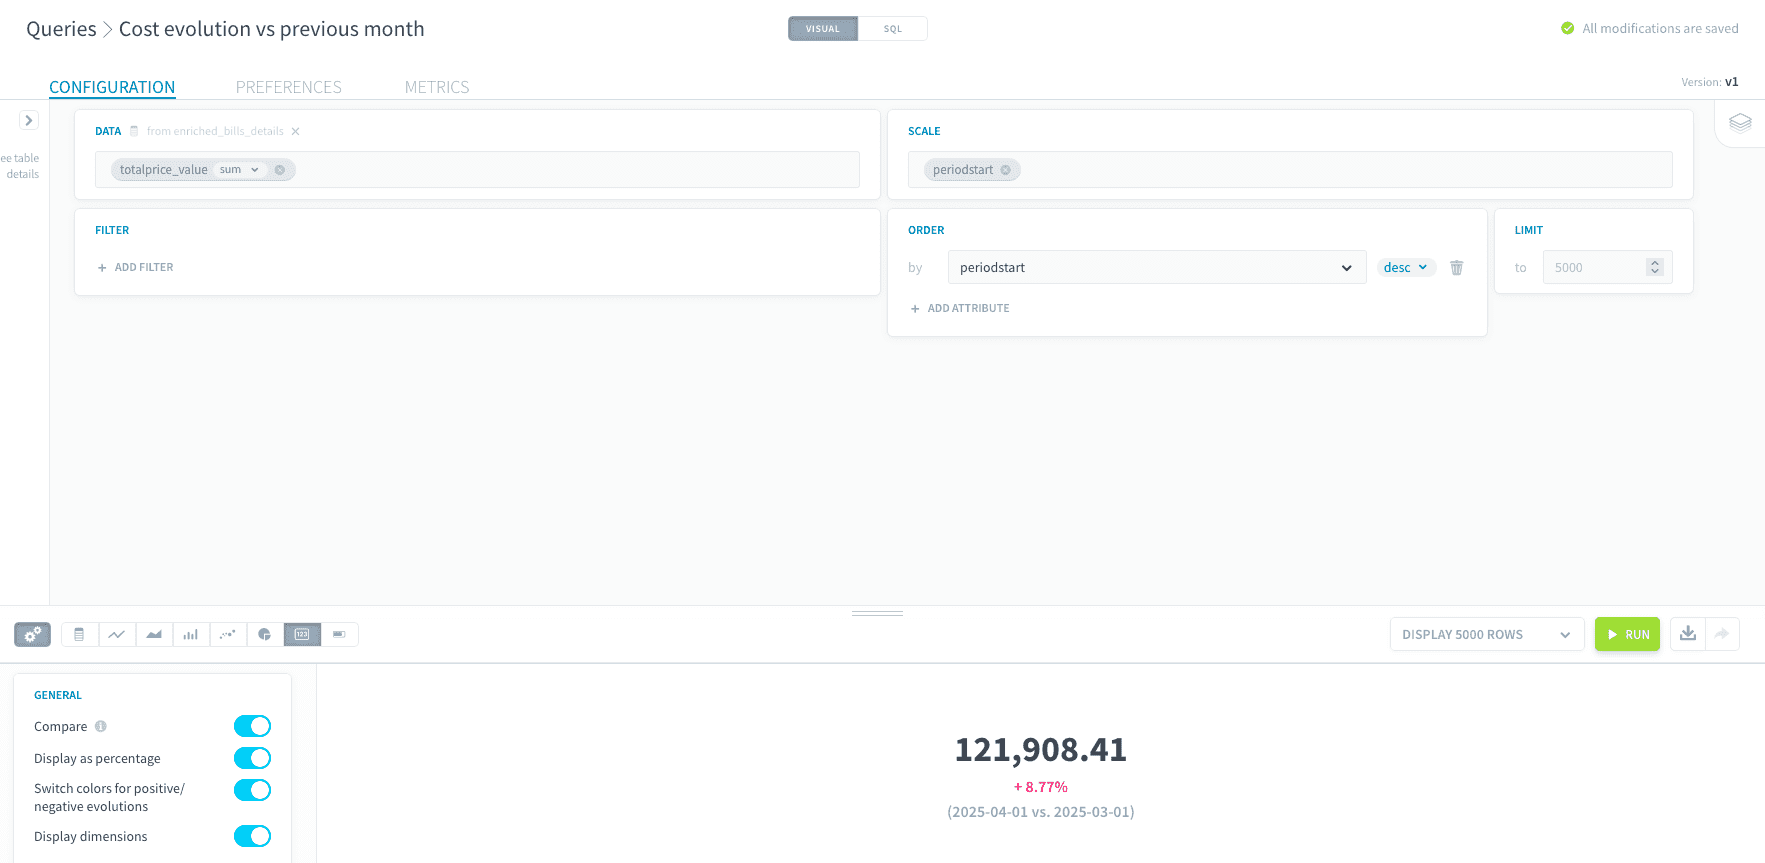
Cost evolution vs previous month
For the query:
- Data:
totalprice_valuesum FROMenriched_bills_details - Scale:
periodstart - Order by:
periodstart desc
For the visualization:
- As a metric
- Customization: enable all the toggle buttons
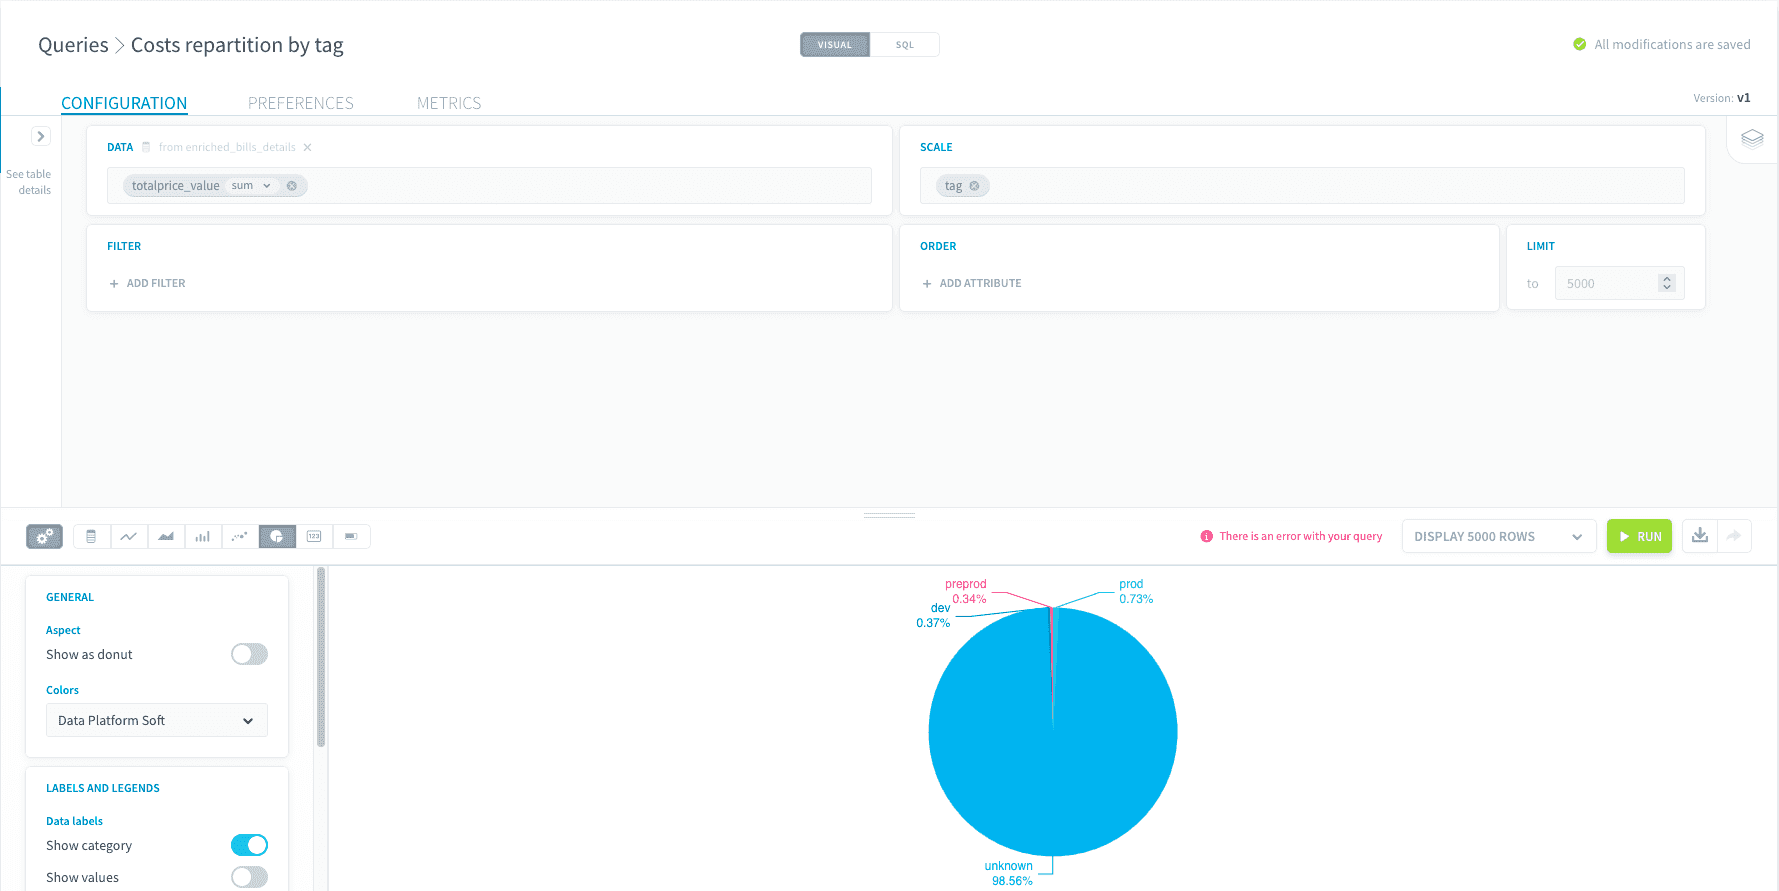
Cost repartition by tag
For the query:
- Data:
totalprice_valuesum FROMenriched_bills_details - Scale:
tag
For the visualization:
- As a pie chart
- Customization:
- Show category
- Show % of total
- Position: outside
- Hide legend
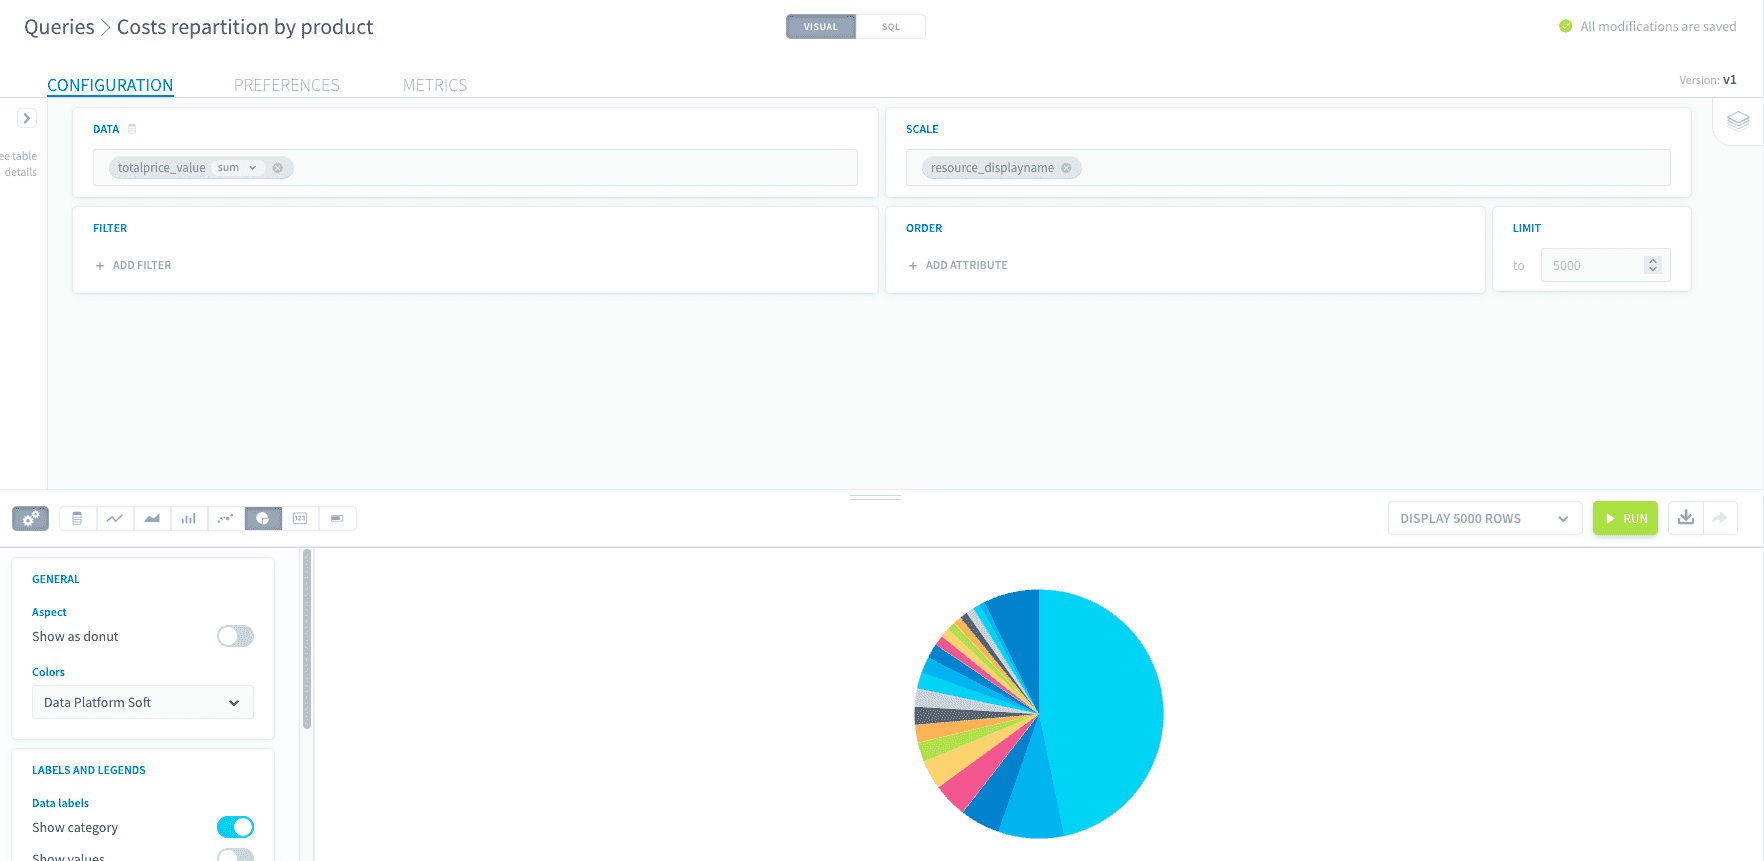
Cost repartition by product
For the query:
- data:
totalprice_valuesum FROMenriched_bills_details - scale:
resource_displayname
For the visualization:
- As a pie chart
- Customization:
- Show category
- Show % of total
- Position: outside
- Hide legend
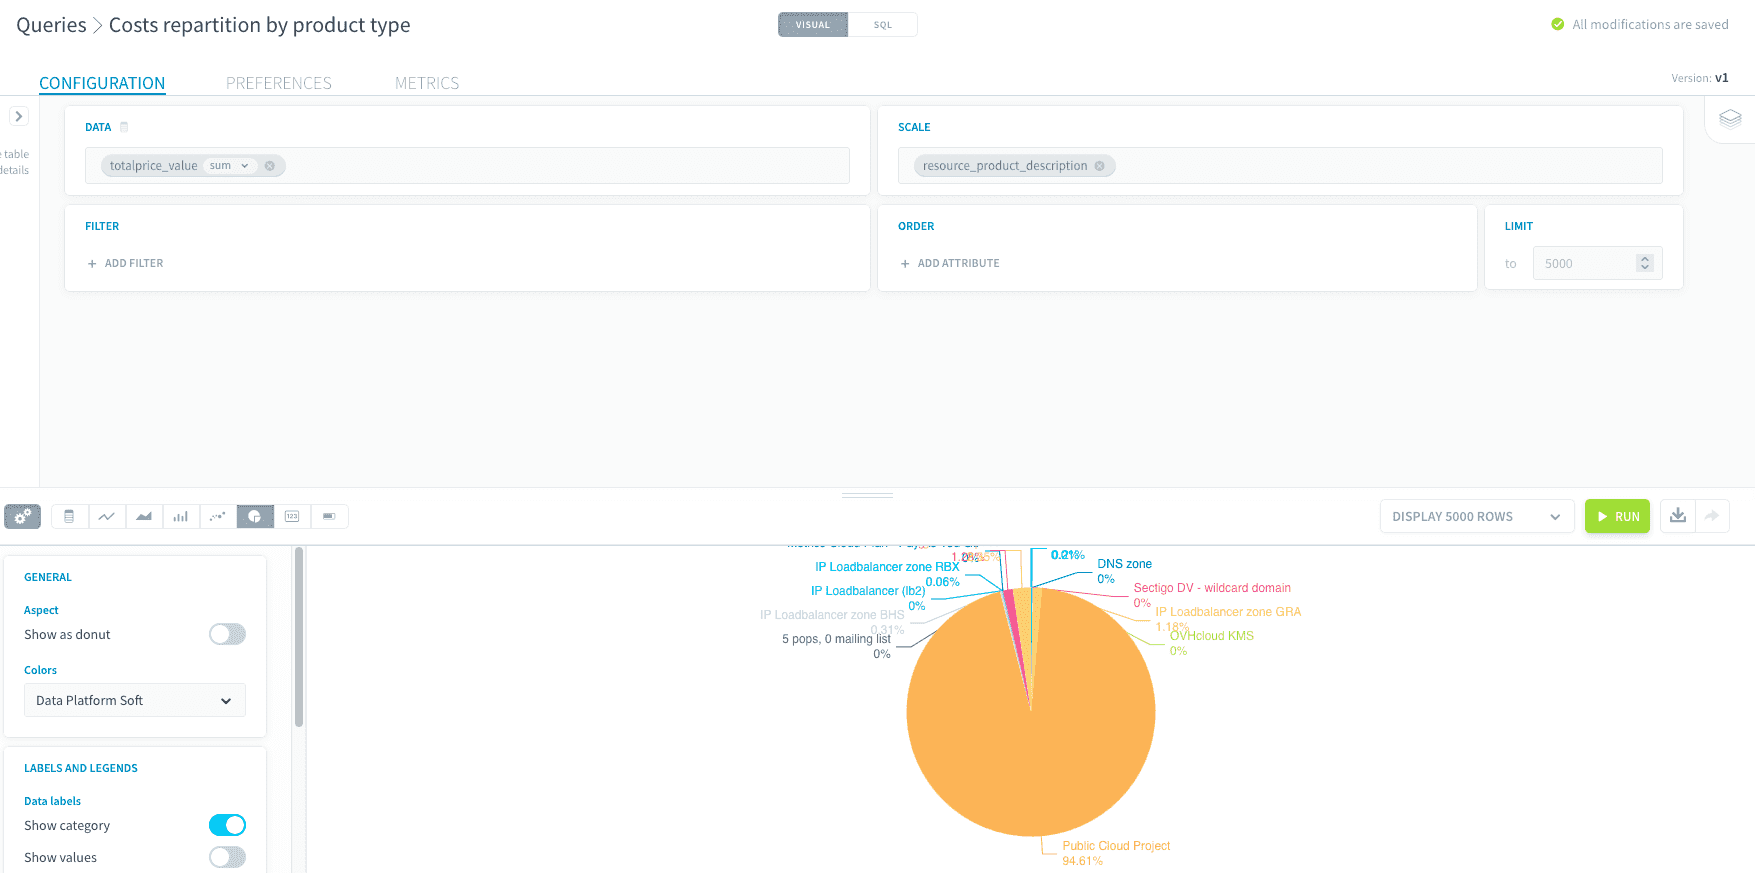
Cost repartition by product type
For the query:
- Data:
totalprice_valuesum FROMenriched_bills_details - Scale:
resource_productdescription
For the visualization:
- As a pie chart
- Customization:
- Show category
- Show % of total
- Position: outside
- Hide legend
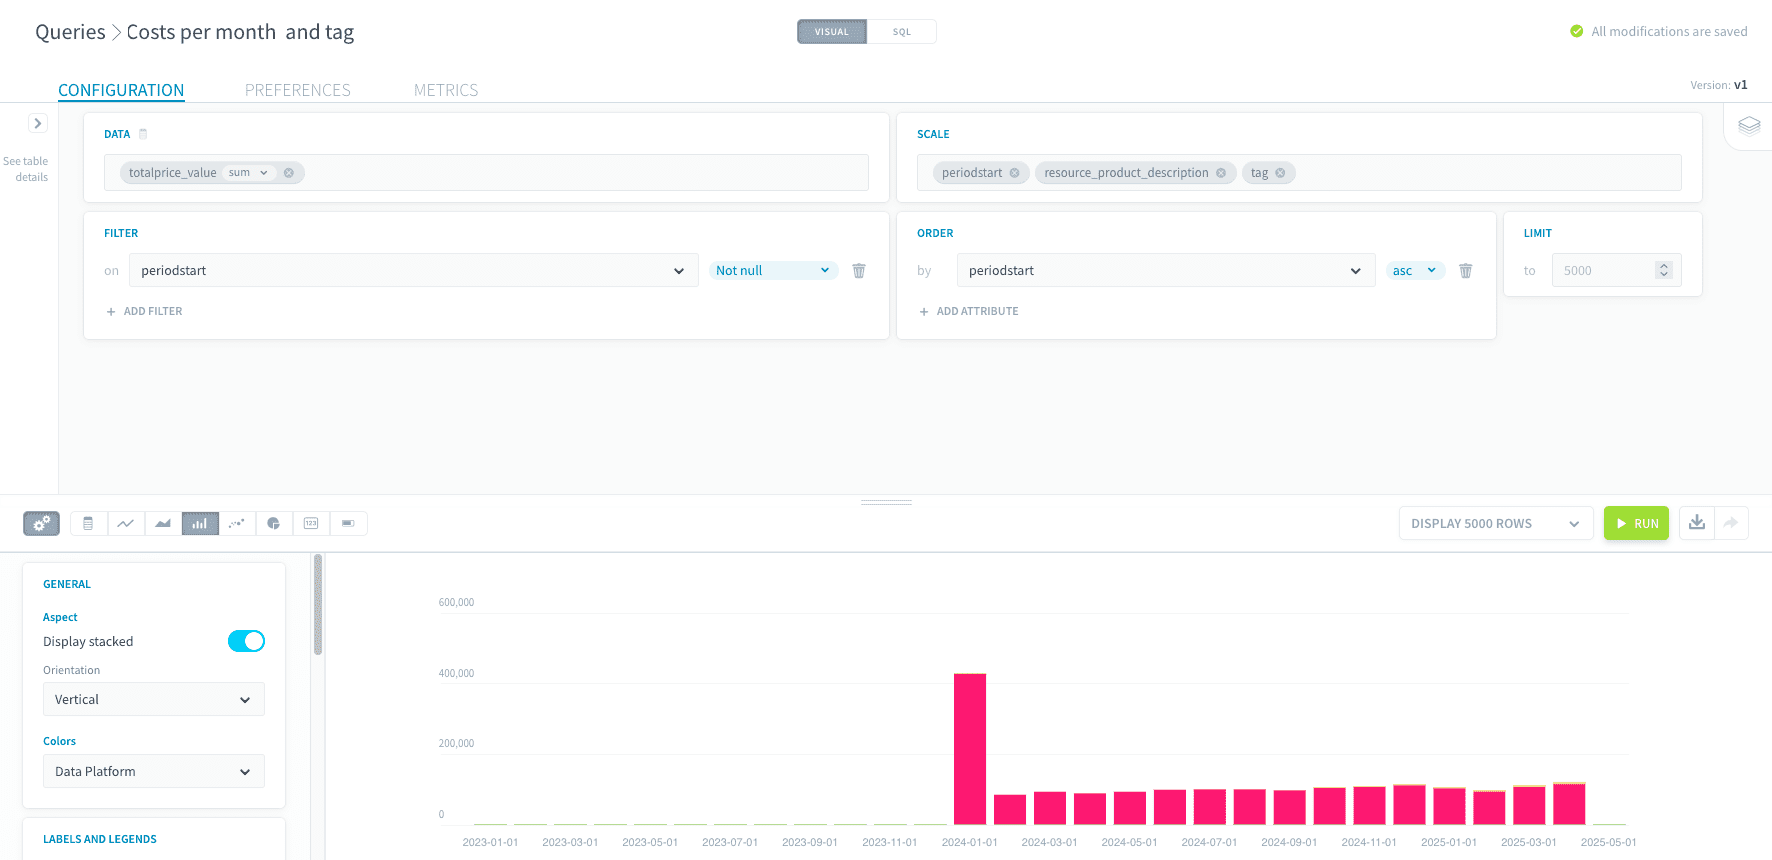
Cost per month and tag
For the query:
- Data:
totalprice_valuesum FROMenriched_bills_details - Scale:
periodstartresource_product_descriptiontag - Filter on:
periodstartNot null - Order by:
periodstartasc
For the visualization:
- As bar charts
- Customization:
- Display stacked
- Hide legend
- X-axis: regroup by periodstart
Create the Dashboard
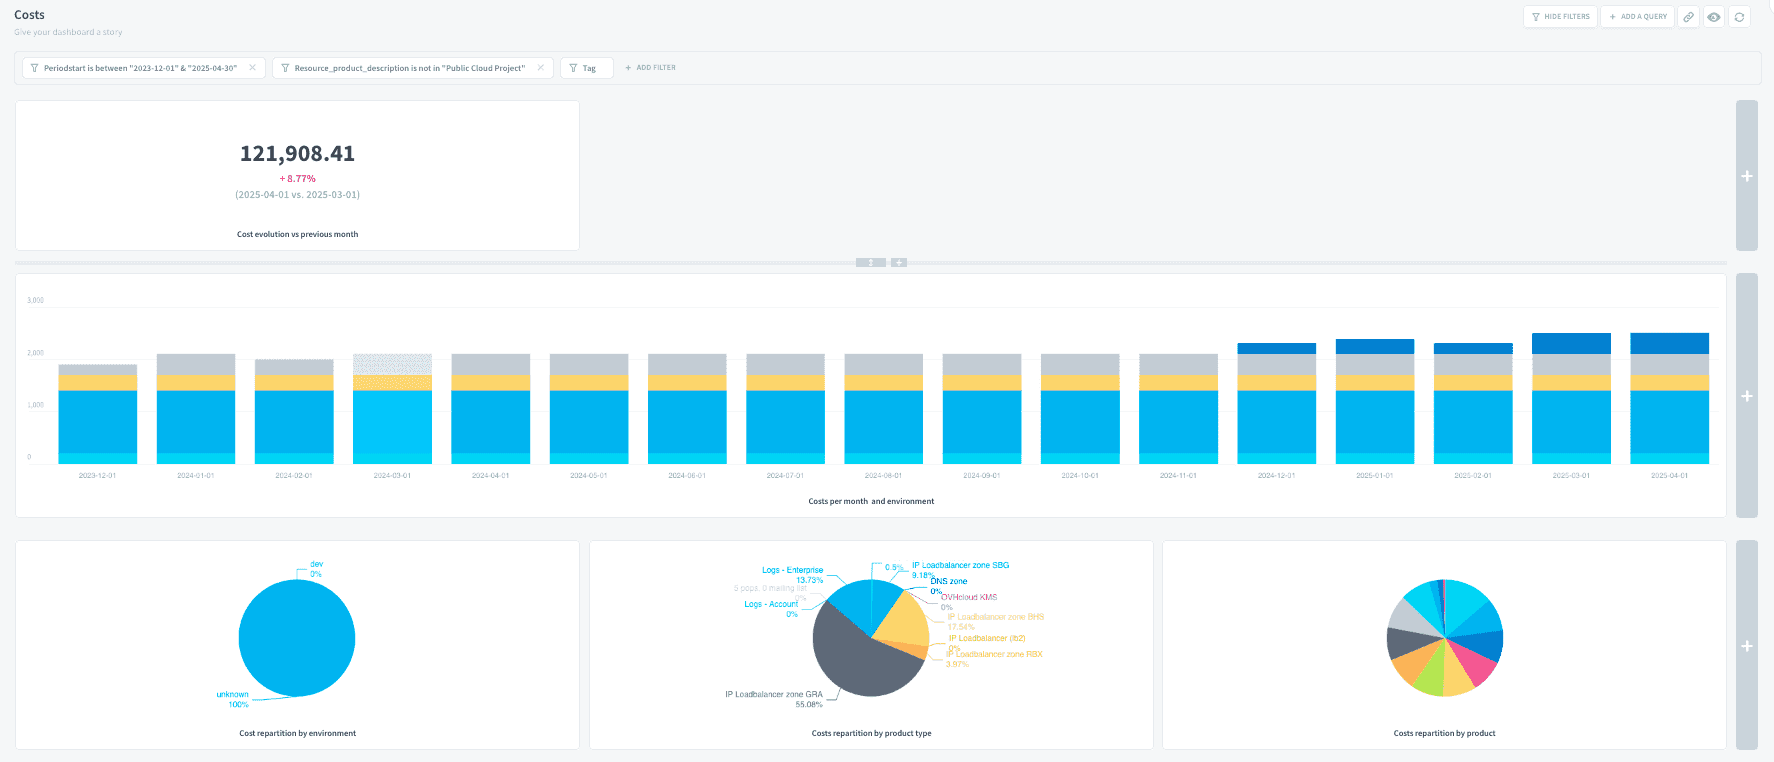
You can now go into the dashboard section, create a new one and put all your charts into this dashboard by clicking the + button.
On top of the dashboard, you can also add filters to ease the naviation into the data. Consider adding the following filters:
periodstarttagresource_product_description
Conclusion
By following these steps, you can effectively configure and utilize the OVHcloud Billing API endpoint to retrieve, process, and analyze billing information programmatically.
Go further
If you need training or technical assistance to implement our solutions, contact your sales representative or click on this link to get a quote and ask our Professional Services experts for a custom analysis of your project.
Ask questions, give your feedback and interact directly with the team building the Data Platform on the dedicated Discord channel.
If you need support with your OVHcloud services, create a request in our Help Centre.
Join our community of users.