

Create and manage actions
Creating an action, keeping several versions of it, and syncing those versions with Git are one workflow rather than three
Objective
Creating an action, keeping several versions of it, and syncing those versions with Git are one workflow rather than three. This page covers that workflow, plus what triggers a rebuild and what is not possible today.
Which action type to create is a separate question, answered on the Actions page.
Create an action
When a repository is empty, the first thing you'd like to do is create an action. From the main page, click the New action button on the top right of the screen. You will then be prompted to choose the type of action you wish to perform from the Platform Store.

Note that editing actions is always on autosave mode. Use versions if you don't want to tamper with your deployed production actions.
Advanced mode
Actions in the Data Processing Engine are all configured using a set of inputs specified via a JSON configuration file. There are 2 ways for users to update an action's inputs:
- either using the graphical user interface
- or using an advanced mode which lets you directly edit the JSON configuration file
Using the "advanced mode" offers a bit more flexibility and options which might come in handy for advanced users.
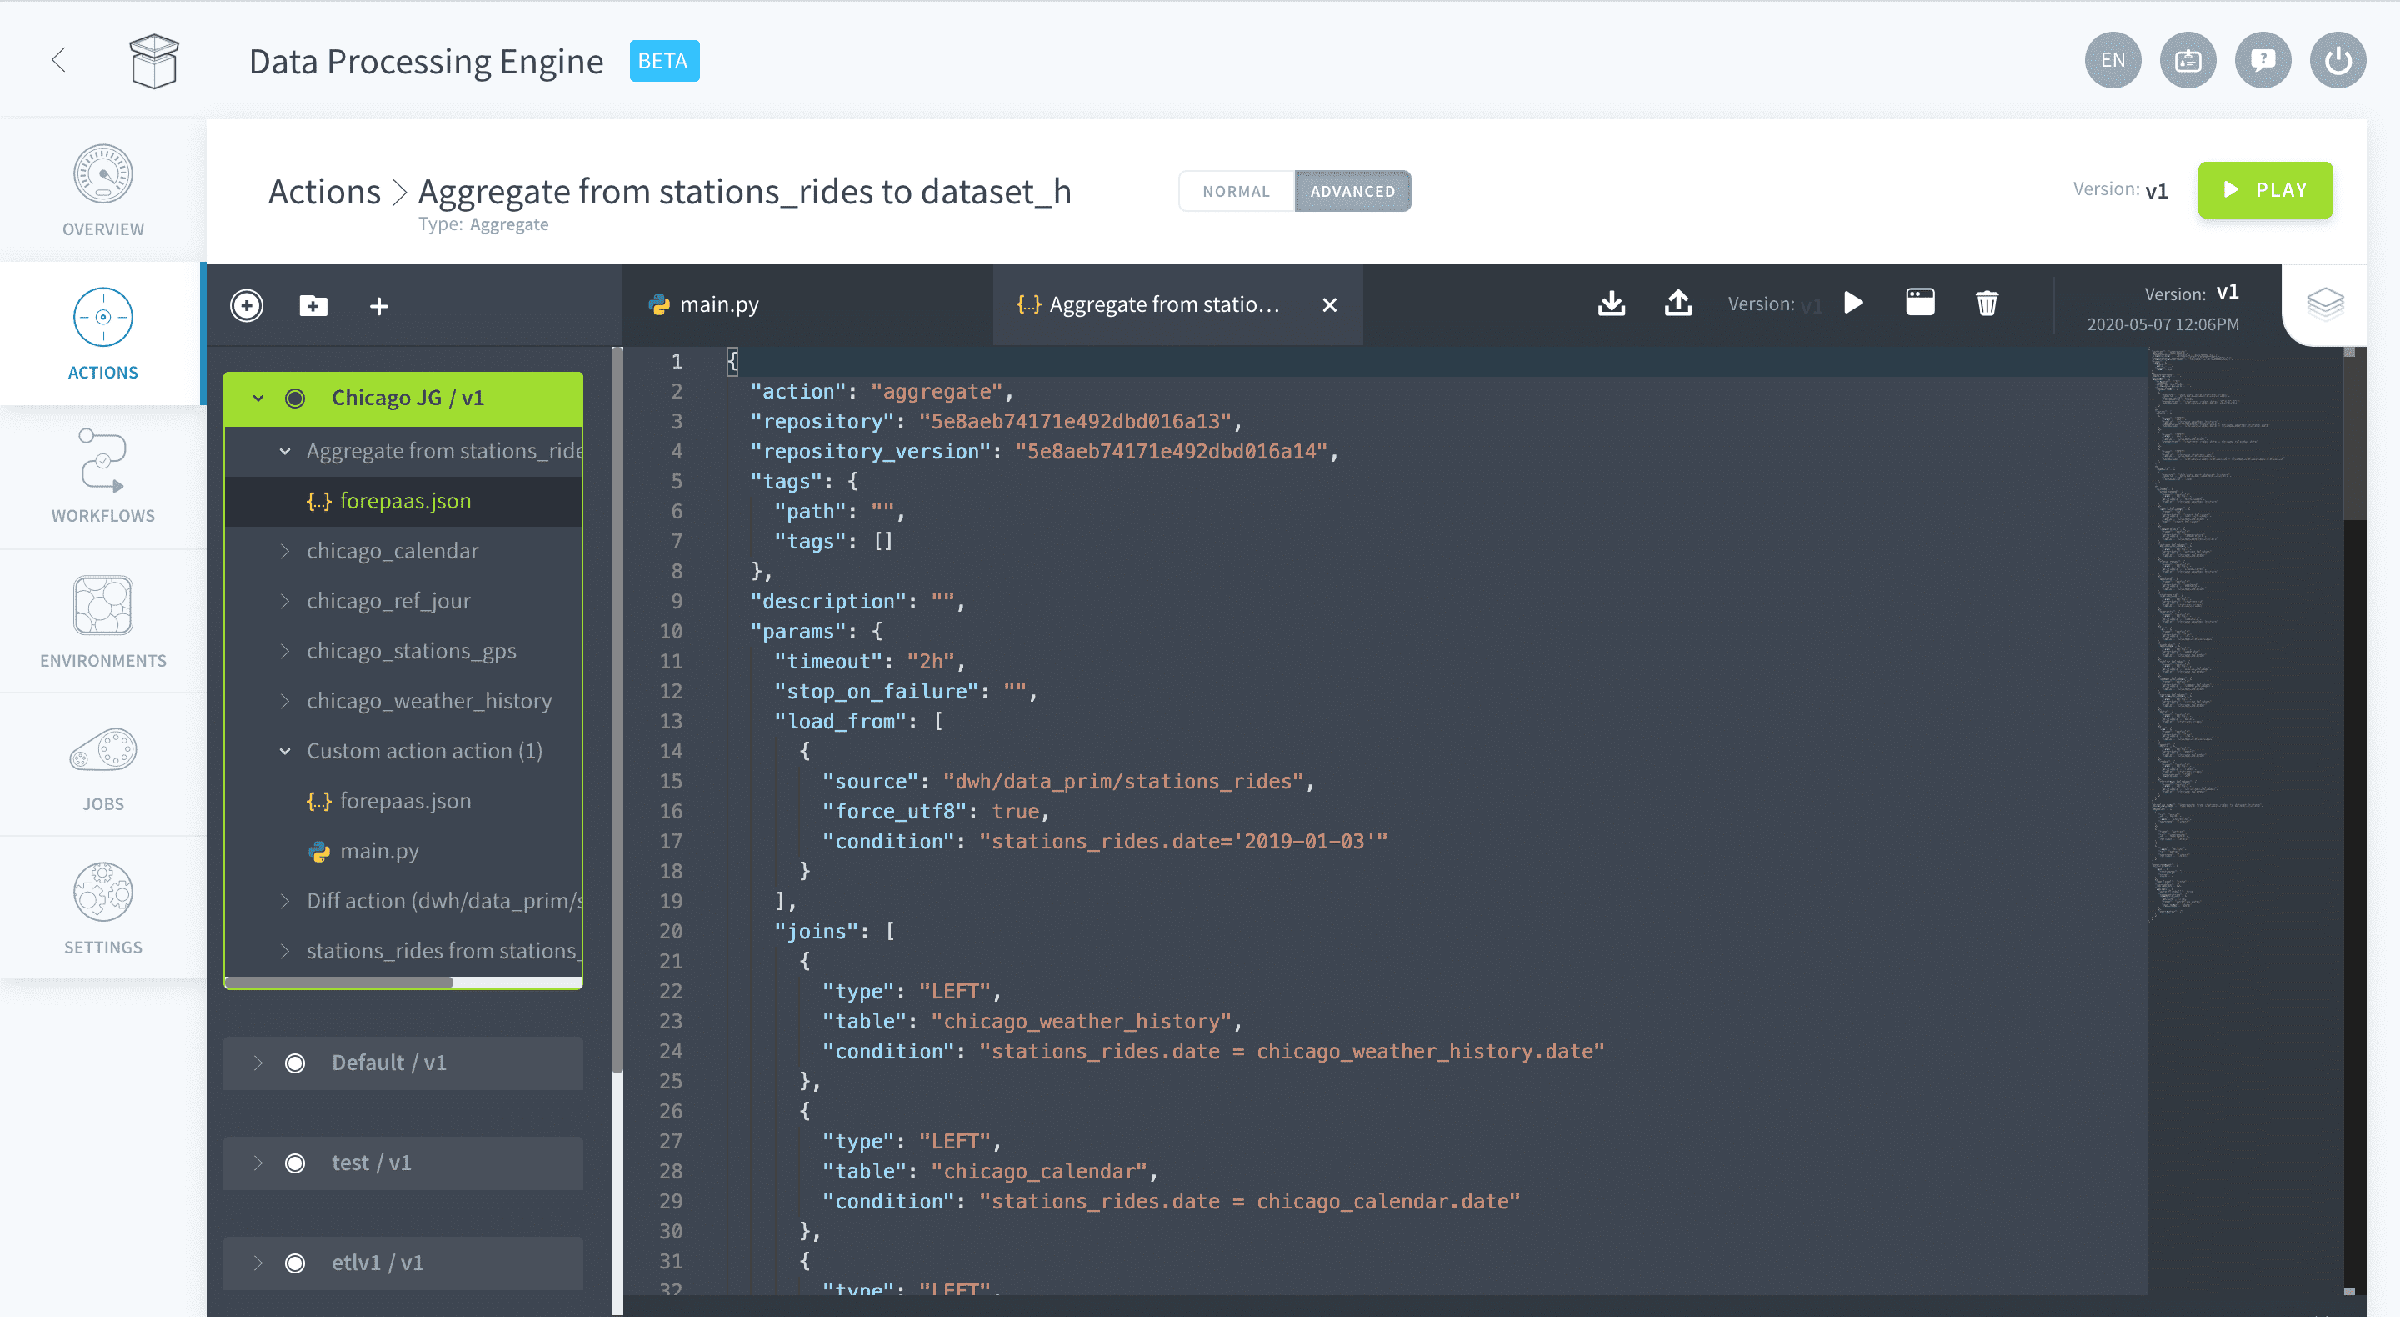
Note that the advanced mode is also very practical for Custom actions as it offers an IDE-like experience in the web. This will allow you to code custom Python script directly inside of the platform without managing files locally on your computer.
Manage actions
As your Project matures, structure and organization becomes increasingly important. To facilitate this, the Platform provides several methods to better organize and manage your actions:
-
Repositories: Allow compartmentalizing your actions into different sections that can be versioned
-
Versions: the platform offers an online versioning experience for each repository of actions individually. The platform has its own version control system, but you can also synchronize each repository with Git
-
Descriptions & Tags: Every action can be assigned a description and/or tags. This allows you to document your Project, particularly useful when collaborating in large teams.
-
Lineage: Every action contains a lineage sub-tab, accessible when editing an action. It displays every workflow that contains the action. Workflows allow you to orchestrate the execution of multiple actions and launch them in a specific order using stages.
Versioning repositories of actions
Editing actions is always on autosave mode. When you are trying to iterate on existing actions, it is recommended to create several versions of the actions' code. This lets you incrementally introduce variations to experiment and test your work, while keeping the version in production always intact.
On the platform, this versioning happens at the level of the repositories. The repositories are the tabs you see at the top of the Actions' tree view.
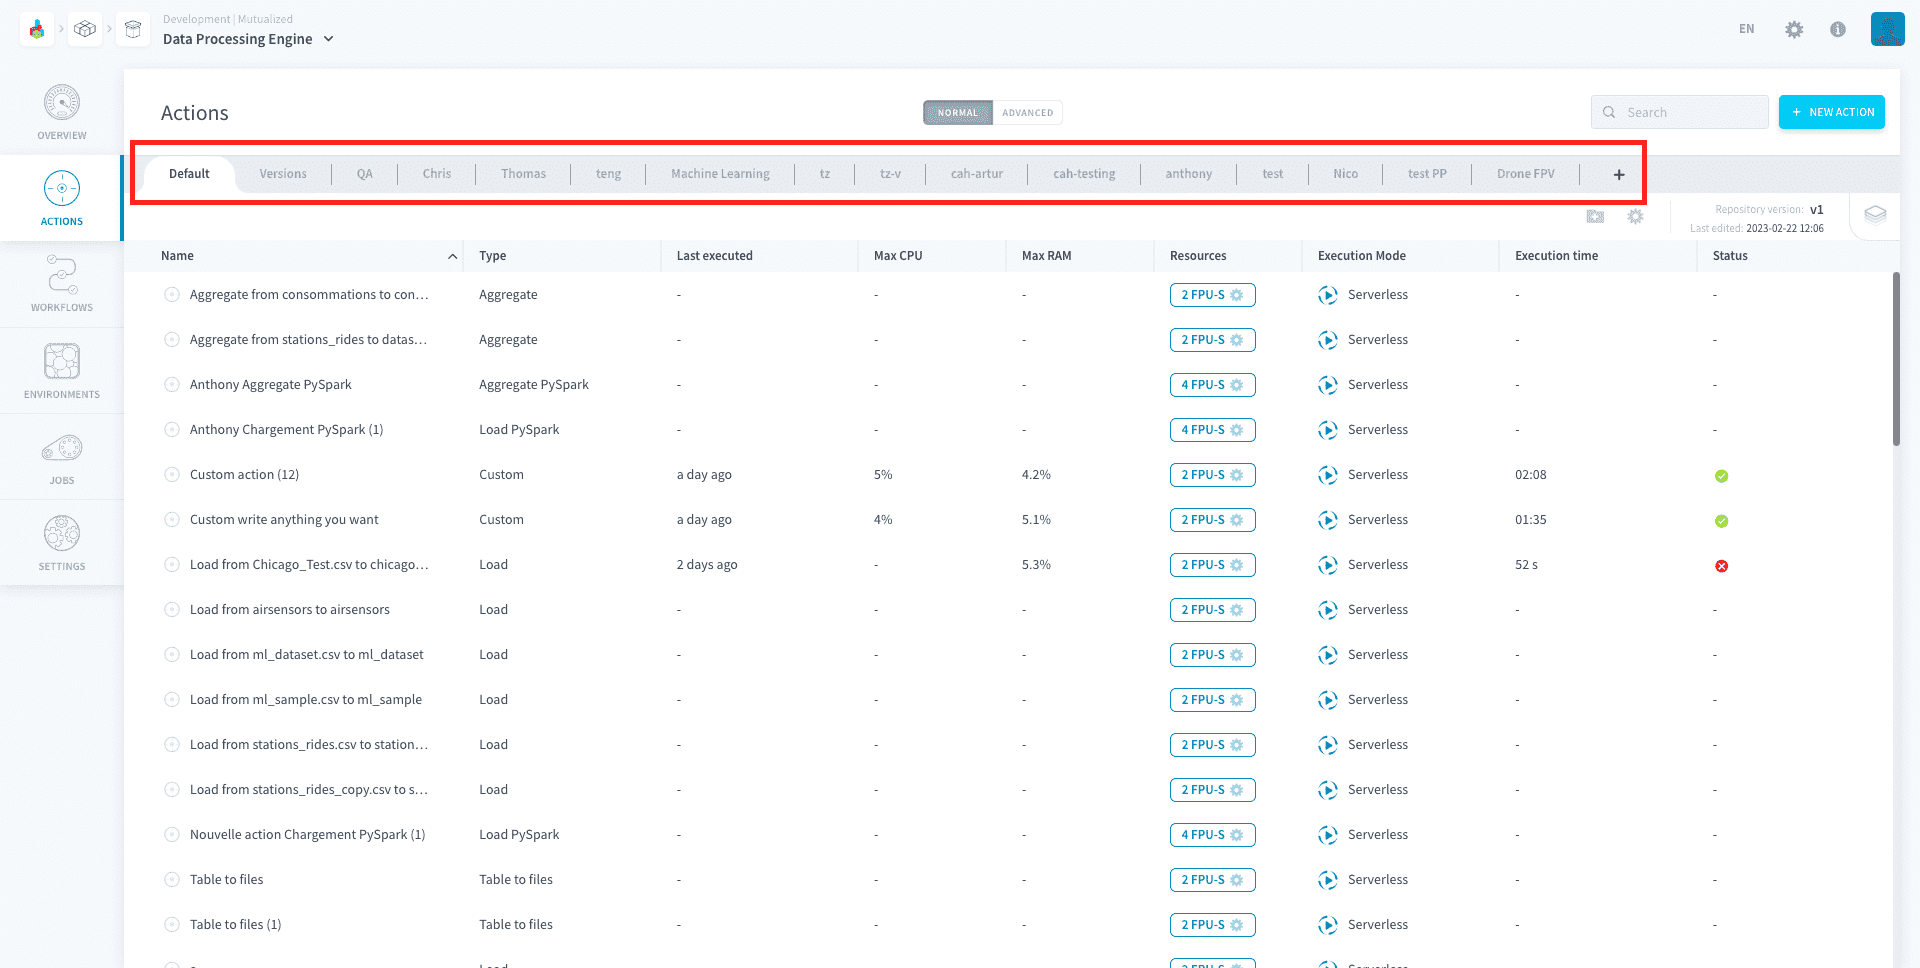
You cannot version an individual action, but rather a whole repository of actions. The versioning panel can be accessed at the top right of the repository header:
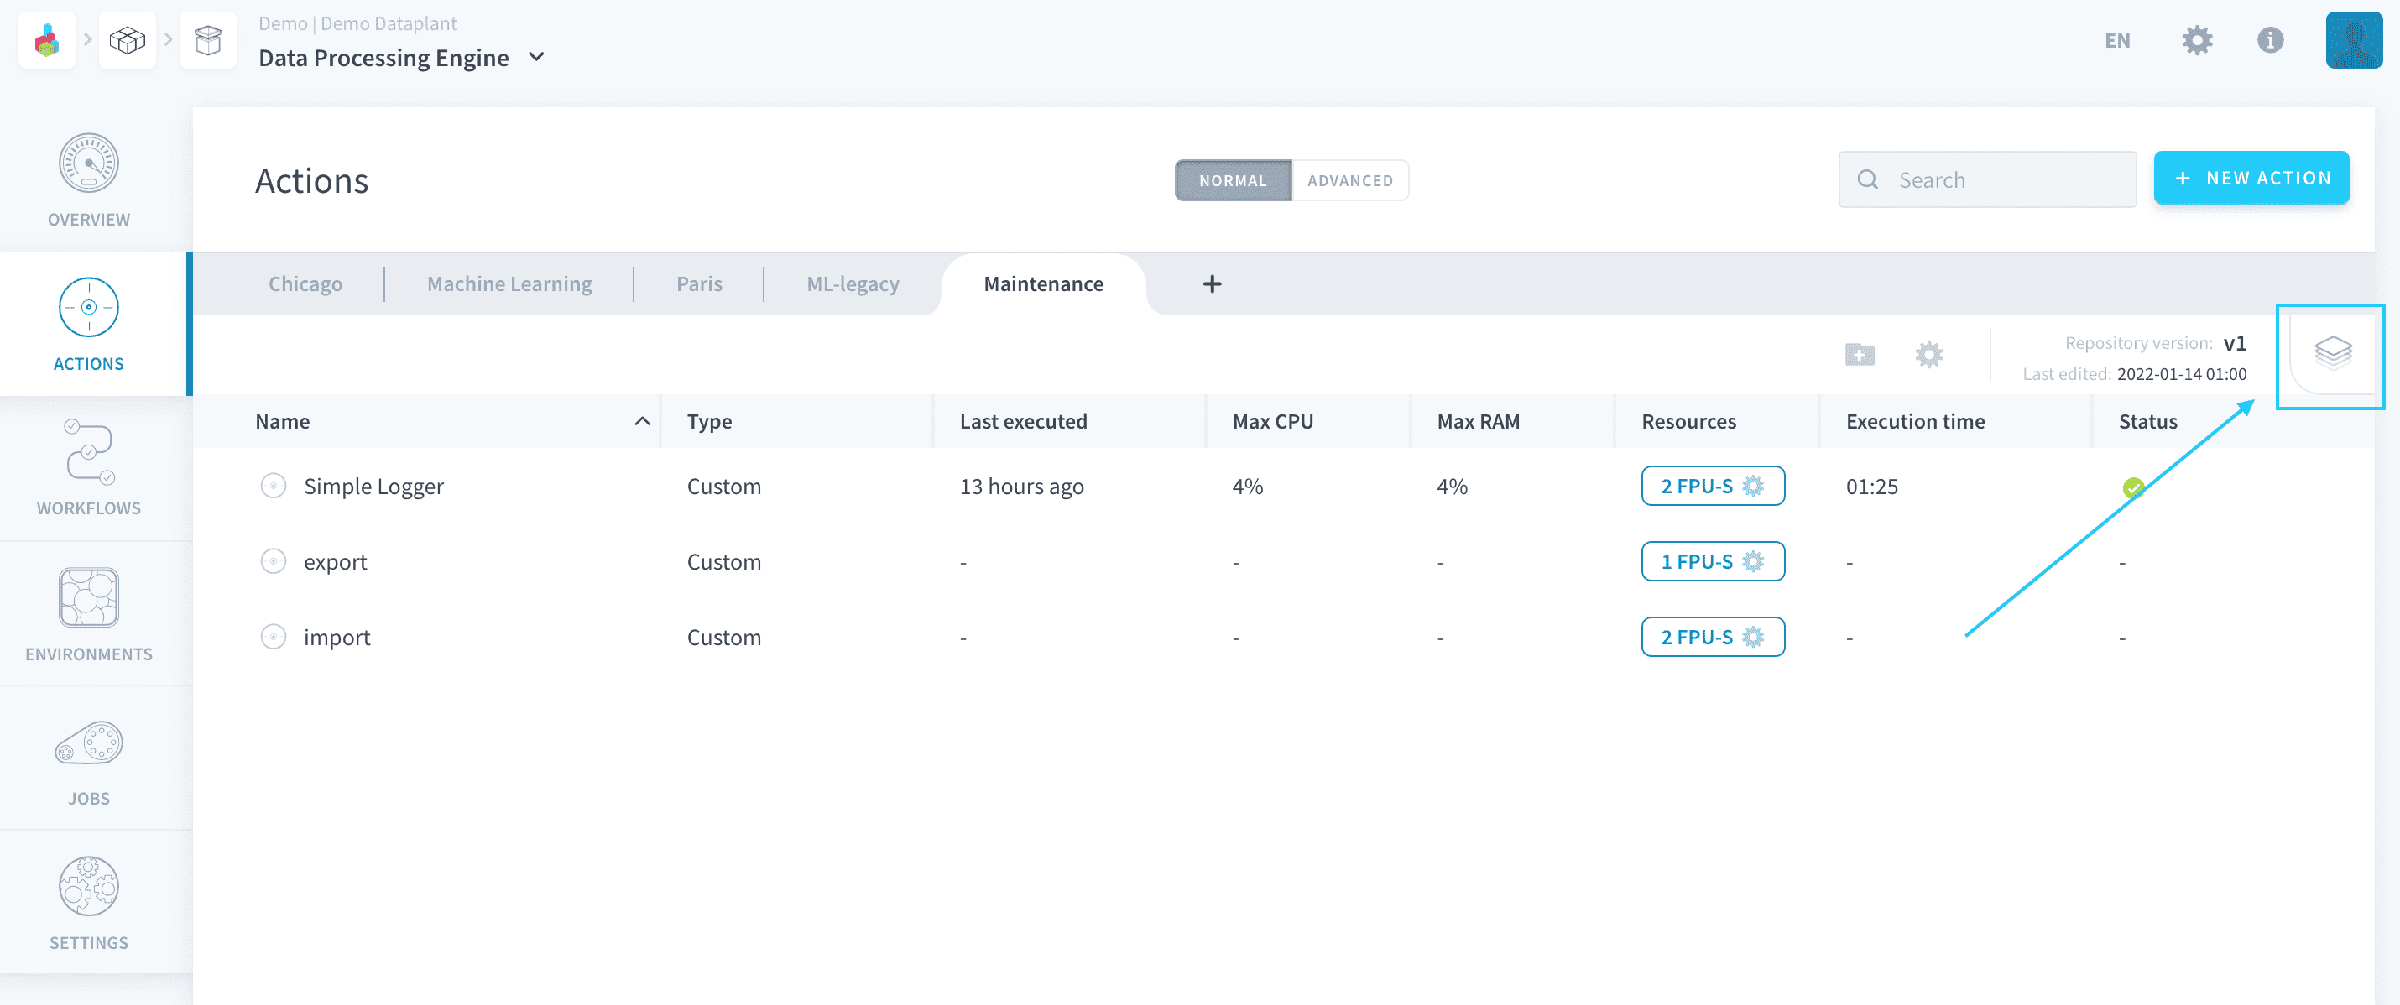
This functionality is also available on other components that implement repositories, such as Analytics Manager queries. It works in the same way, just look for the equivalent UI elements in the Queries screen.
There are 2 versioning systems on the Platform:
- Data Platform version control system: the default versioning system on all repositories
- Git versioning: if you decide to synchronize your repository with Git
Now let's see how all of this works in practice!
Use the Platform Version Control System
By default, each repository of actions on the platform has an integrated version control system, allowing you to manually manage different versions of the code (i.e., actions) they contain.
Repositories now have:
- a deployed version, which is the version served when executing the job.
- a latest version, which is the current version being edited through the editor panel.
If your repository has only one version, that version is both the deployed and editable version, meaning changes affect production immediately.
If your repository has two or more versions, only the latest version can be edited. All other versions, including the deployed version, will be in read-only mode.
To create a new version for the repository, open the versioning panel at the top right and click on the + icon.
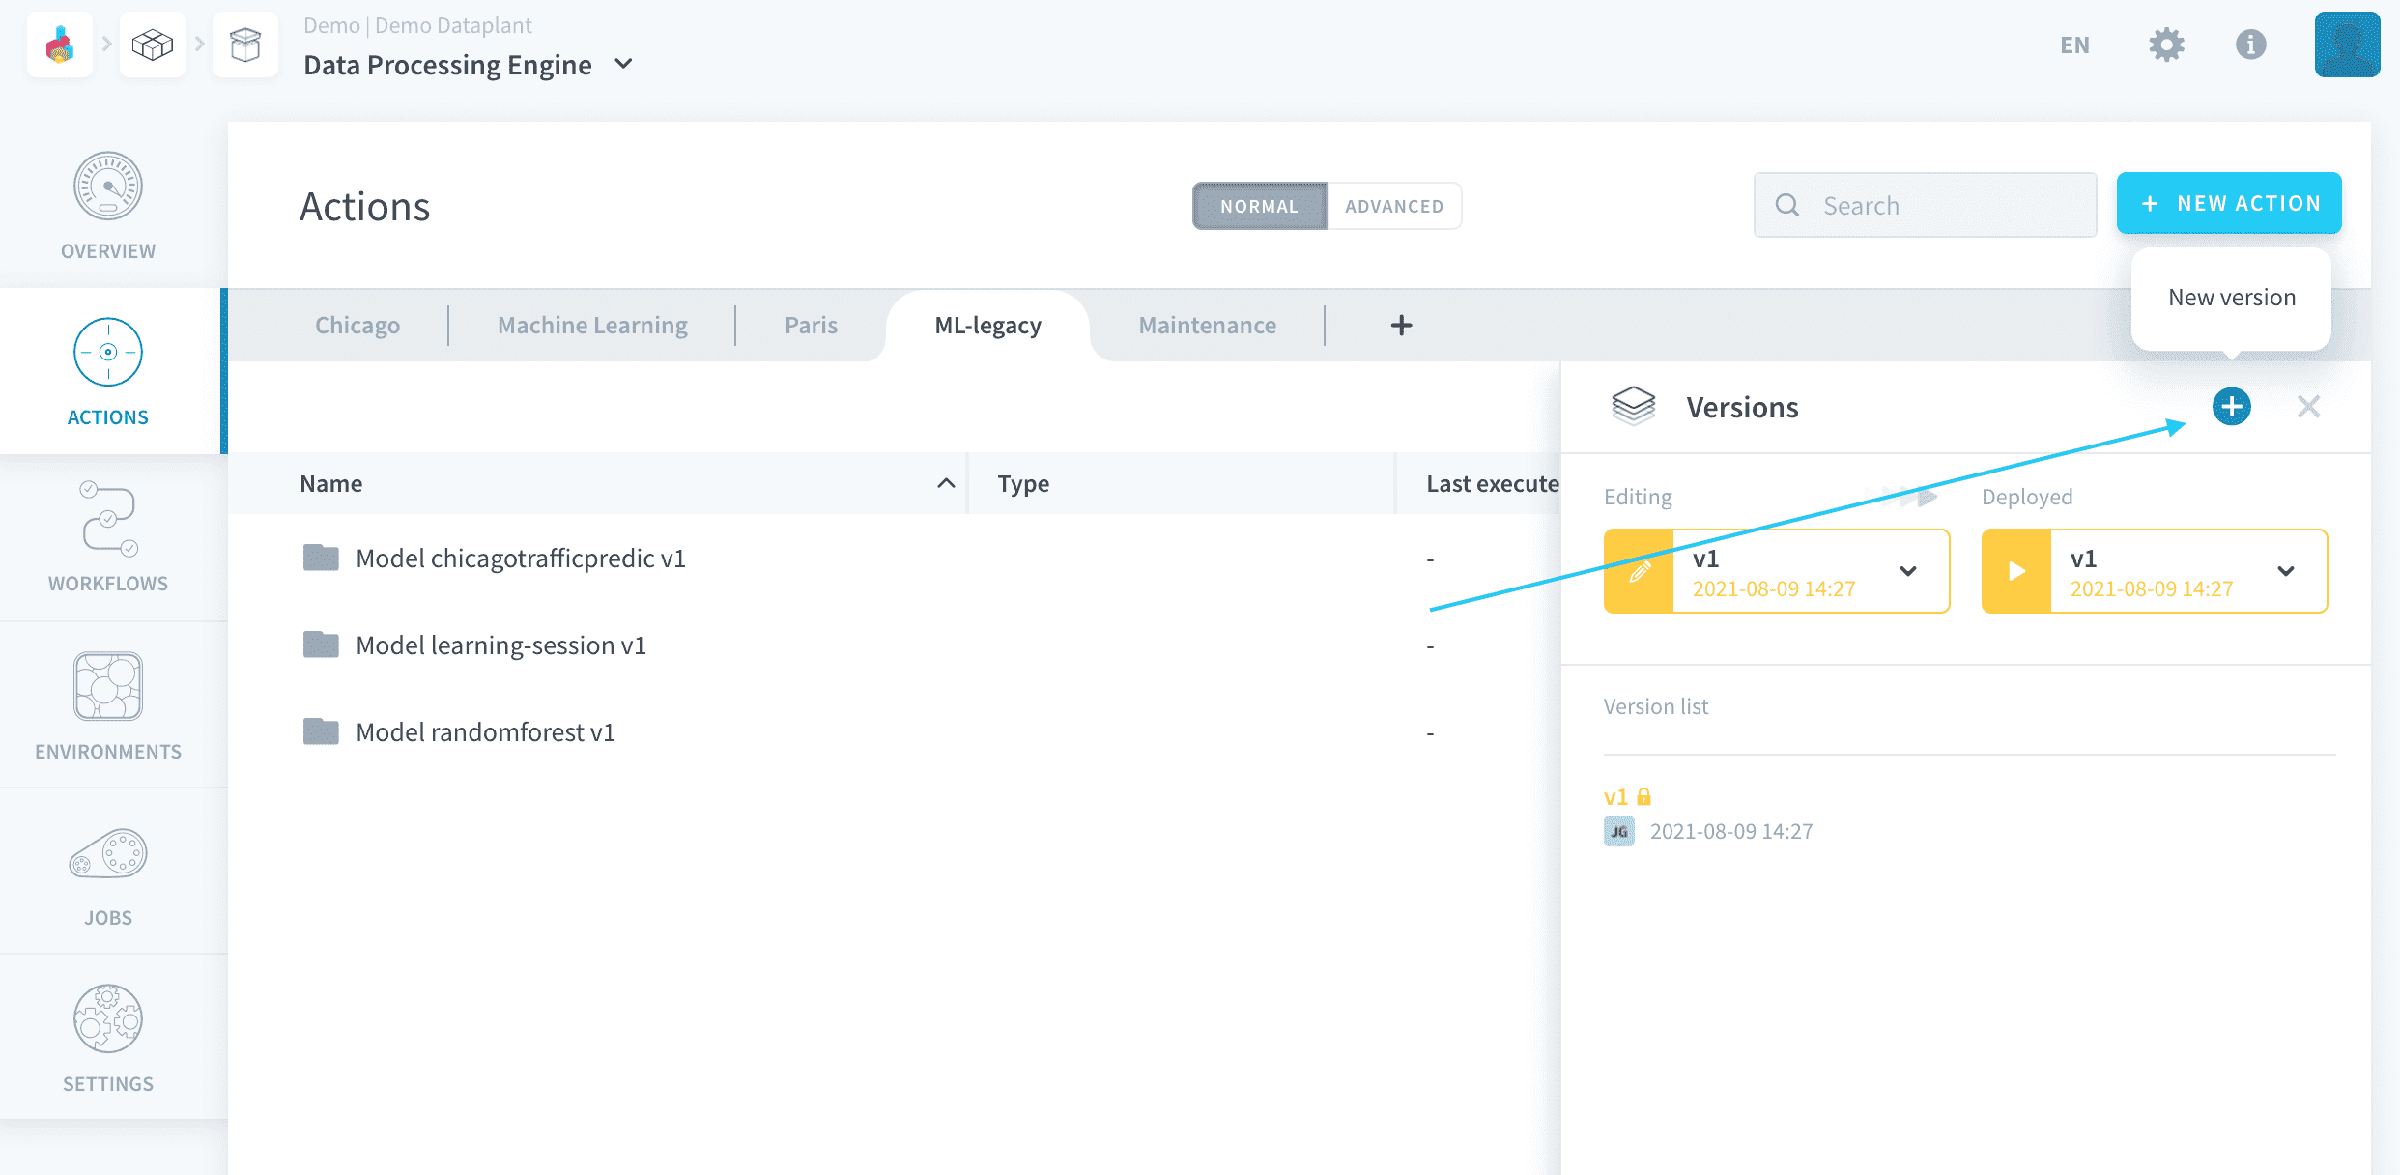
Choose which version to duplicate to create the new version.
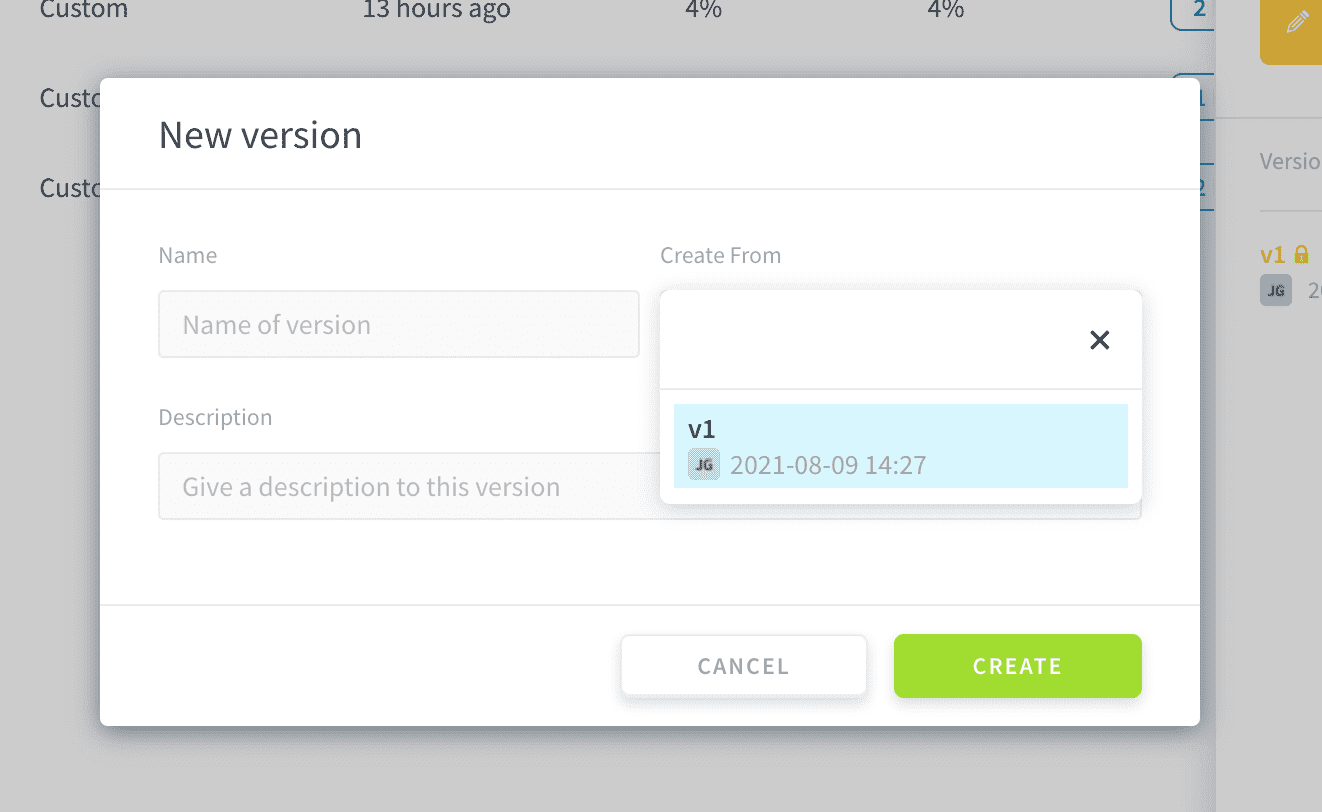
After creating the new version, the deployed version will not change. You are able to edit the new version directly.
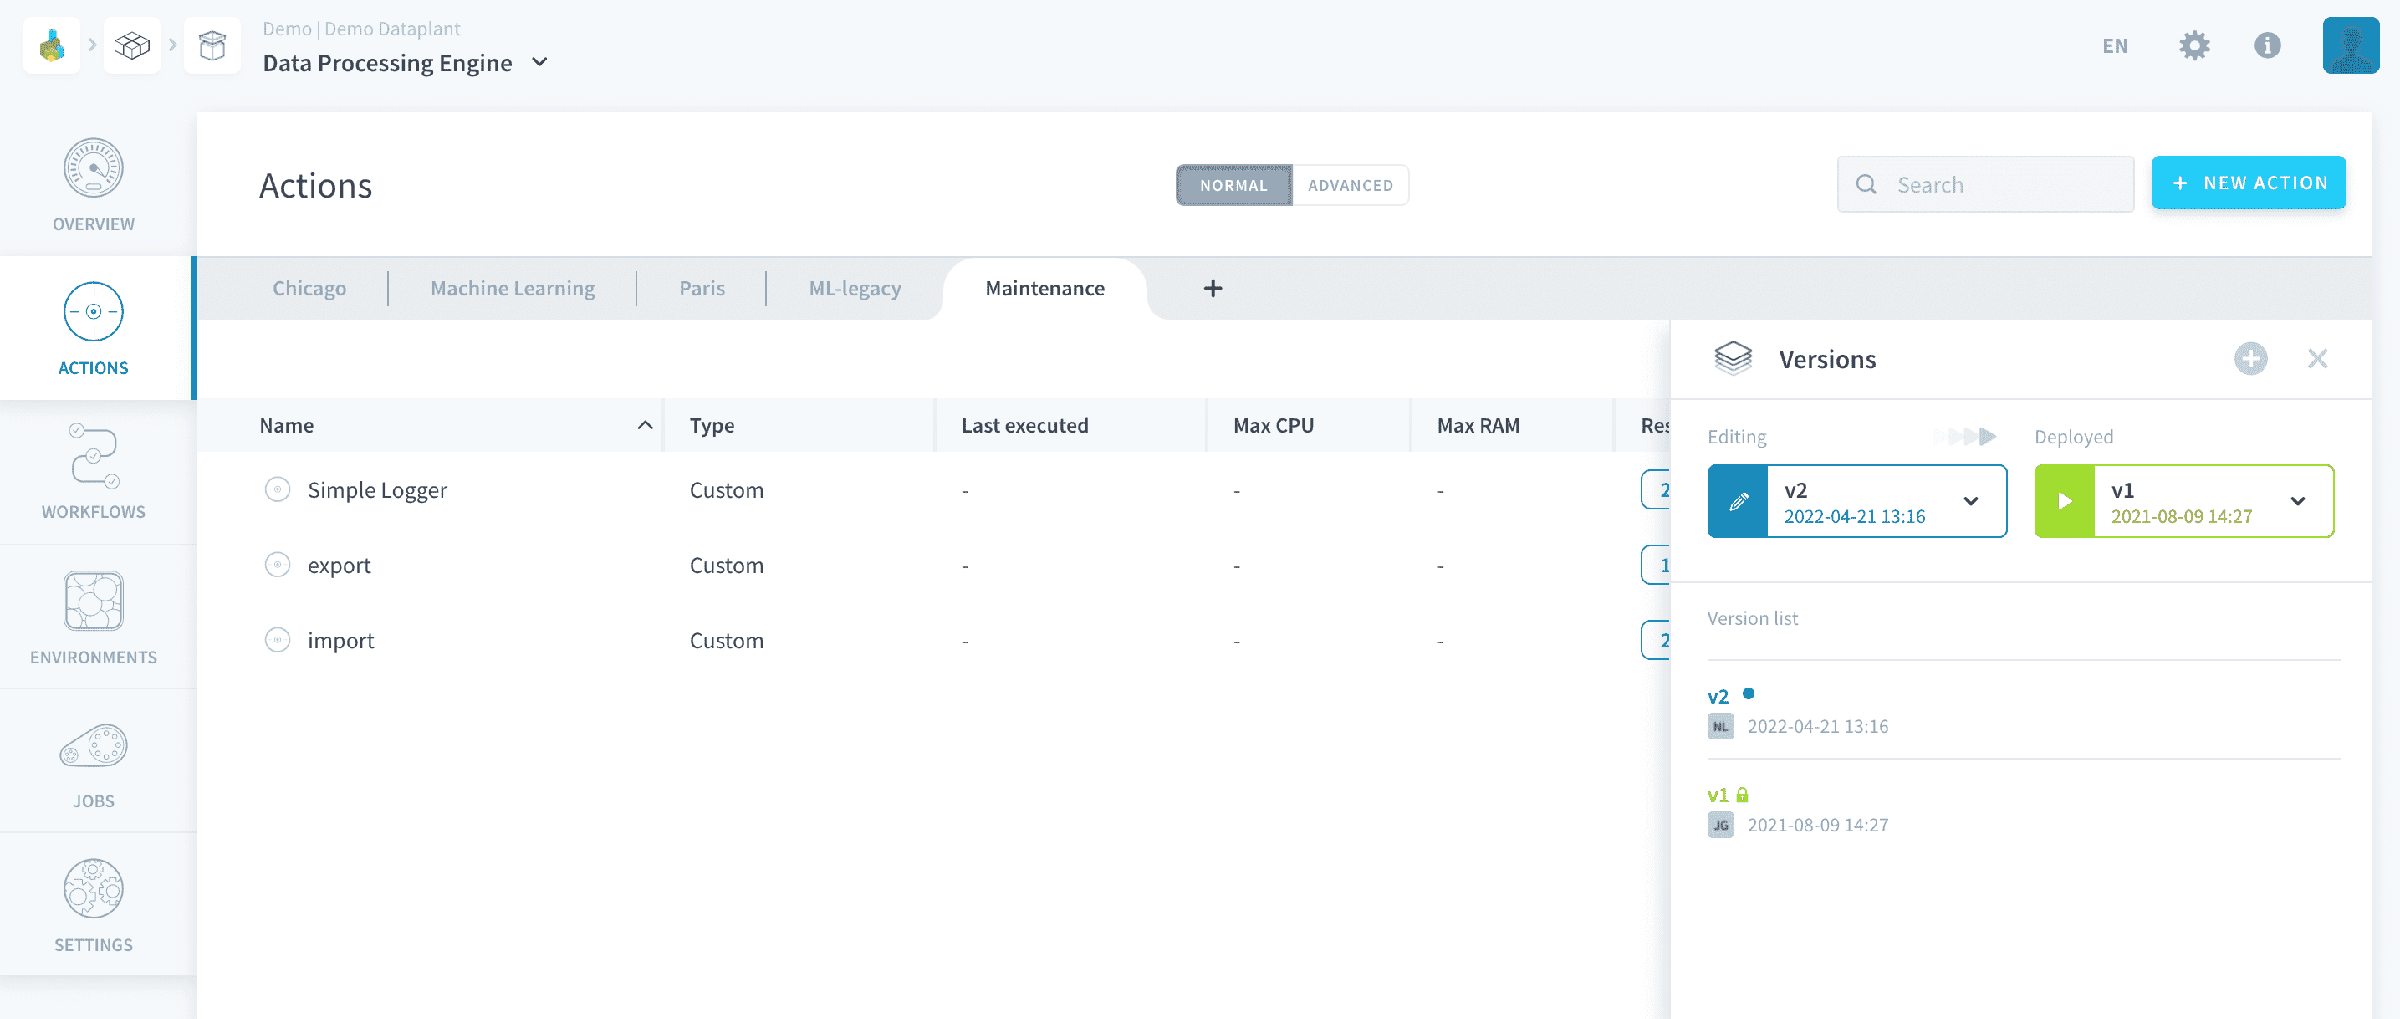
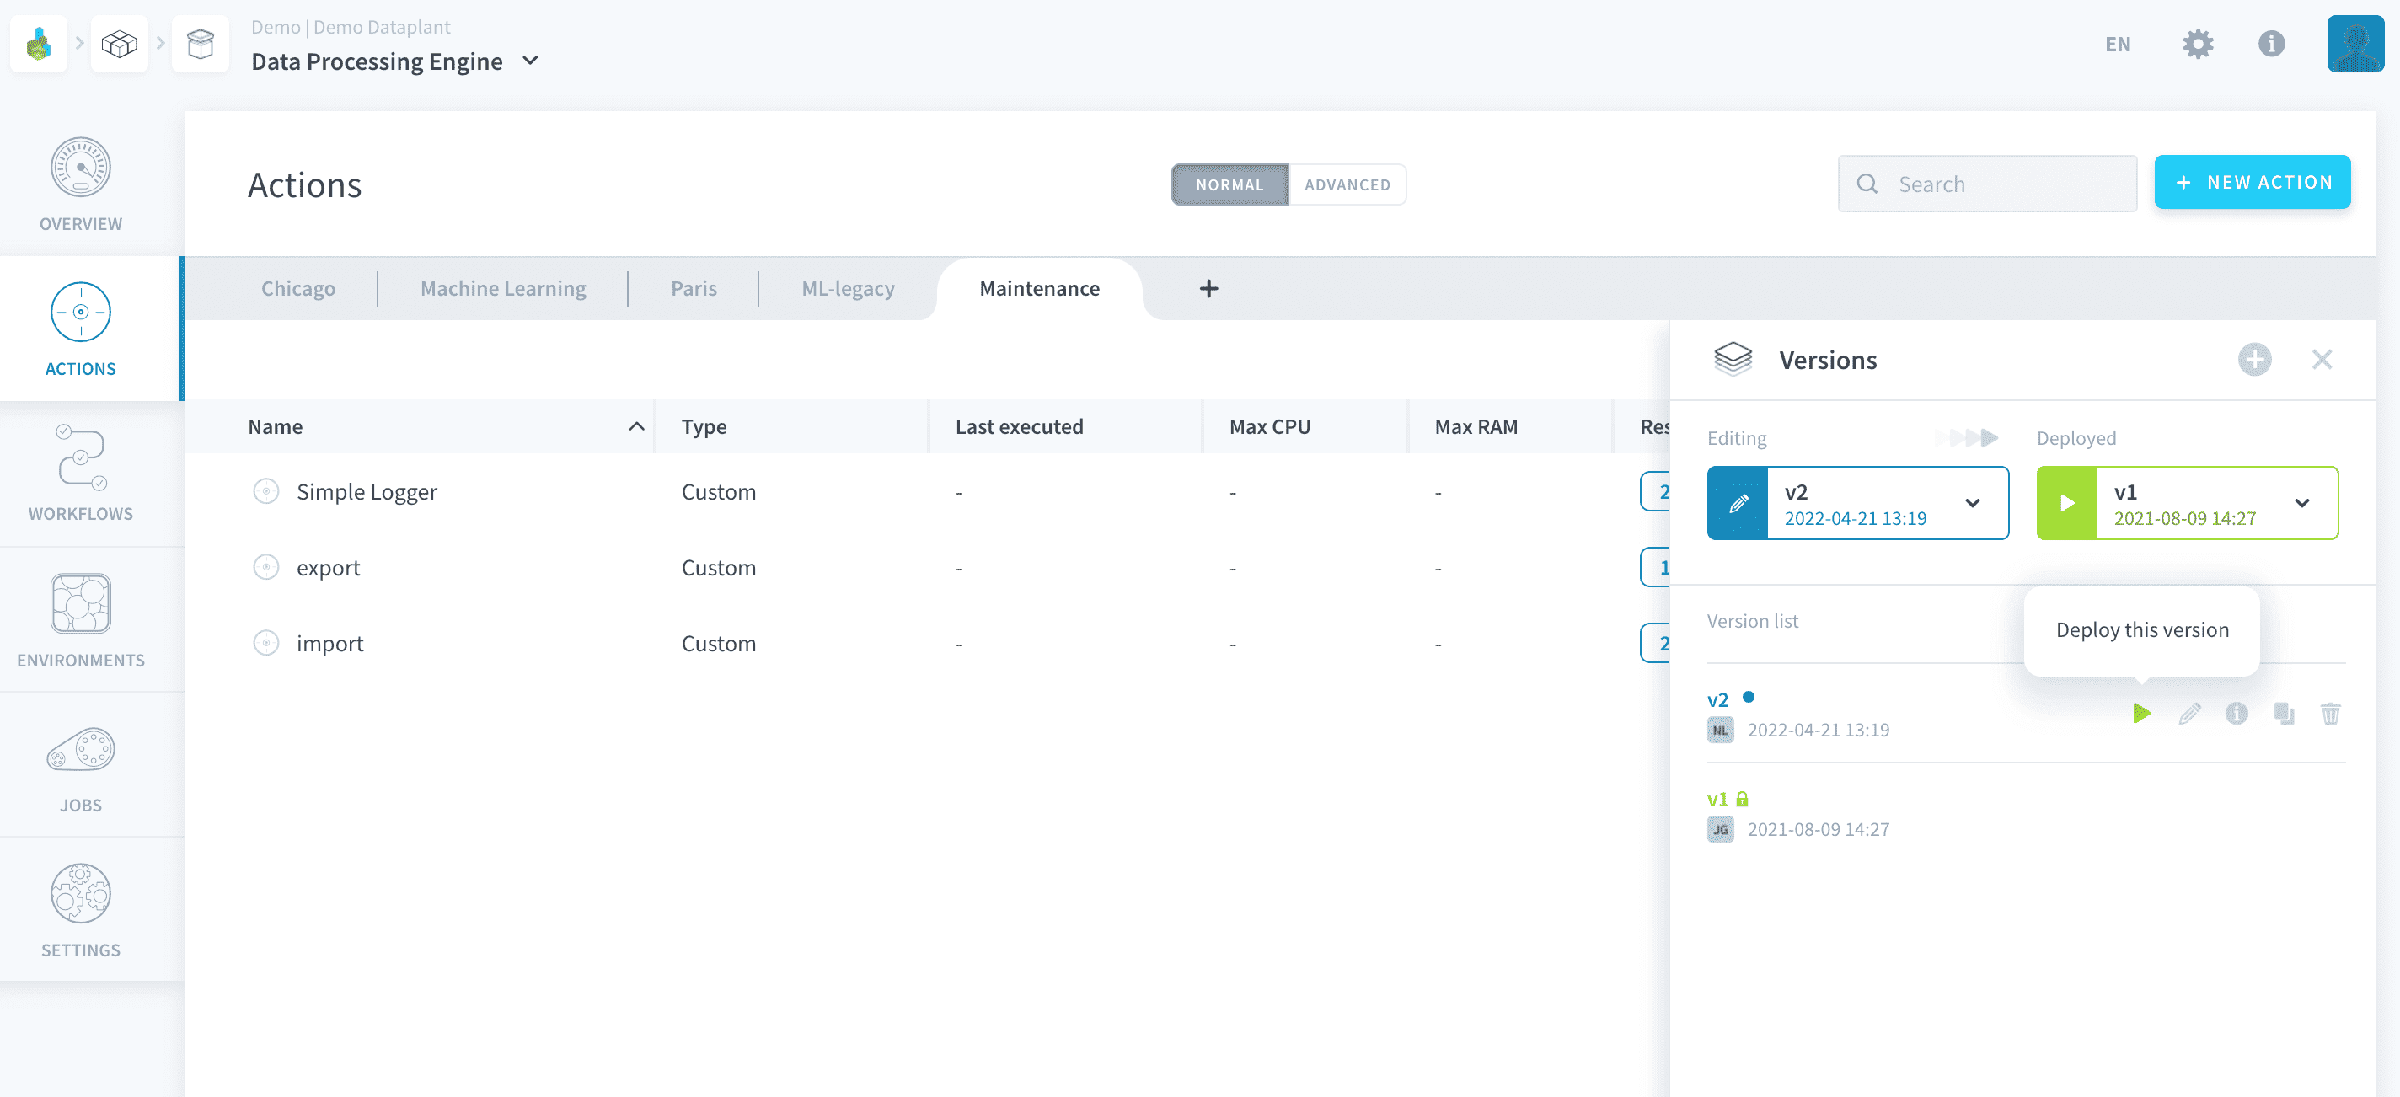
Click on the Play button to set a new version as the deployed version: the version of the code used when actions of the repo are executed.
Use a repository linked to Git
Each repository can be linked to an external Git repository in which case versions are synced with Git commits. This allows you to update & test actions continuously without affecting the version deployed in production.
Linking a repository to Git
To link your repository on the platform to Git, you must click on the gear icon to edit an existing repository or create a new a one. Either of these actions will open the repository configuration window.
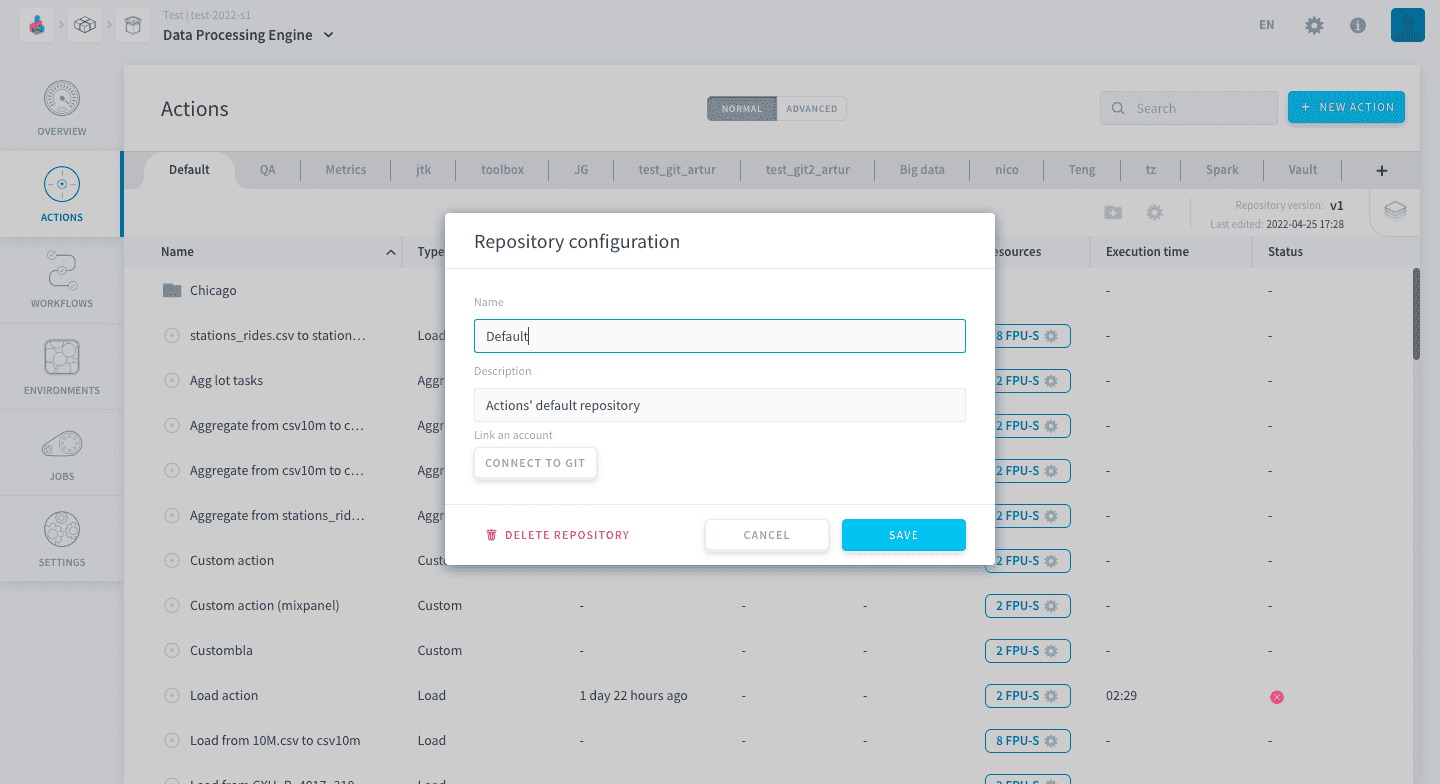
Click on Connect to Git to expand the window.
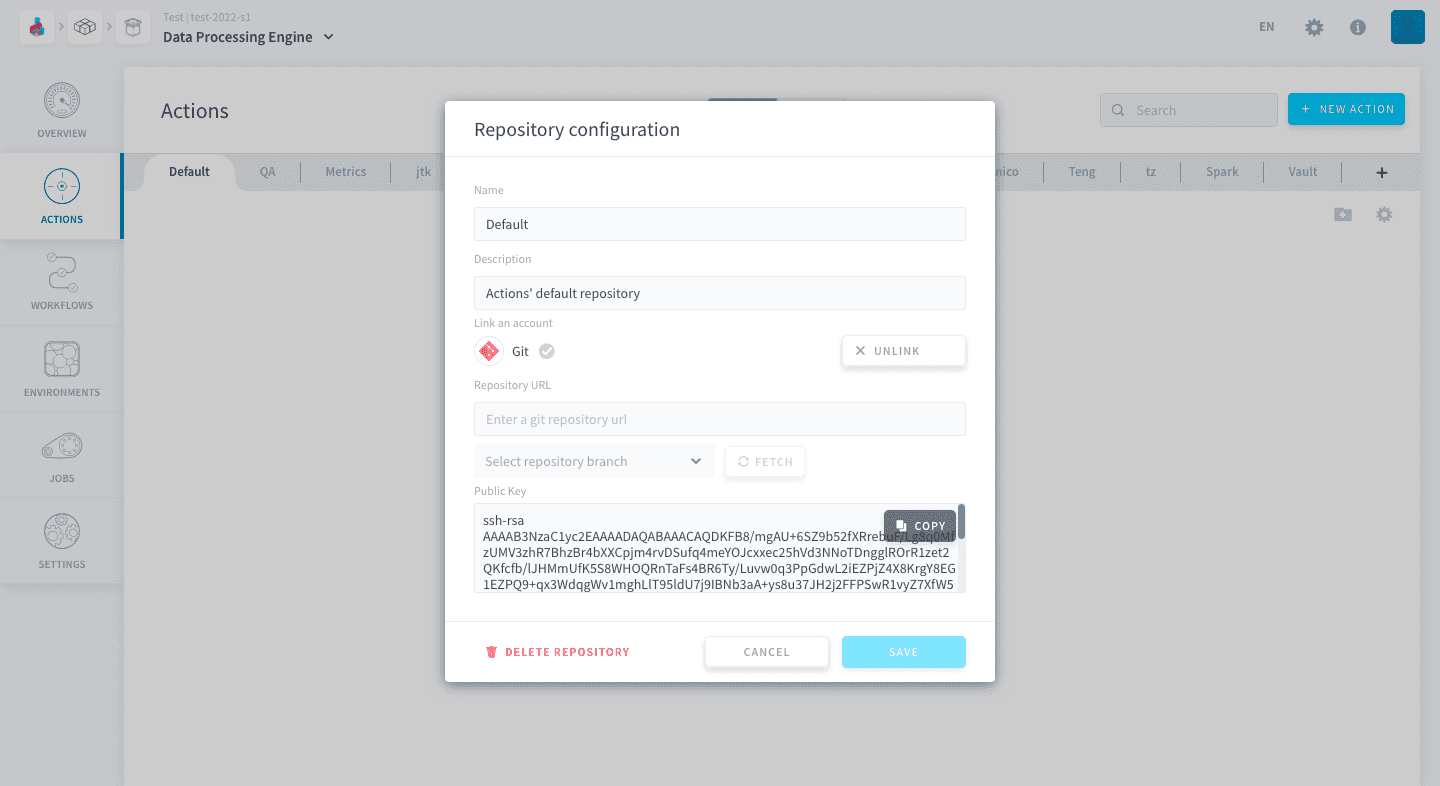
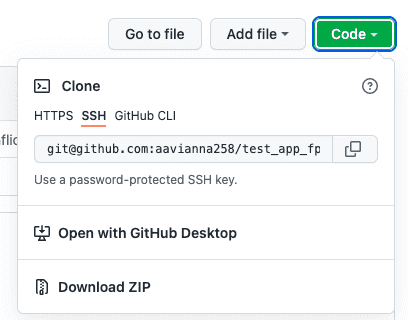
Here the first thing you need to enter is the Repository SSH URL.
It is generally found on repository cloning options of common Git solutions. On GitHUB, for instance, it can be found on Code > Clone > SSH.
Next click on FETCH to get the distant branches and select the branch you desire to use.
Finally, copy the Public SSH key given at the bottom and paste it in the list of SSH keys associated to your account on your Git solution. For GitHUB, you can follow this tutorial.
Committing and pushing
After changing an object in a repo, your repo will display the uncommitted changes as shown in the image below. You can commit and push them by clicking on the arrow pointing upwards indicated in the image.
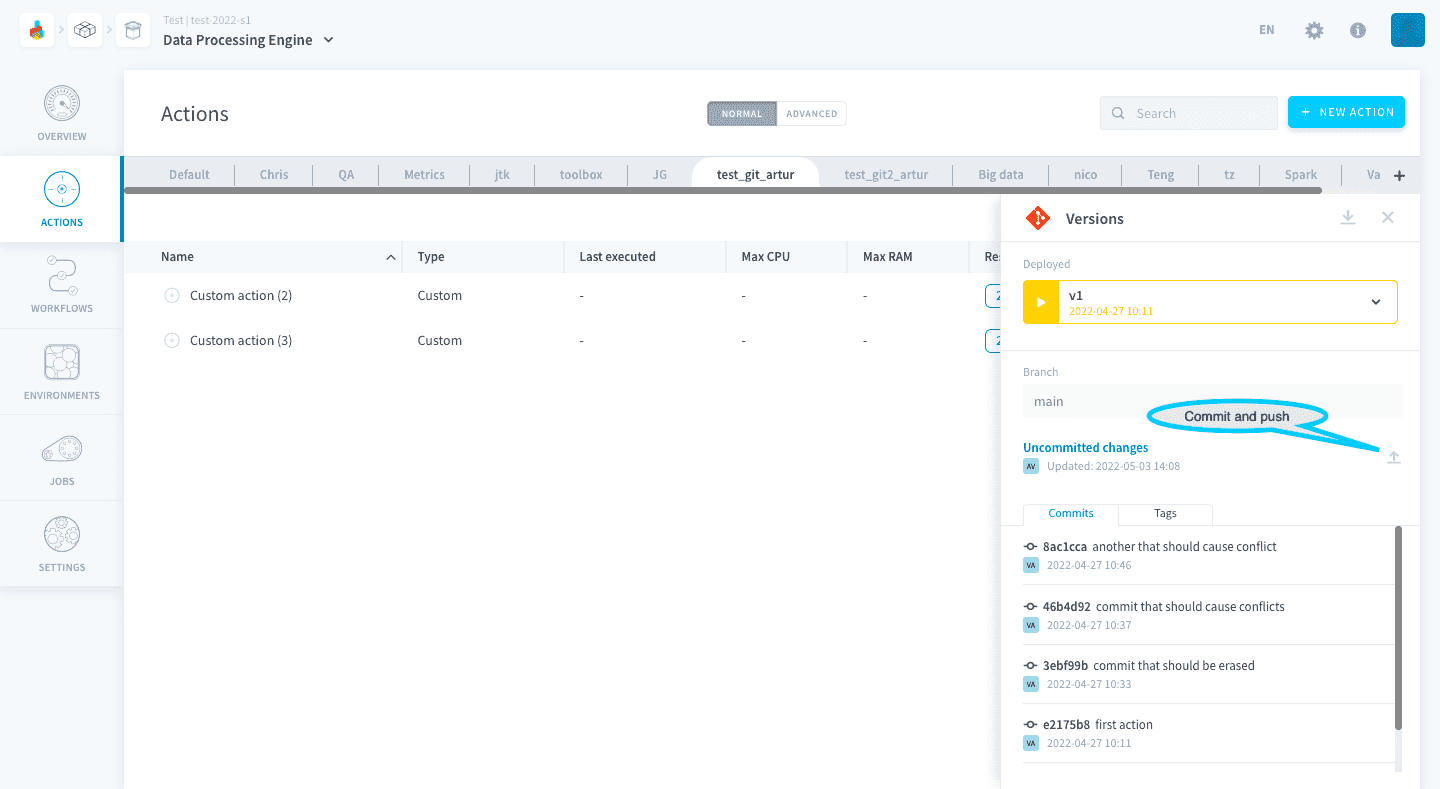
If there is a conflict when you push, your changes will not be pushed to the branch you configured, instead they will be pushed to a new branch with same name of the current branch and a suffix of _conflictN, where N is the number of the conflict. For example, if your branch is named current-branch and your push causes a conflict, the new branch will be named current-branch_conflict1. If there is a conflict again when you push, the new branch will be named current-branch_conflict2.
Pulling and merging
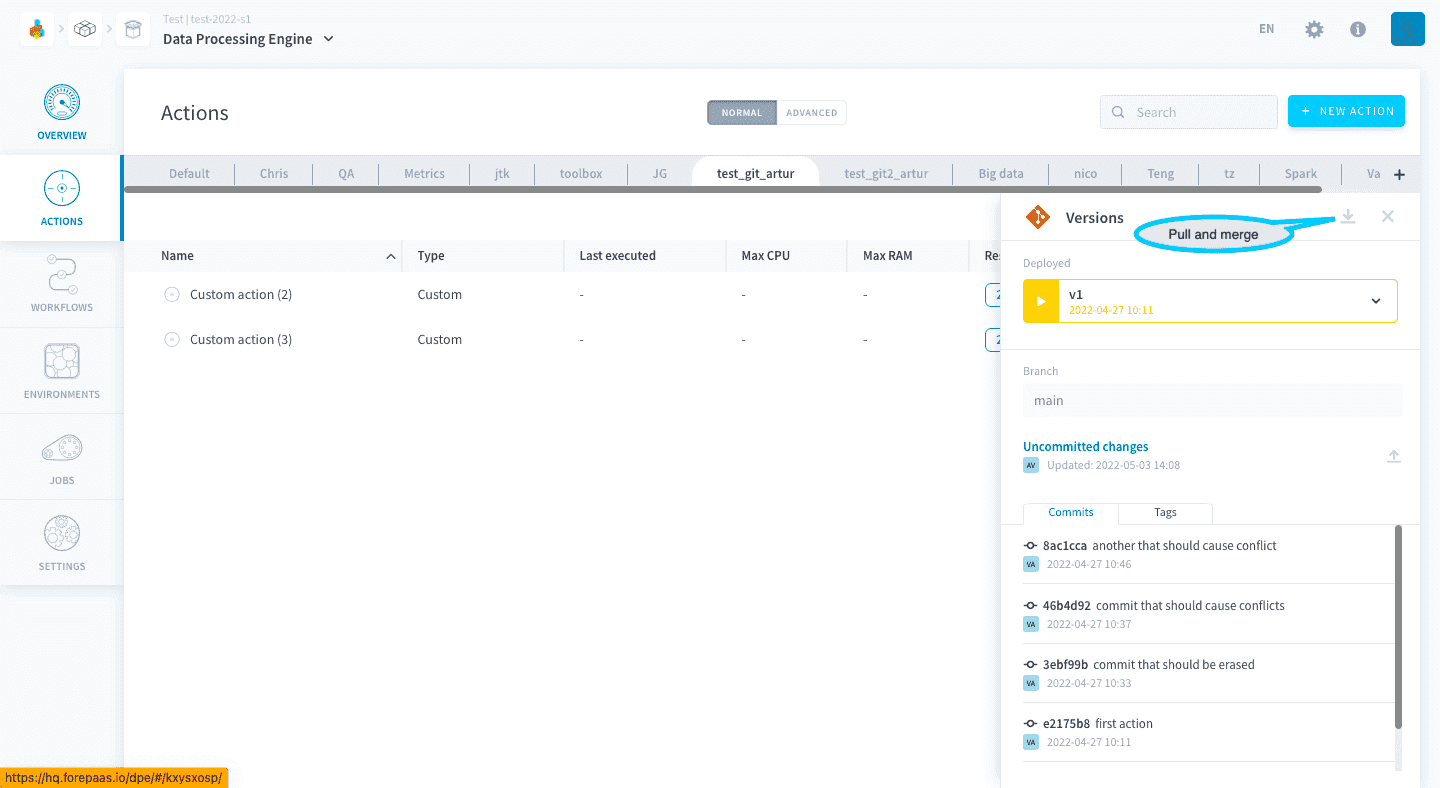
Pull distant changes by clicking on the arrow pointing downwards indicated in the image, a popup window will prompt you to confirm your decision. All uncommitted changes will be lost and both branches will be merged together.
Organising and sharing code across actions
An action is a single .py file with one entry function (customfunc(event) by default), added through drag & drop or the advanced IDE. There is no multi-file package structure inside a single action.
To reuse code across actions, use one of the documented paths:
- Reference a Git repository in the Python Requirements field:
- Version your whole actions repository through Git: link it over SSH, fetch a branch, and paste the public SSH key on the Git side. This is the intended mechanism for sharing code between actions.
There are no global Python variables shared between actions: each job runs in a fresh container that shuts down when the job finishes. Reusable values are passed through Environments (environment variables), which can be assigned to several actions and workflows at once.
Triggering a Notebook from an action
Triggering a Notebook from a Custom action is not supported. Notebooks are Jupyter instances with their own manual Start/Stop lifecycle, and the documented flow is the reverse one: converting a notebook into an action.
Recommended pattern: convert the notebook code into a Custom action, which can then be orchestrated in a workflow or through an API call.
Managing actions programmatically (CI/CD)
There is no dedicated REST endpoint for creating, updating or deleting actions. The official approach is Git synchronisation: link the actions repository to a Git repository over SSH, then commit and push from the platform, or pull changes made outside of it.
For CI/CD, this means that changing an action is a commit into the linked Git repository, followed by a pull from the platform. Workflows can be run manually or through an API call, so triggering is available even though the CRUD of actions goes through Git.
Build behaviour
- What triggers a build. Worker builds are triggered by dependency changes: updating dependencies redeploys the environment. For Git dependencies, click Force Build to reinstall.
- No image cache. Pre-built workers and image caching for actions are not available today (unlike the preconfigured Notebook images: Base, Data Science, PySpark, TensorFlow).
- Autosave and versions. Editing an action is always in autosave mode. To avoid affecting production, create a new version: it becomes the editable latest, while the deployed version stays frozen.
To keep rebuilds to a minimum, factor shared dependencies into a reusable Environment instead of redeclaring them per action.
Go further
If you need training or technical assistance to implement our solutions, contact your sales representative or click on this link to get a quote and ask our Professional Services experts for a custom analysis of your project.
Ask questions, give your feedback and interact directly with the team building the Data Platform on the dedicated Discord channel.
If you need support with your OVHcloud services, create a request in our Help Centre.
Join our community of users.