

Plug Power BI to your Data Platform
Are you or your teammates already proficient with Microsoft Power BI? If you want to use it as your analytics solution on top your Data Platform
Objective
Are you or your teammates already proficient with Microsoft Power BI? If you want to use it as your analytics solution on top your Data Platform, this guide is for you.
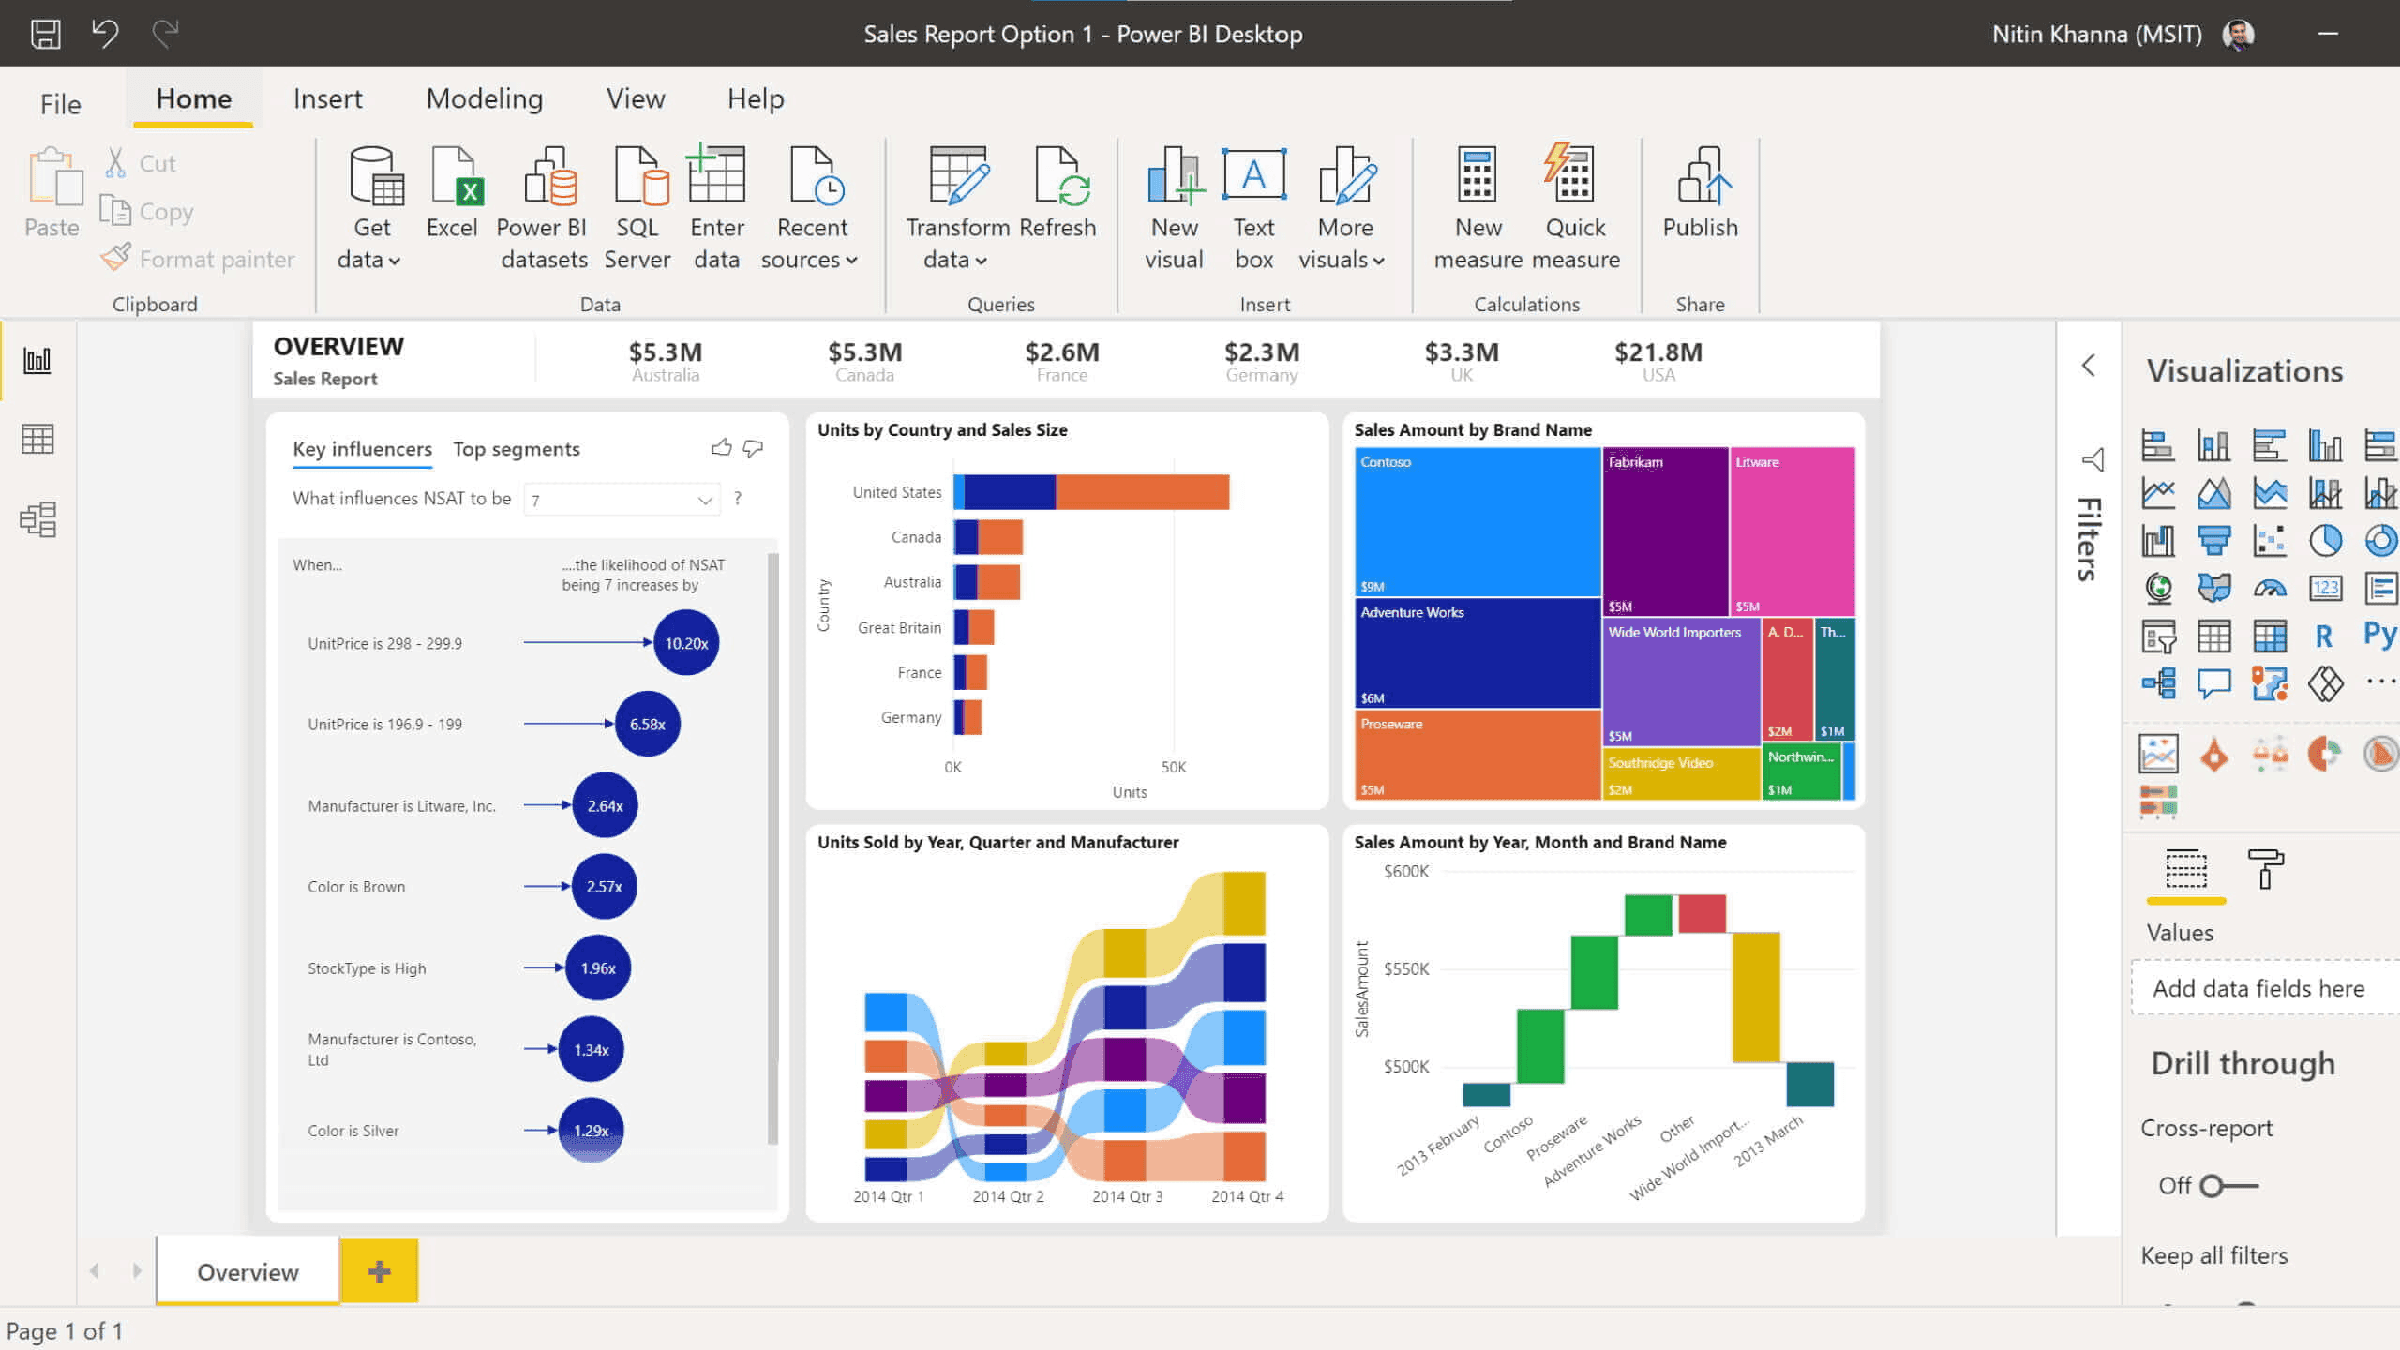
The configuration is done in two parts. First you need to configure the consumer on Data Platform and then configure the connector on Power BI Desktop.
How to configure Power BI with your Data Platform
If you haven't done so already, add a new Power BI consumer in the Connectors. Else, just edit it.
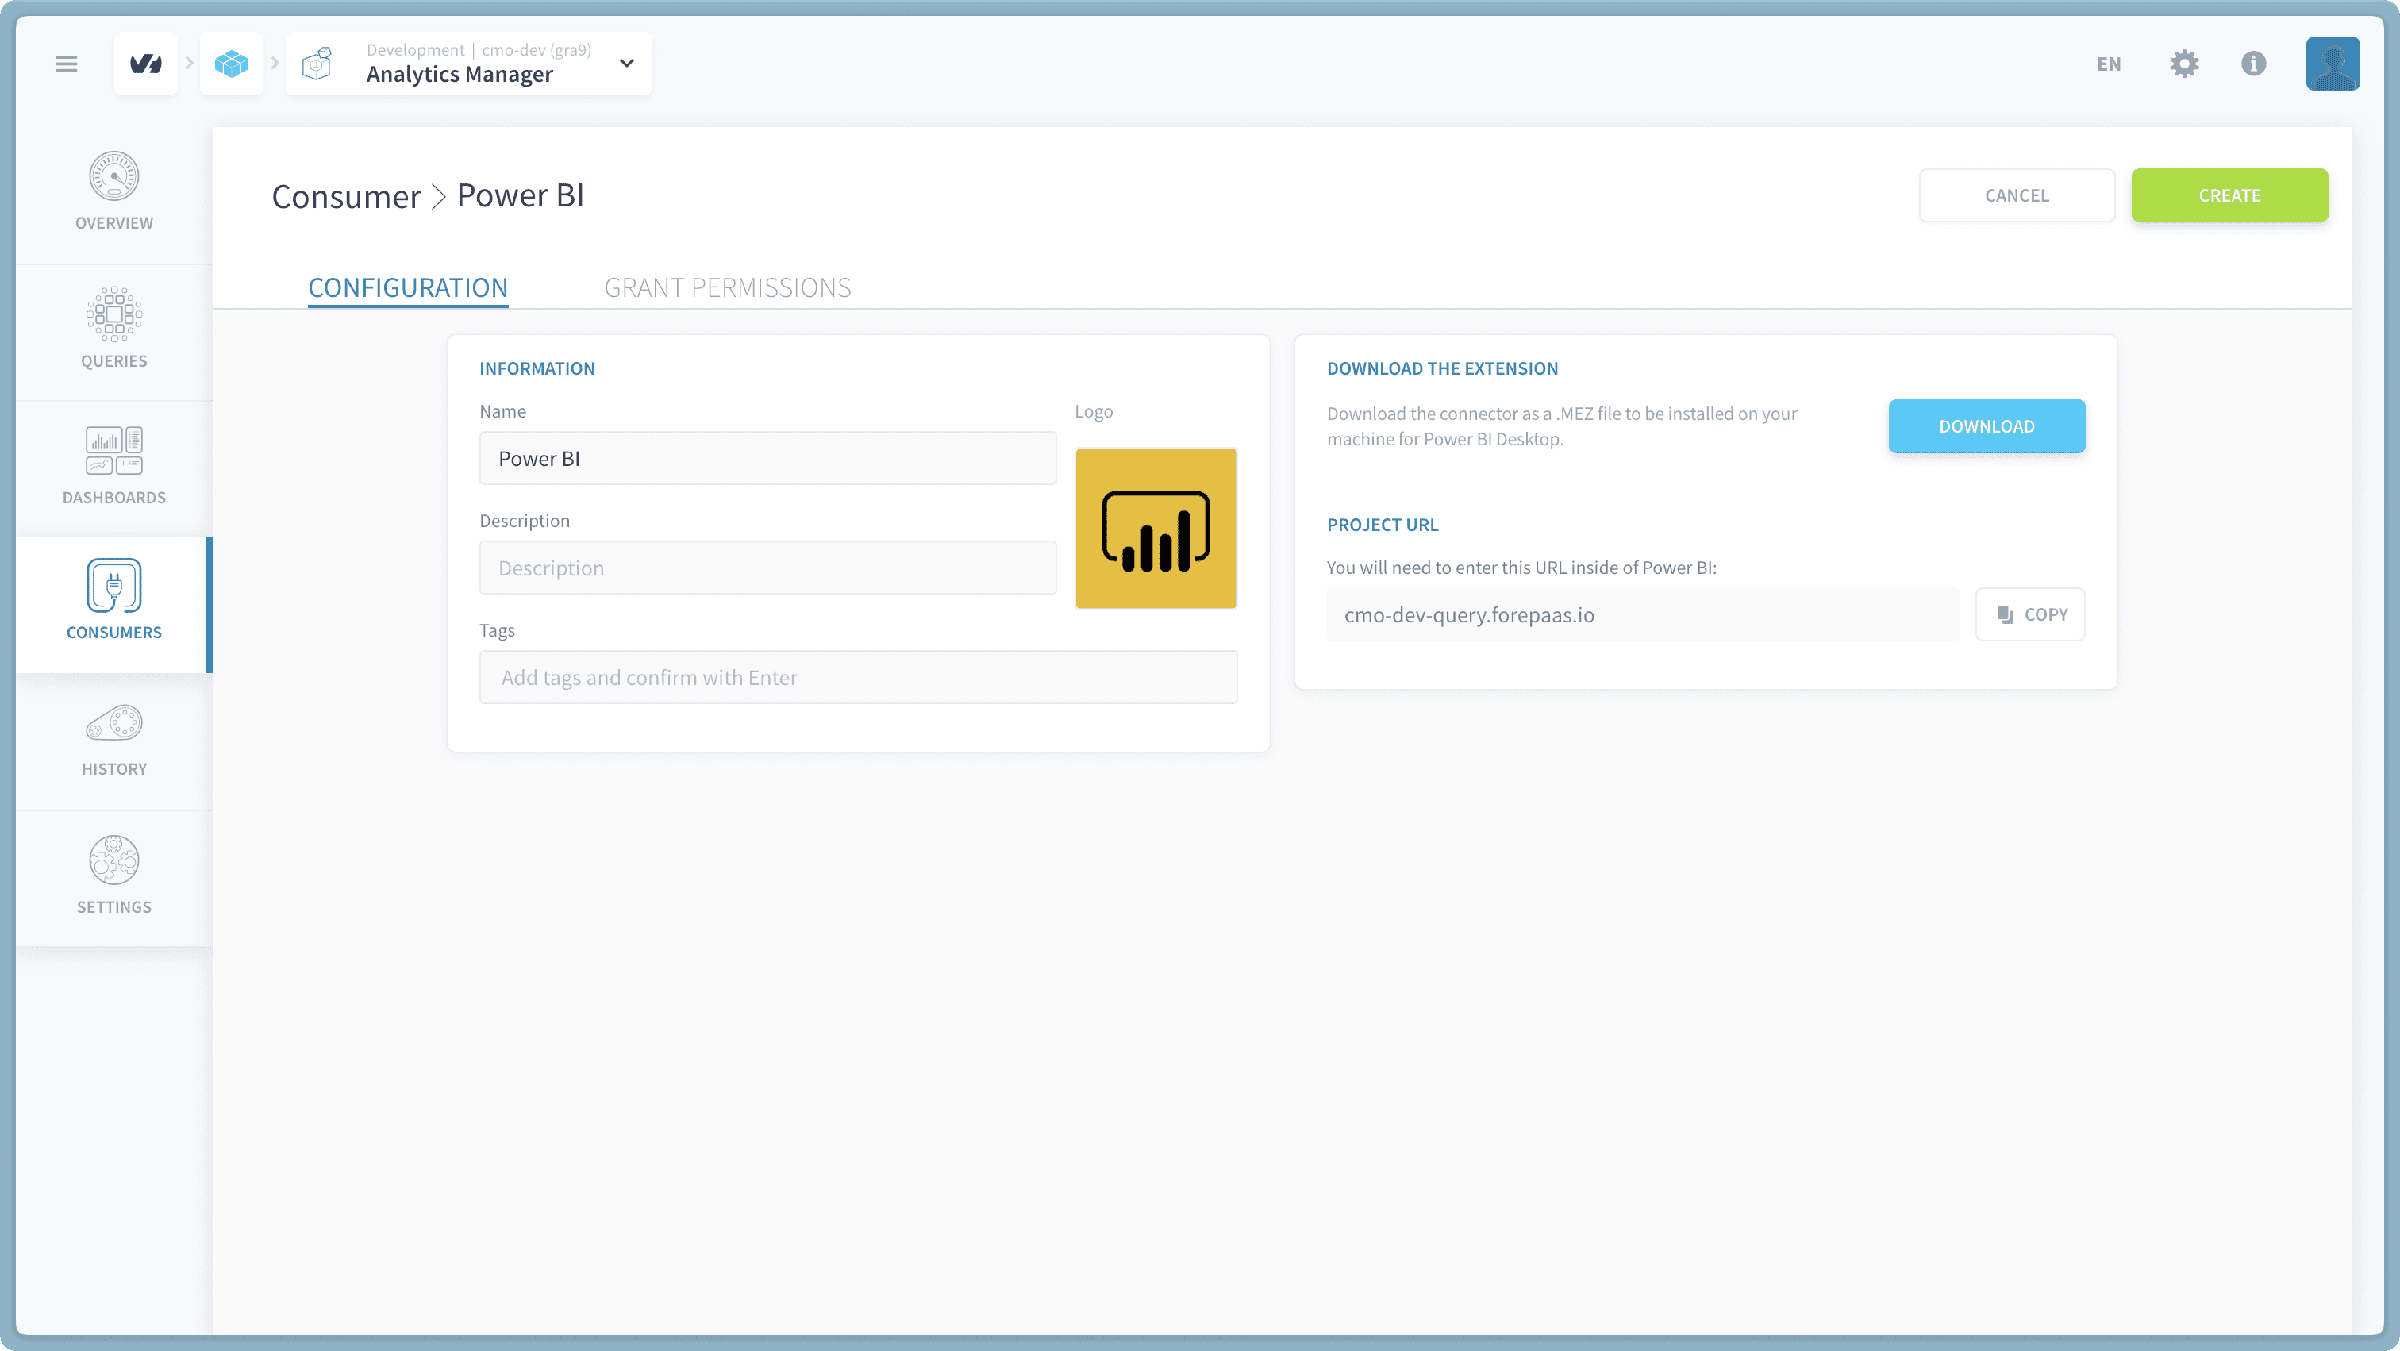
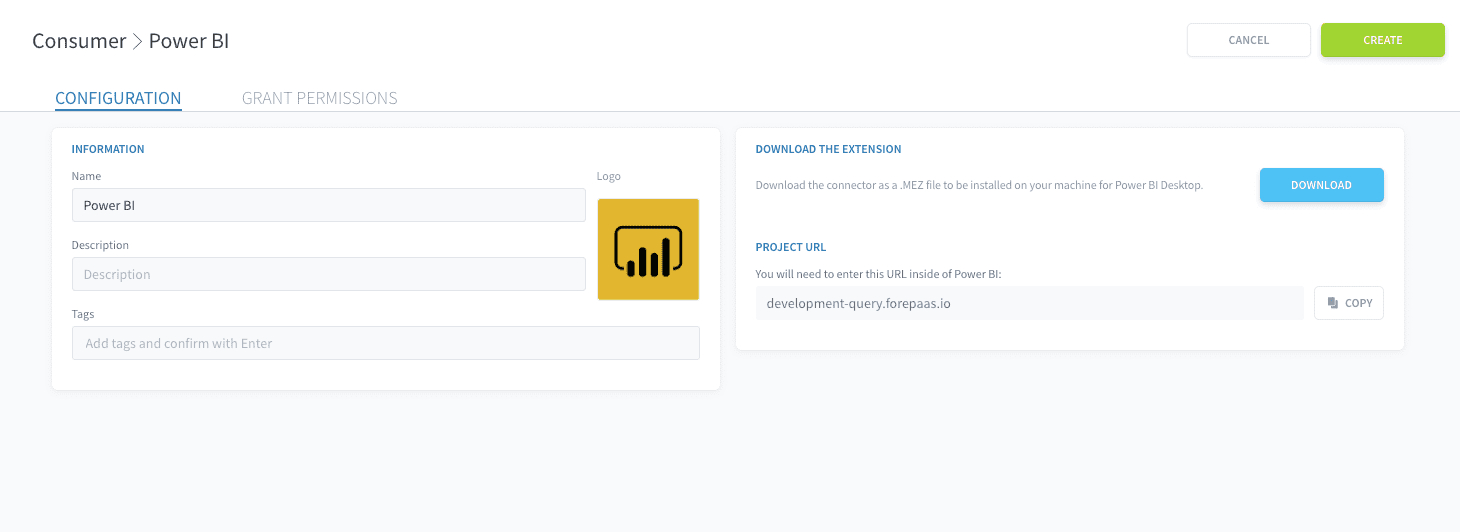
Since the Trino connector for Power BI is an open sourced project and not yet certified by Microsoft, you have to download the extension, either manually from this link or from the interface shown below.
Power BI users will have to be registered in a Project's Identity Access Manager (IAM) in order to access its data. They will only access the data associated to their API Secret Key.
You can easily grant full access to a new Power BI user by assigning them the Analytics Consumer role. This is a default role that can be assigned to a group, user, or service account and provides the appropriate permissions to view data from an external consumer.
Alternatively, if you prefer to fine-tune permissions, you can go to your project's Identity Access Manager and grant the user the following specific permissions:
- Data Manager | Source | Read and Data Manager | Table | Read: to import a table's data inside Power BI
- Advanced Data Access Control | Read: to access the data inside the project
Any user who has the role of Admin will also have access to the Project's data
Configuration on Power BI
Once you have downloaded the connector .MEZ file, follow this procedure to use it on Power BI Desktop.
Allow your Power BI Desktop to use a custom connector
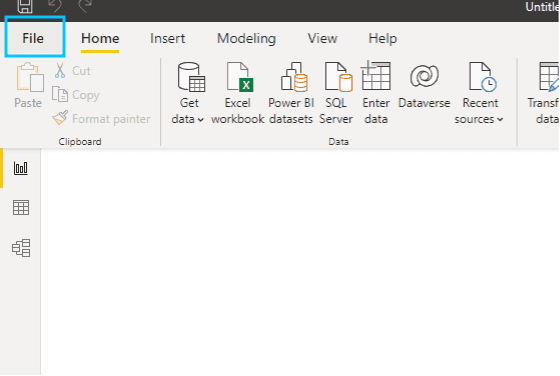
Open Power BI Desktop. Click on File in the header.
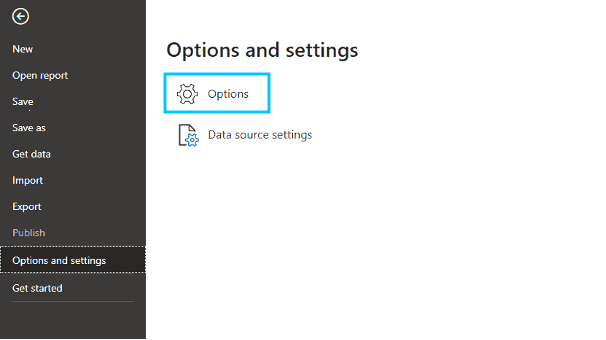
Open the Options and settings section, then select Options.
Find the Global > Security section, then activate the following option: (Not Recommended) Allow any extension to load without validation or warning.
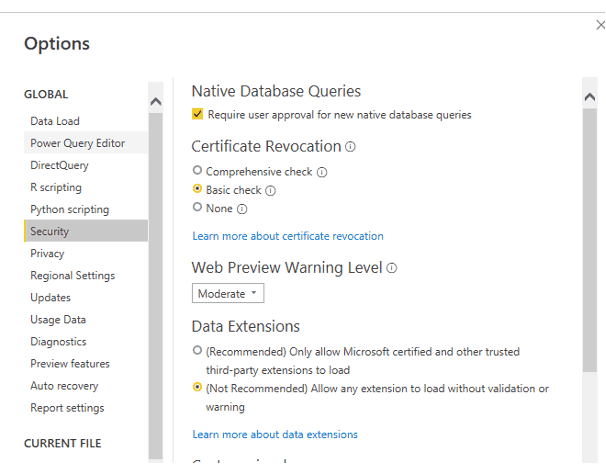
This will allow you to get data from a source not yet certified by Microsoft, in this case the Trino Connector.
Now, close Power BI Desktop for the changes to be applied.
Install the connector
Create this folder in your user directory:
If the Microsoft Power BI Desktop\Custom Connectors folders already exists, then you don't have to create it.
Make sure that the folders have exactly the same names as above, or you won't be able to find the Trino connector inside Power BI Desktop.
Copy the connector .MEZ file that you have previously downloaded into this new directory.
You can now restart Power BI Desktop.
Import your first data from Data Platform
Click on Get Data.
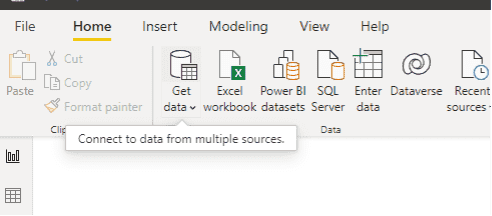
Search for Trino, and select the connector.

You now have to enter the URL of the Data Platform Project you want to connect to. You can easily find this URL on the page of the consumer on the Data Platform project. The port is 443.
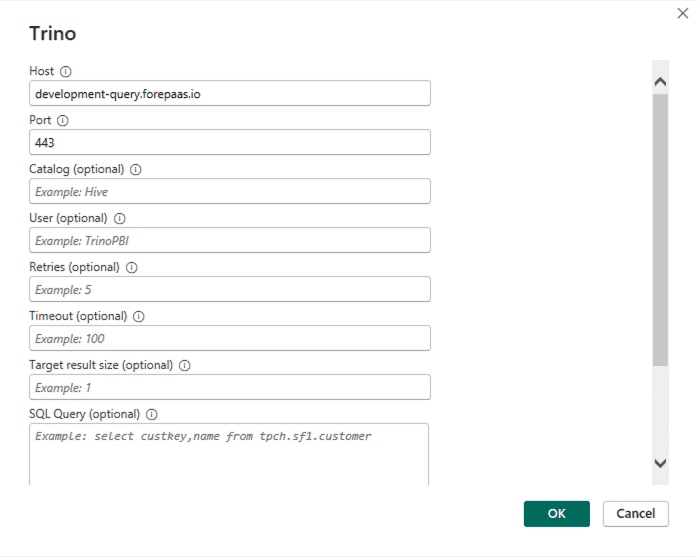
If you are not yet authenticated to this Project, you will be asked to authenticate at this step.
Choose the Basic mode and use API key for User name and Secret key for Password as configured to your Service-Account/User in IAM.
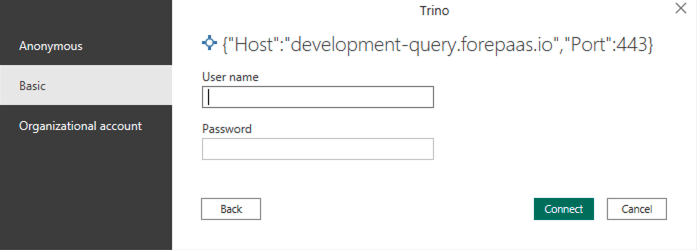
When you are successfully authenticated, press connect to continue.
Then you will see your datasets, schemas and tables in preview mode.
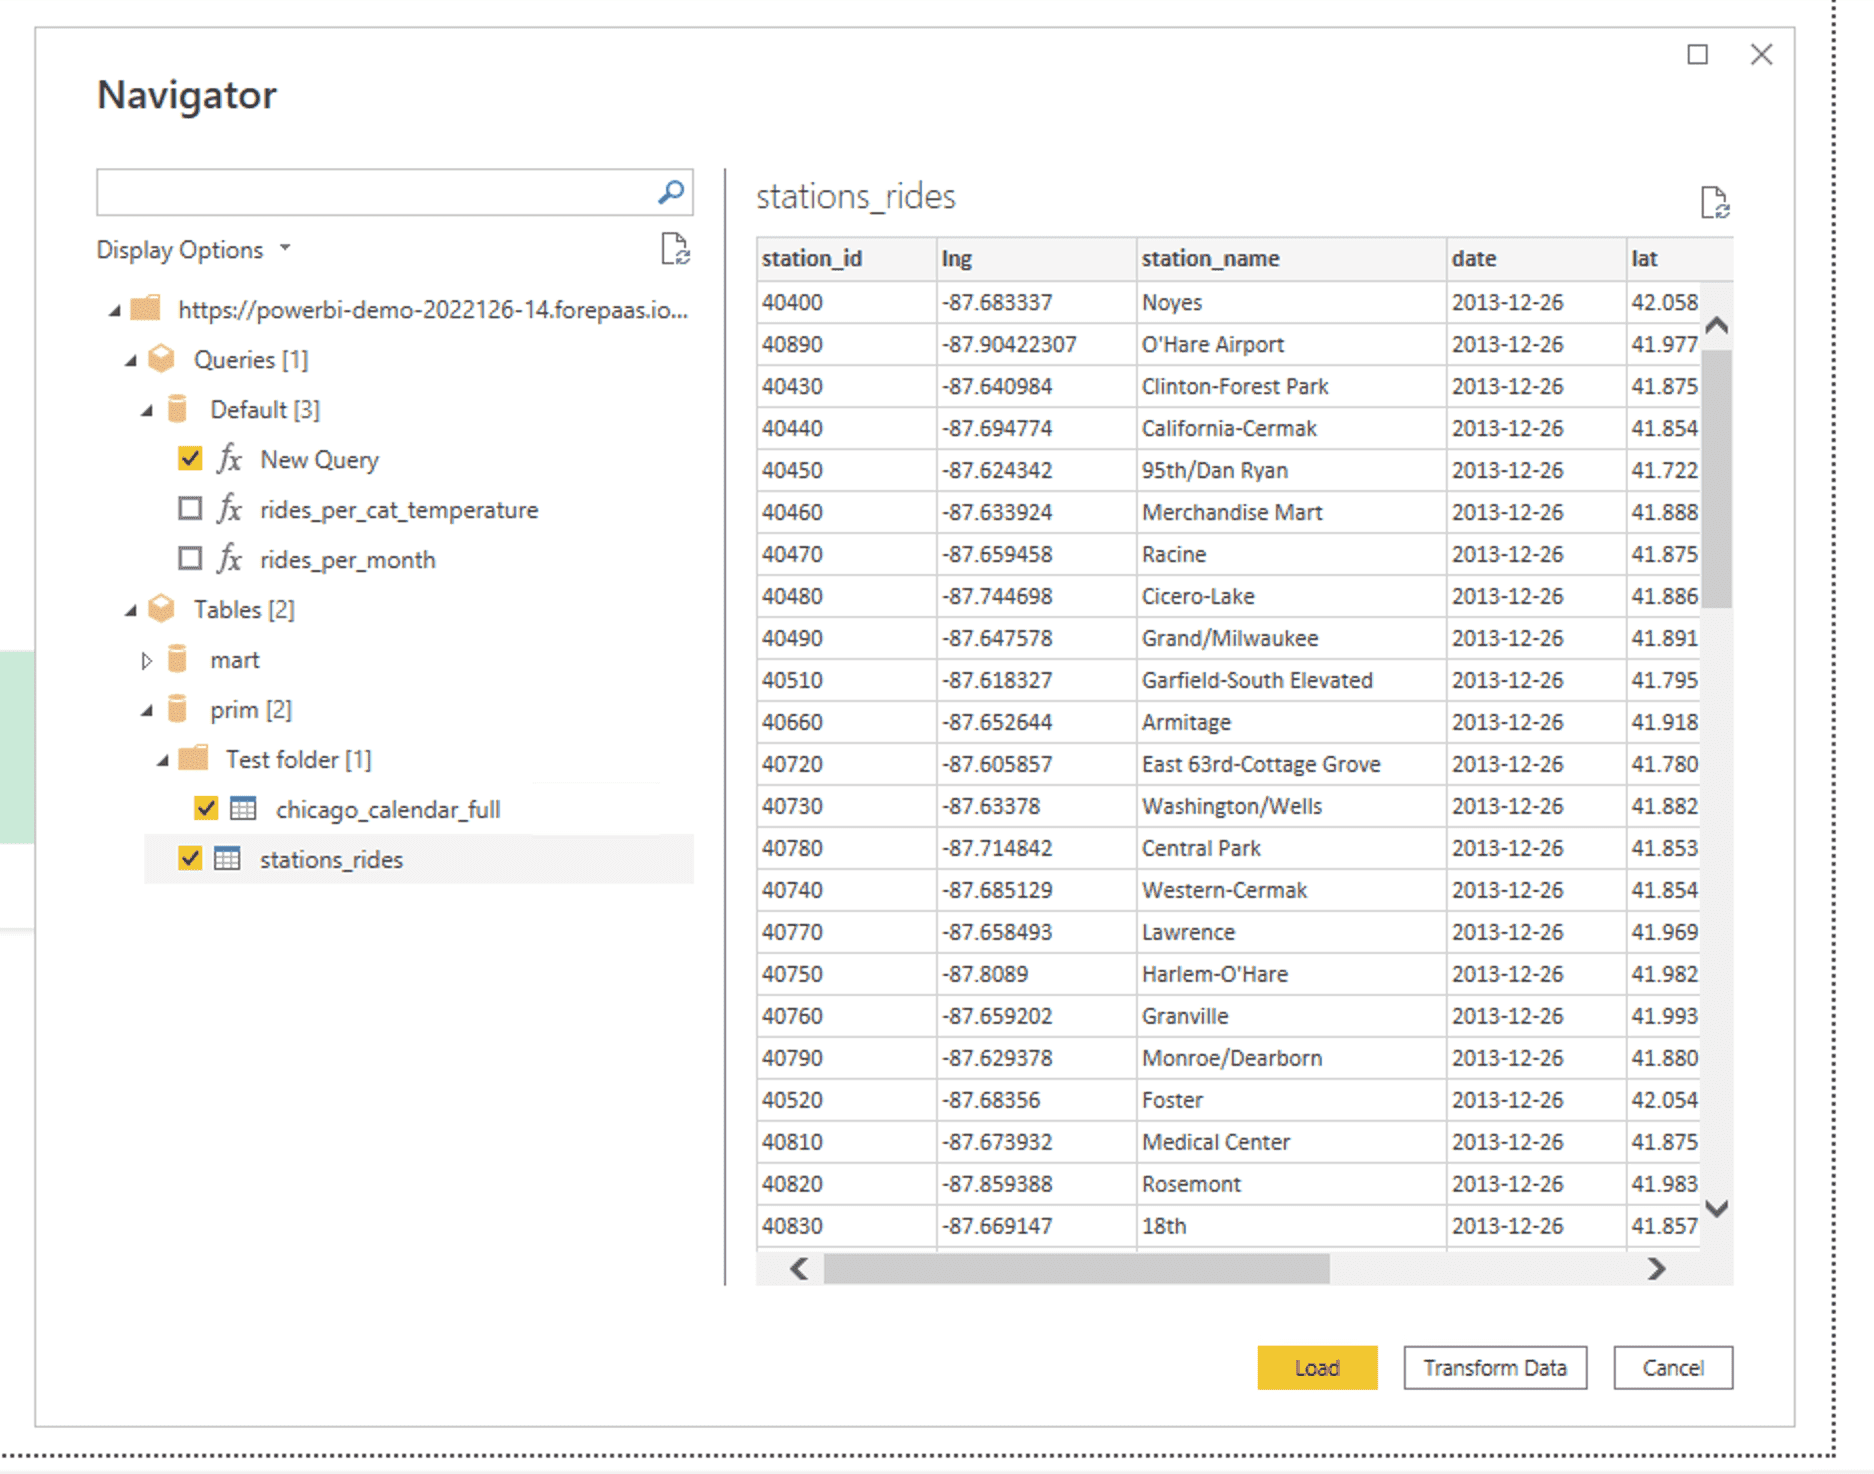
You can now create your first visualizations on your data from your Data Platform project using Power BI Desktop.
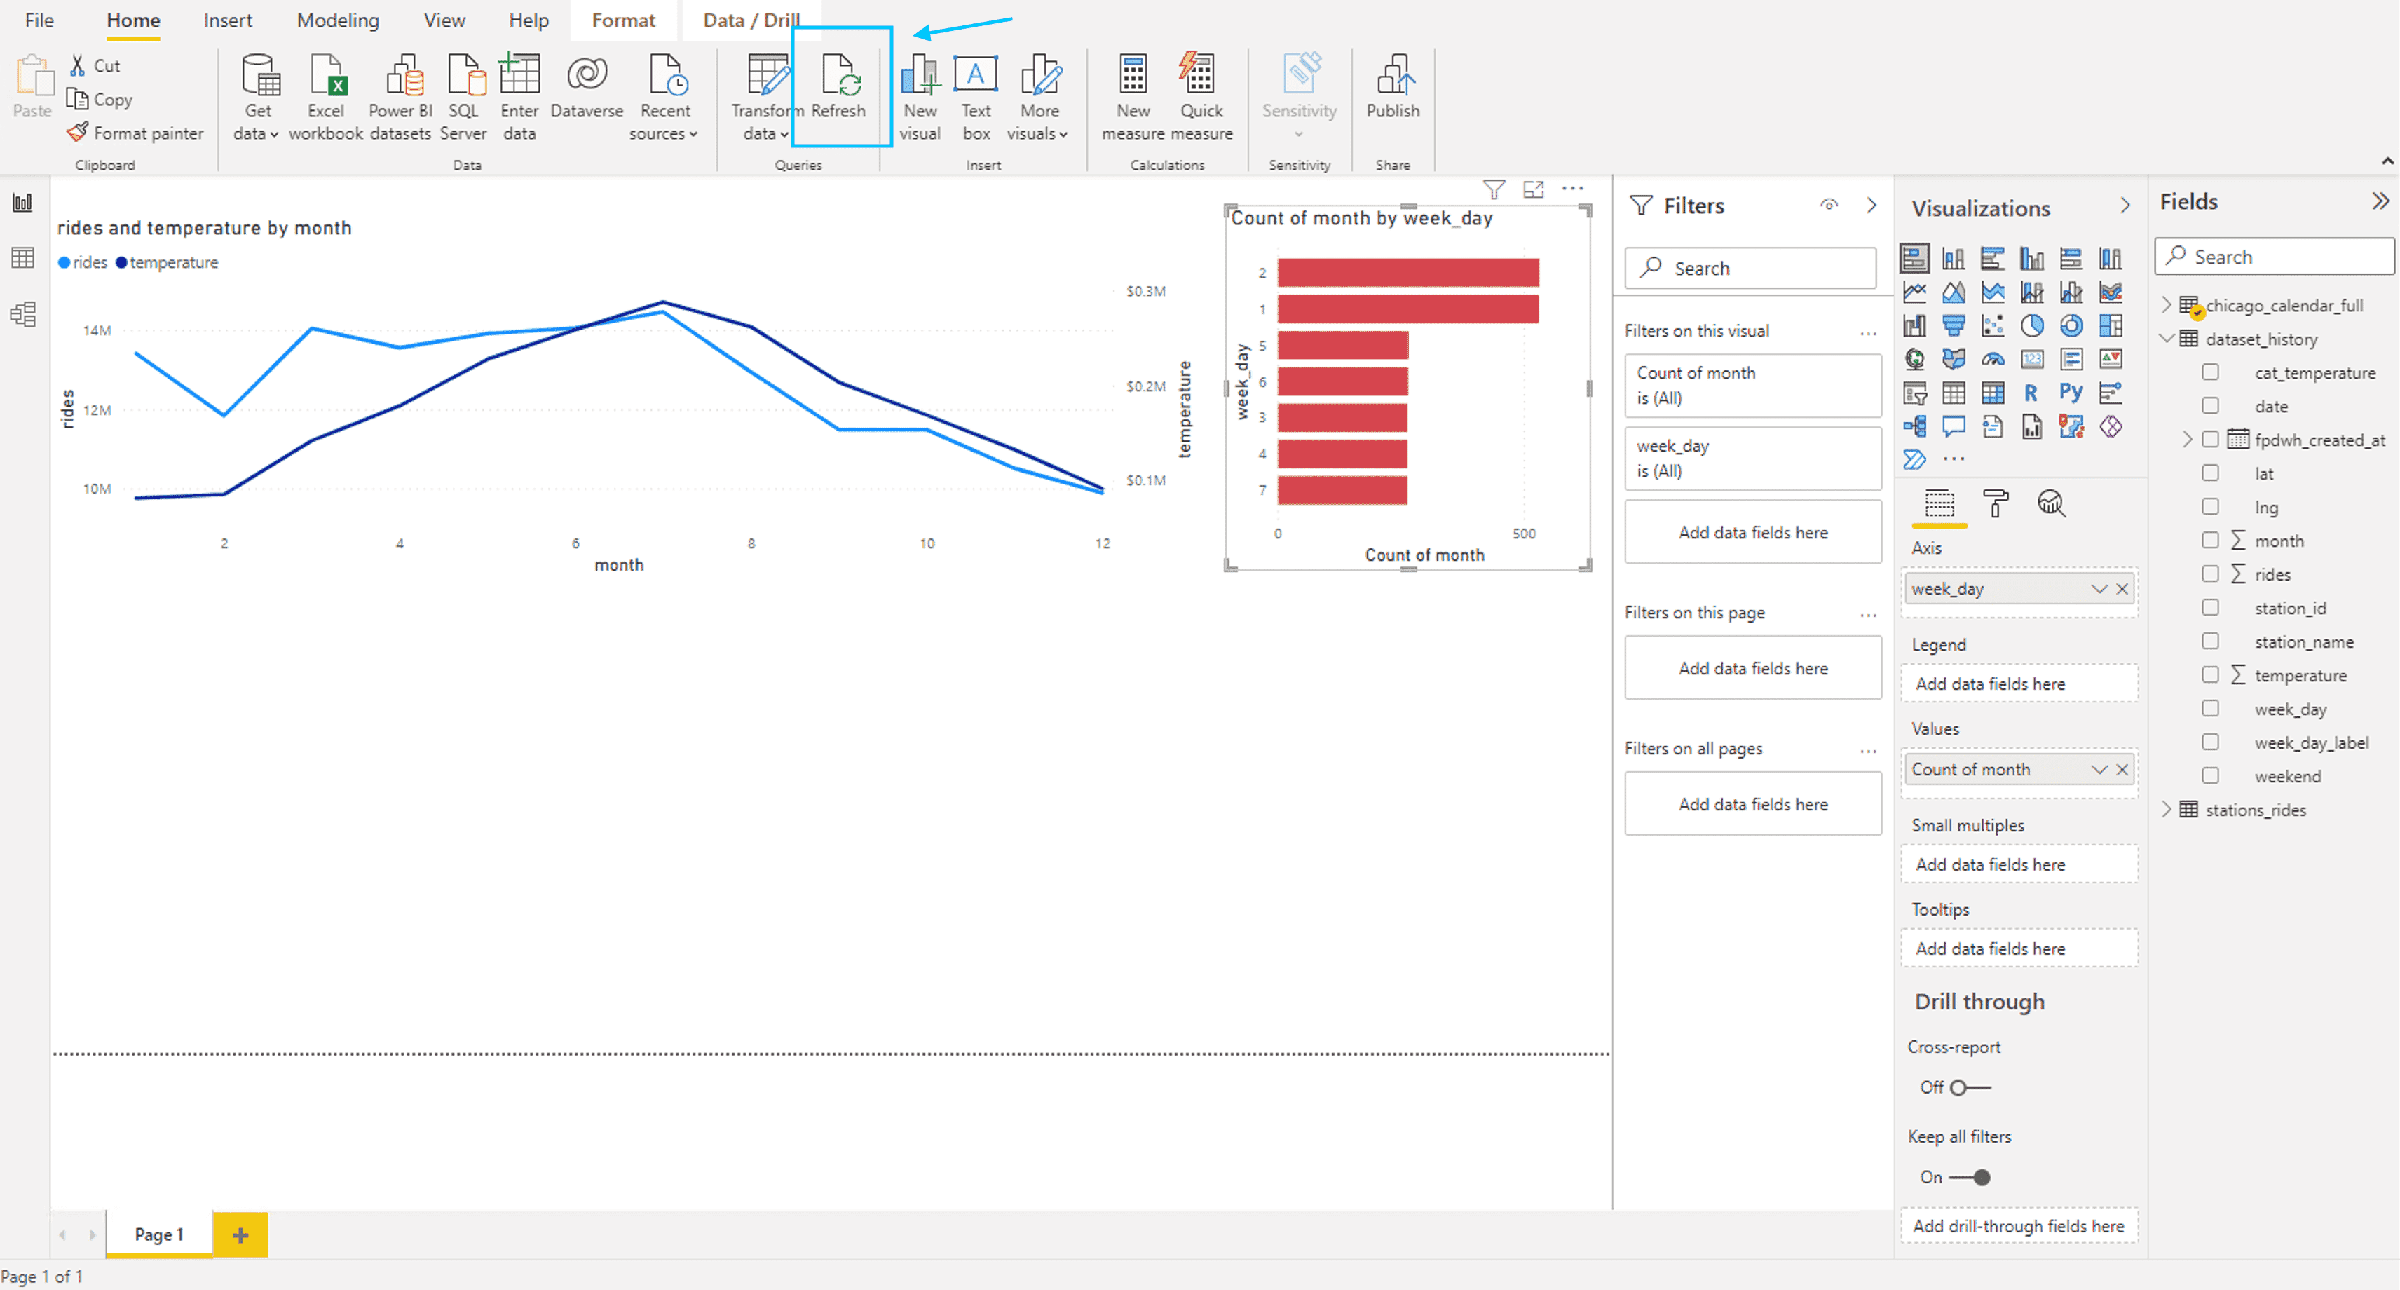
If the data is updated on Data Platform, graphs can be manually refreshed with the latest data by pressing the refresh button in the Power BI header.
Go further
If you need training or technical assistance to implement our solutions, contact your sales representative or click on this link to get a quote and ask our Professional Services experts for a custom analysis of your project.
Ask questions, give your feedback and interact directly with the team building the Data Platform on the dedicated Discord channel.
If you need support with your OVHcloud services, create a request in our Help Centre.
Join our community of users.