

Manage tables in the Lakehouse Manager
When you access the Tables tab, you will be in the Canvas view-mode, selected by default
Objective
Tables give you full control over your data lake / data warehouse (tables and attributes) by providing a visual and logical structure of tables within datasets on a single screen.
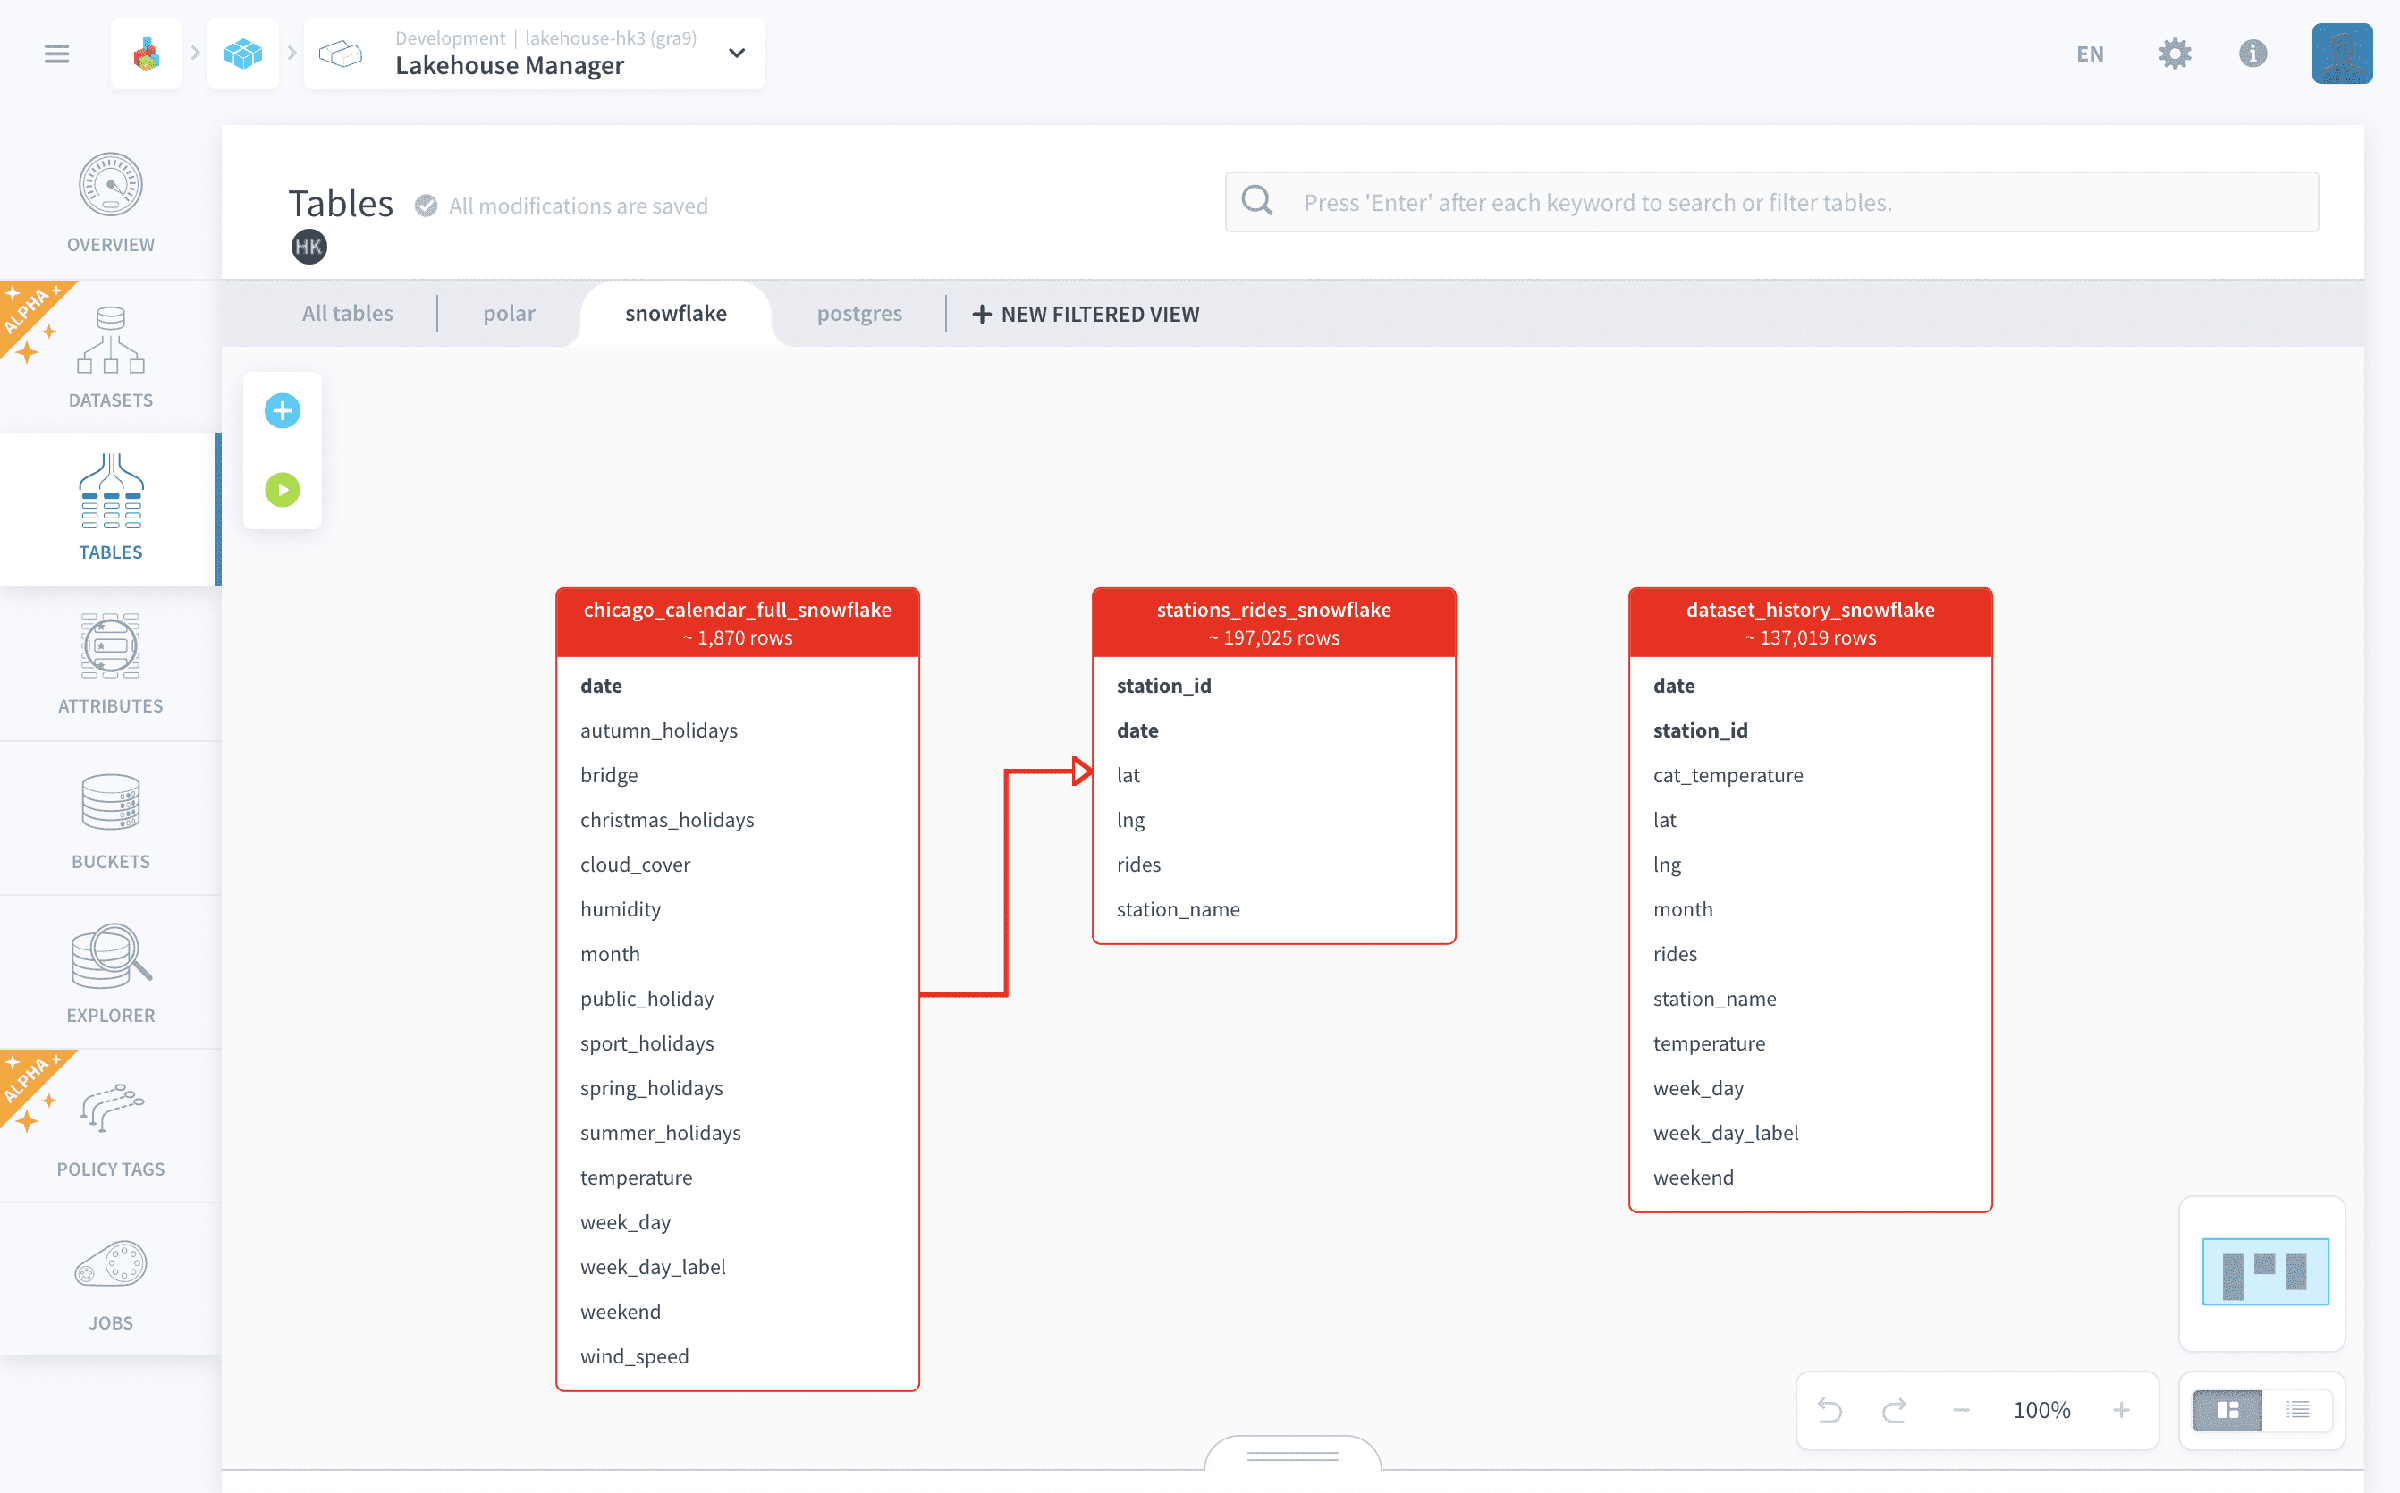
When you access the Tables tab, you will be in the Canvas view-mode, selected by default. This view-mode is designed to provide a visual depiction of your data. However, this representation can be overwhelming if there are too many tables. That is why we also provide the List view-mode.
Note that some features are only available on one of the view-modes. For instance, linking tables of external datasets is only doable in Canvas-view.
Create a table
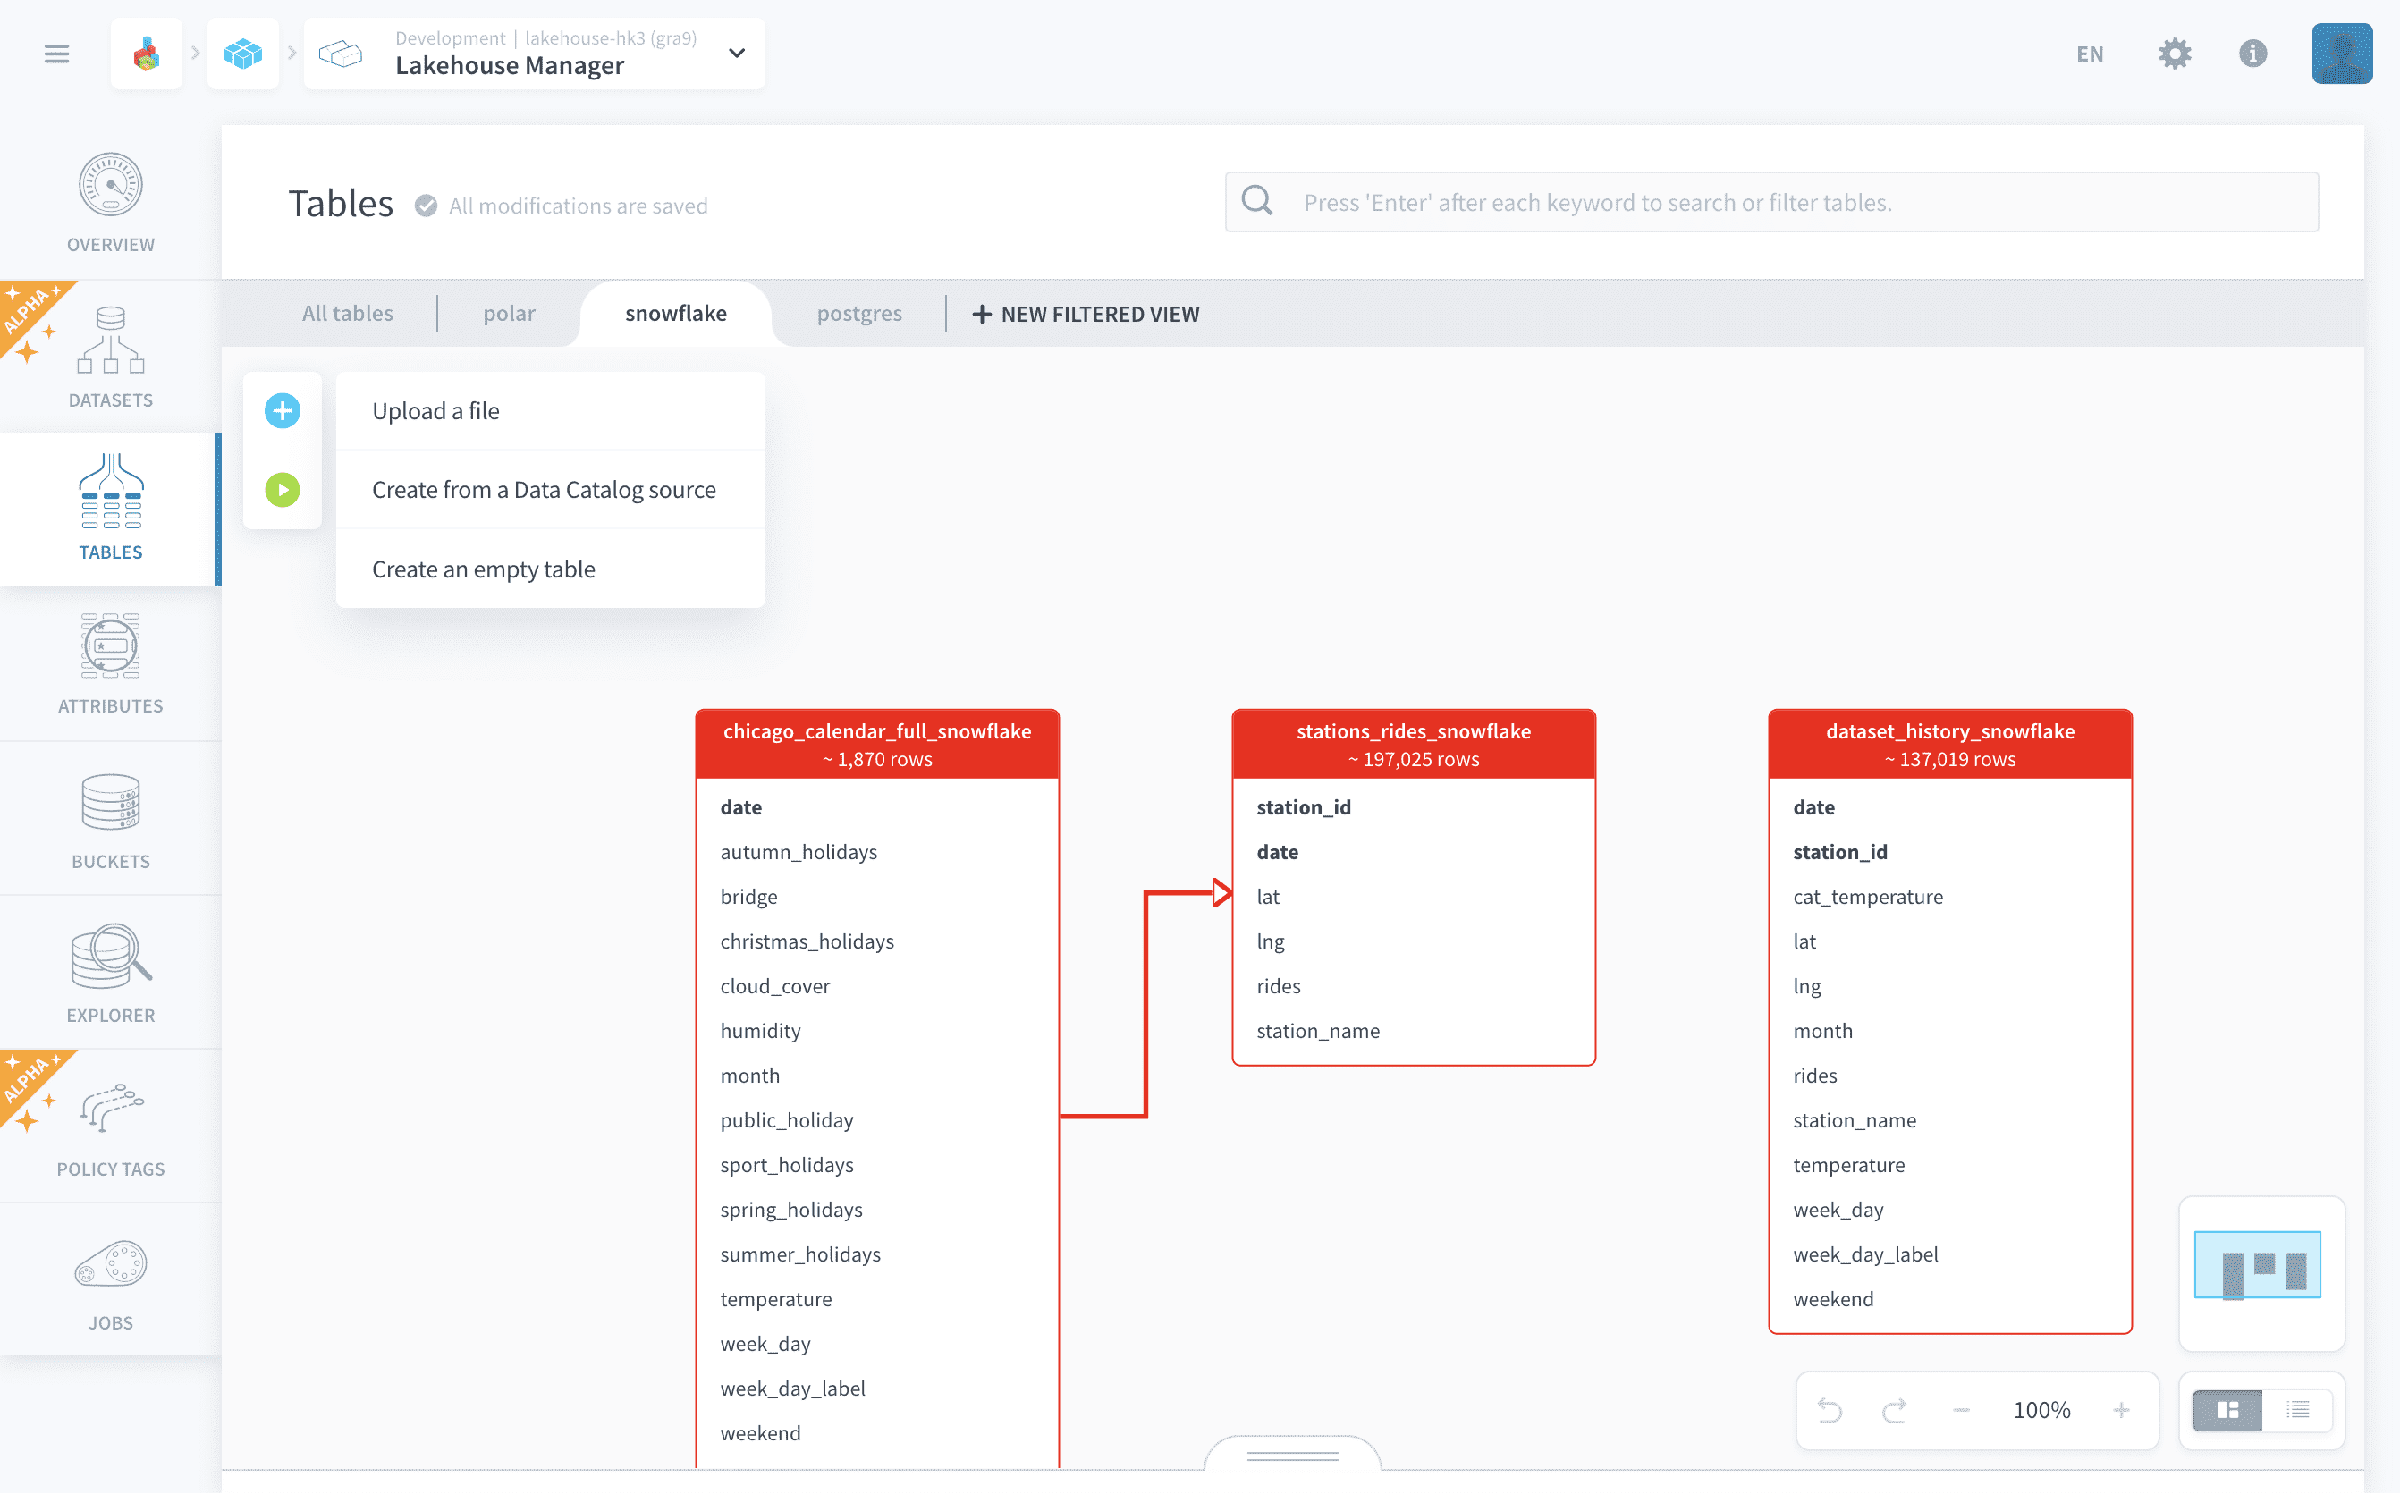
Hover over the + icon (or the New table button if you are in list mode) to see the options for creating a new table on the schema:
- Create a table by uploading a file
- Create a table from source
- Create an empty table
The getting started tutorial contains the step-by-step guide to creating a table from source and creating an empty table. Here, let's see the how create a table by uploading a file:
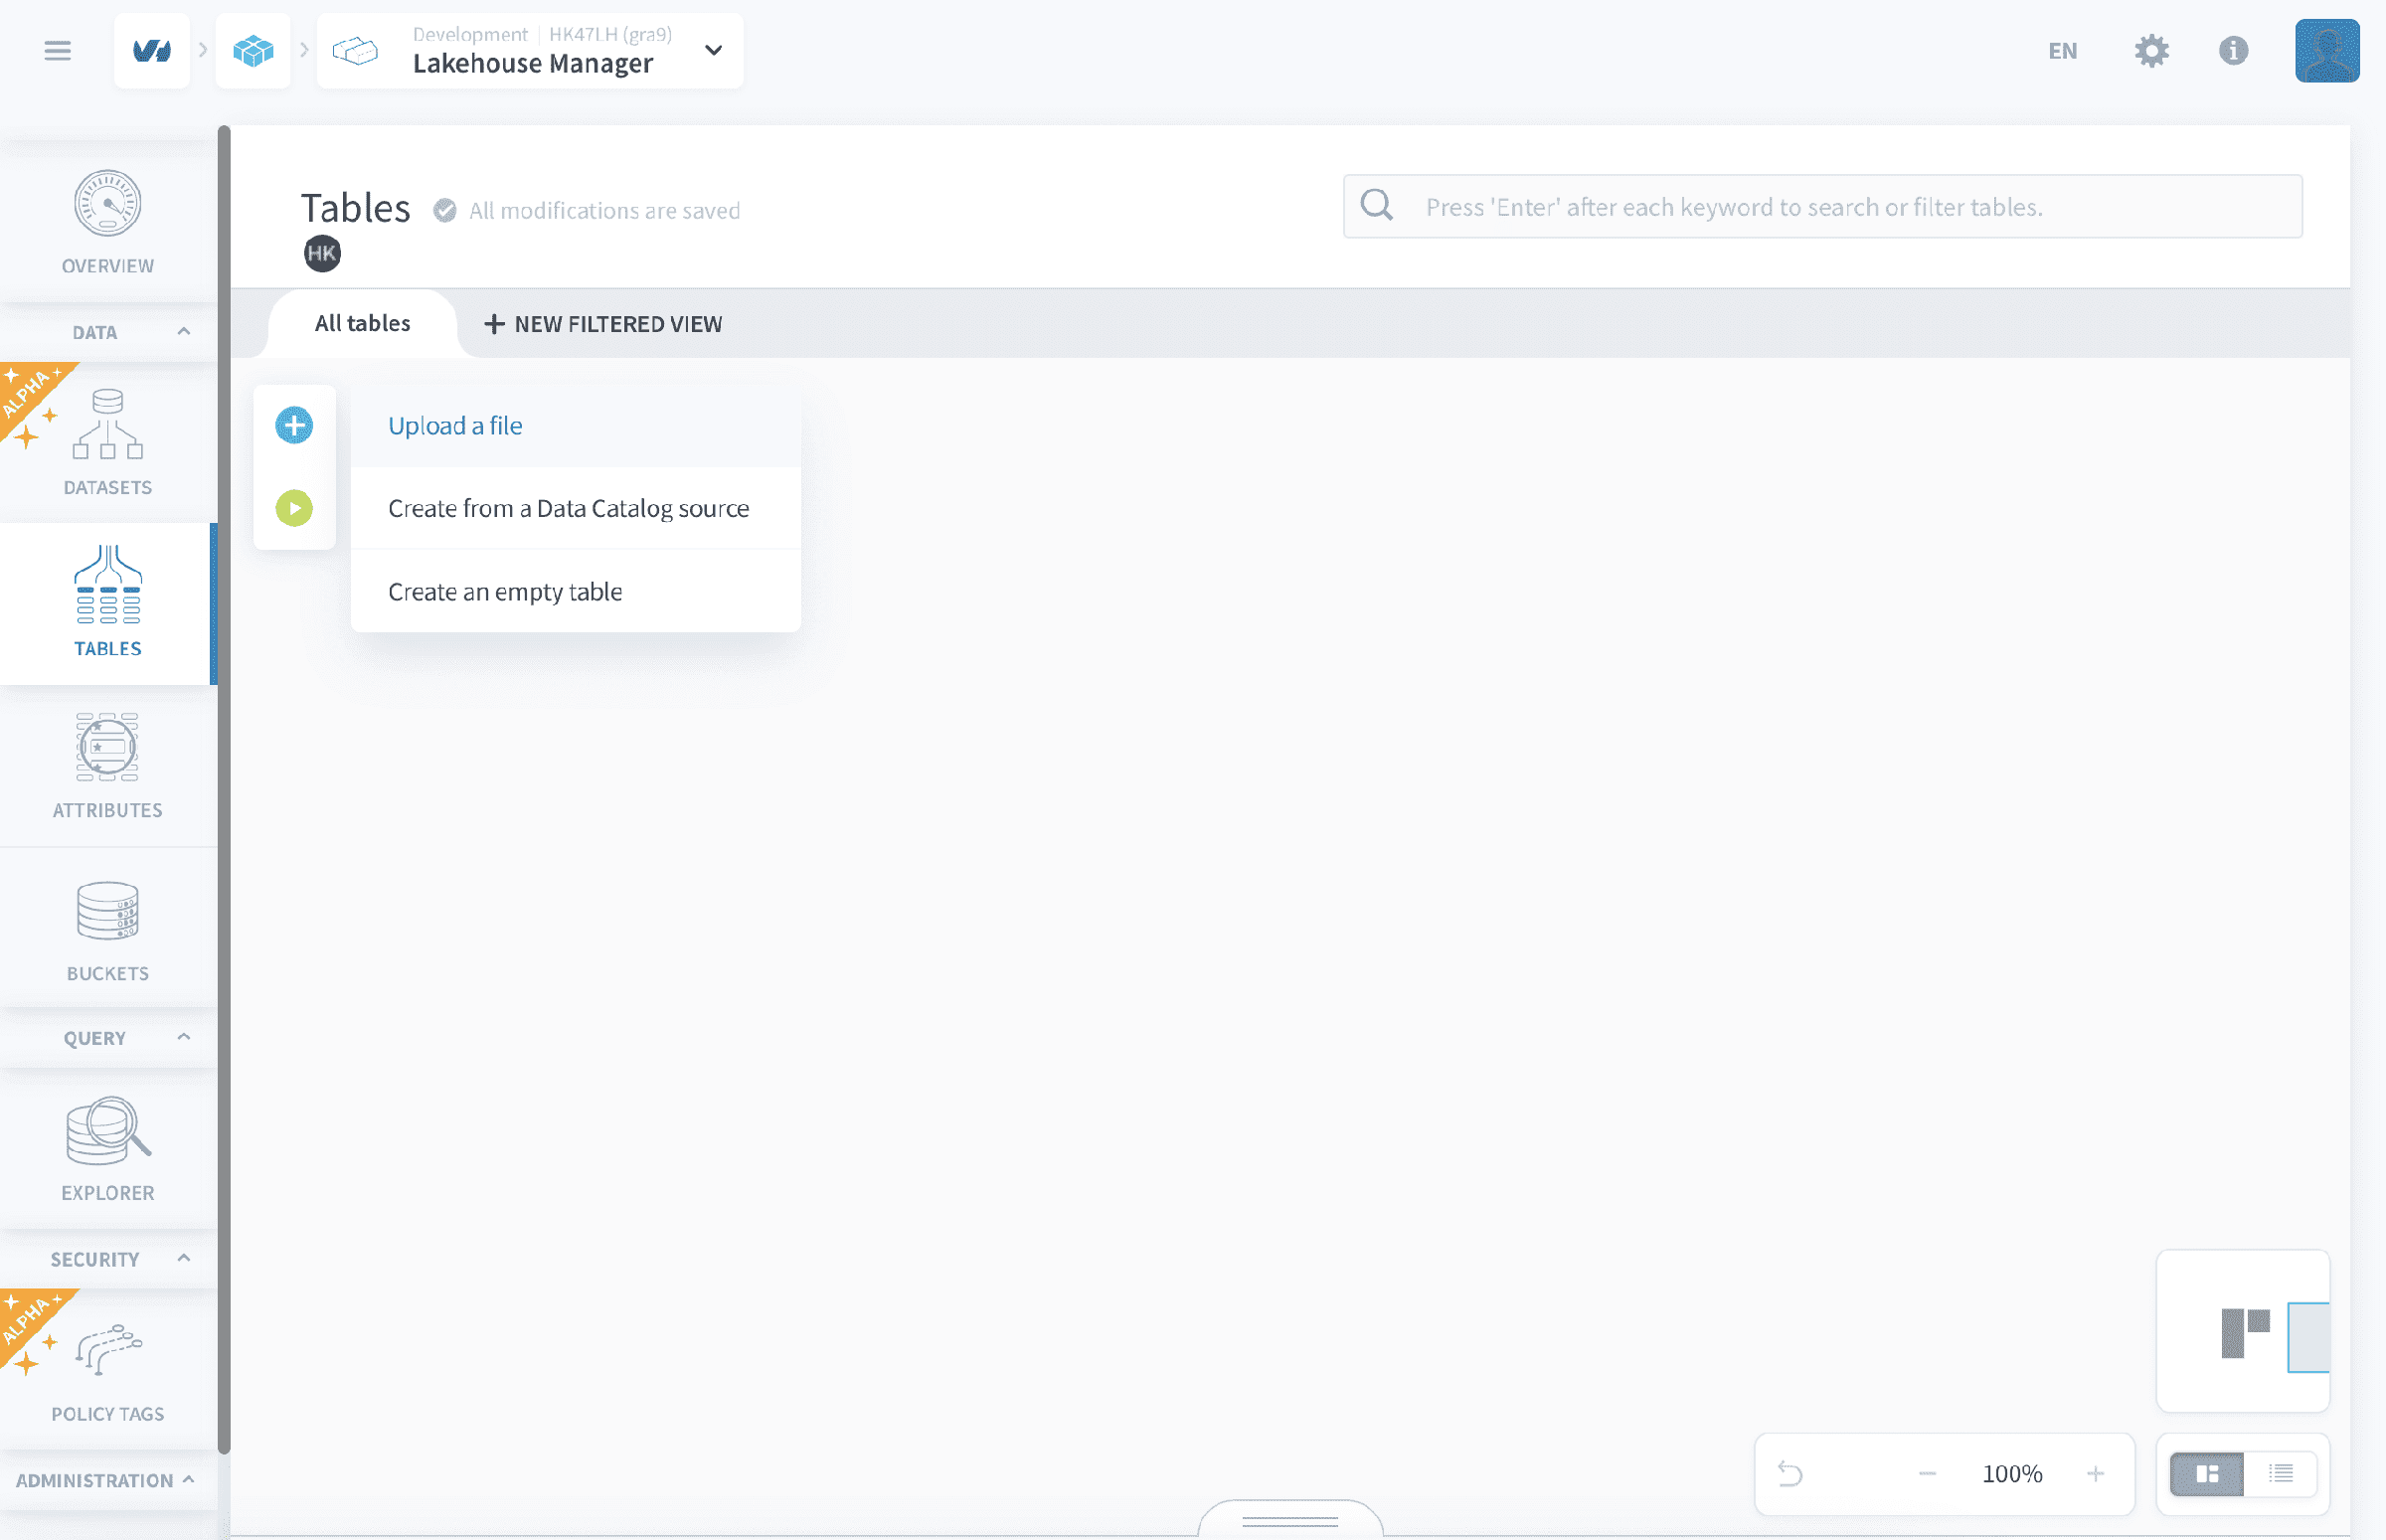
- Click on ➕ and select - Upload a file
- Upload the file using the options shown on the screen. (Currently support is present for CSV and XLSX files)
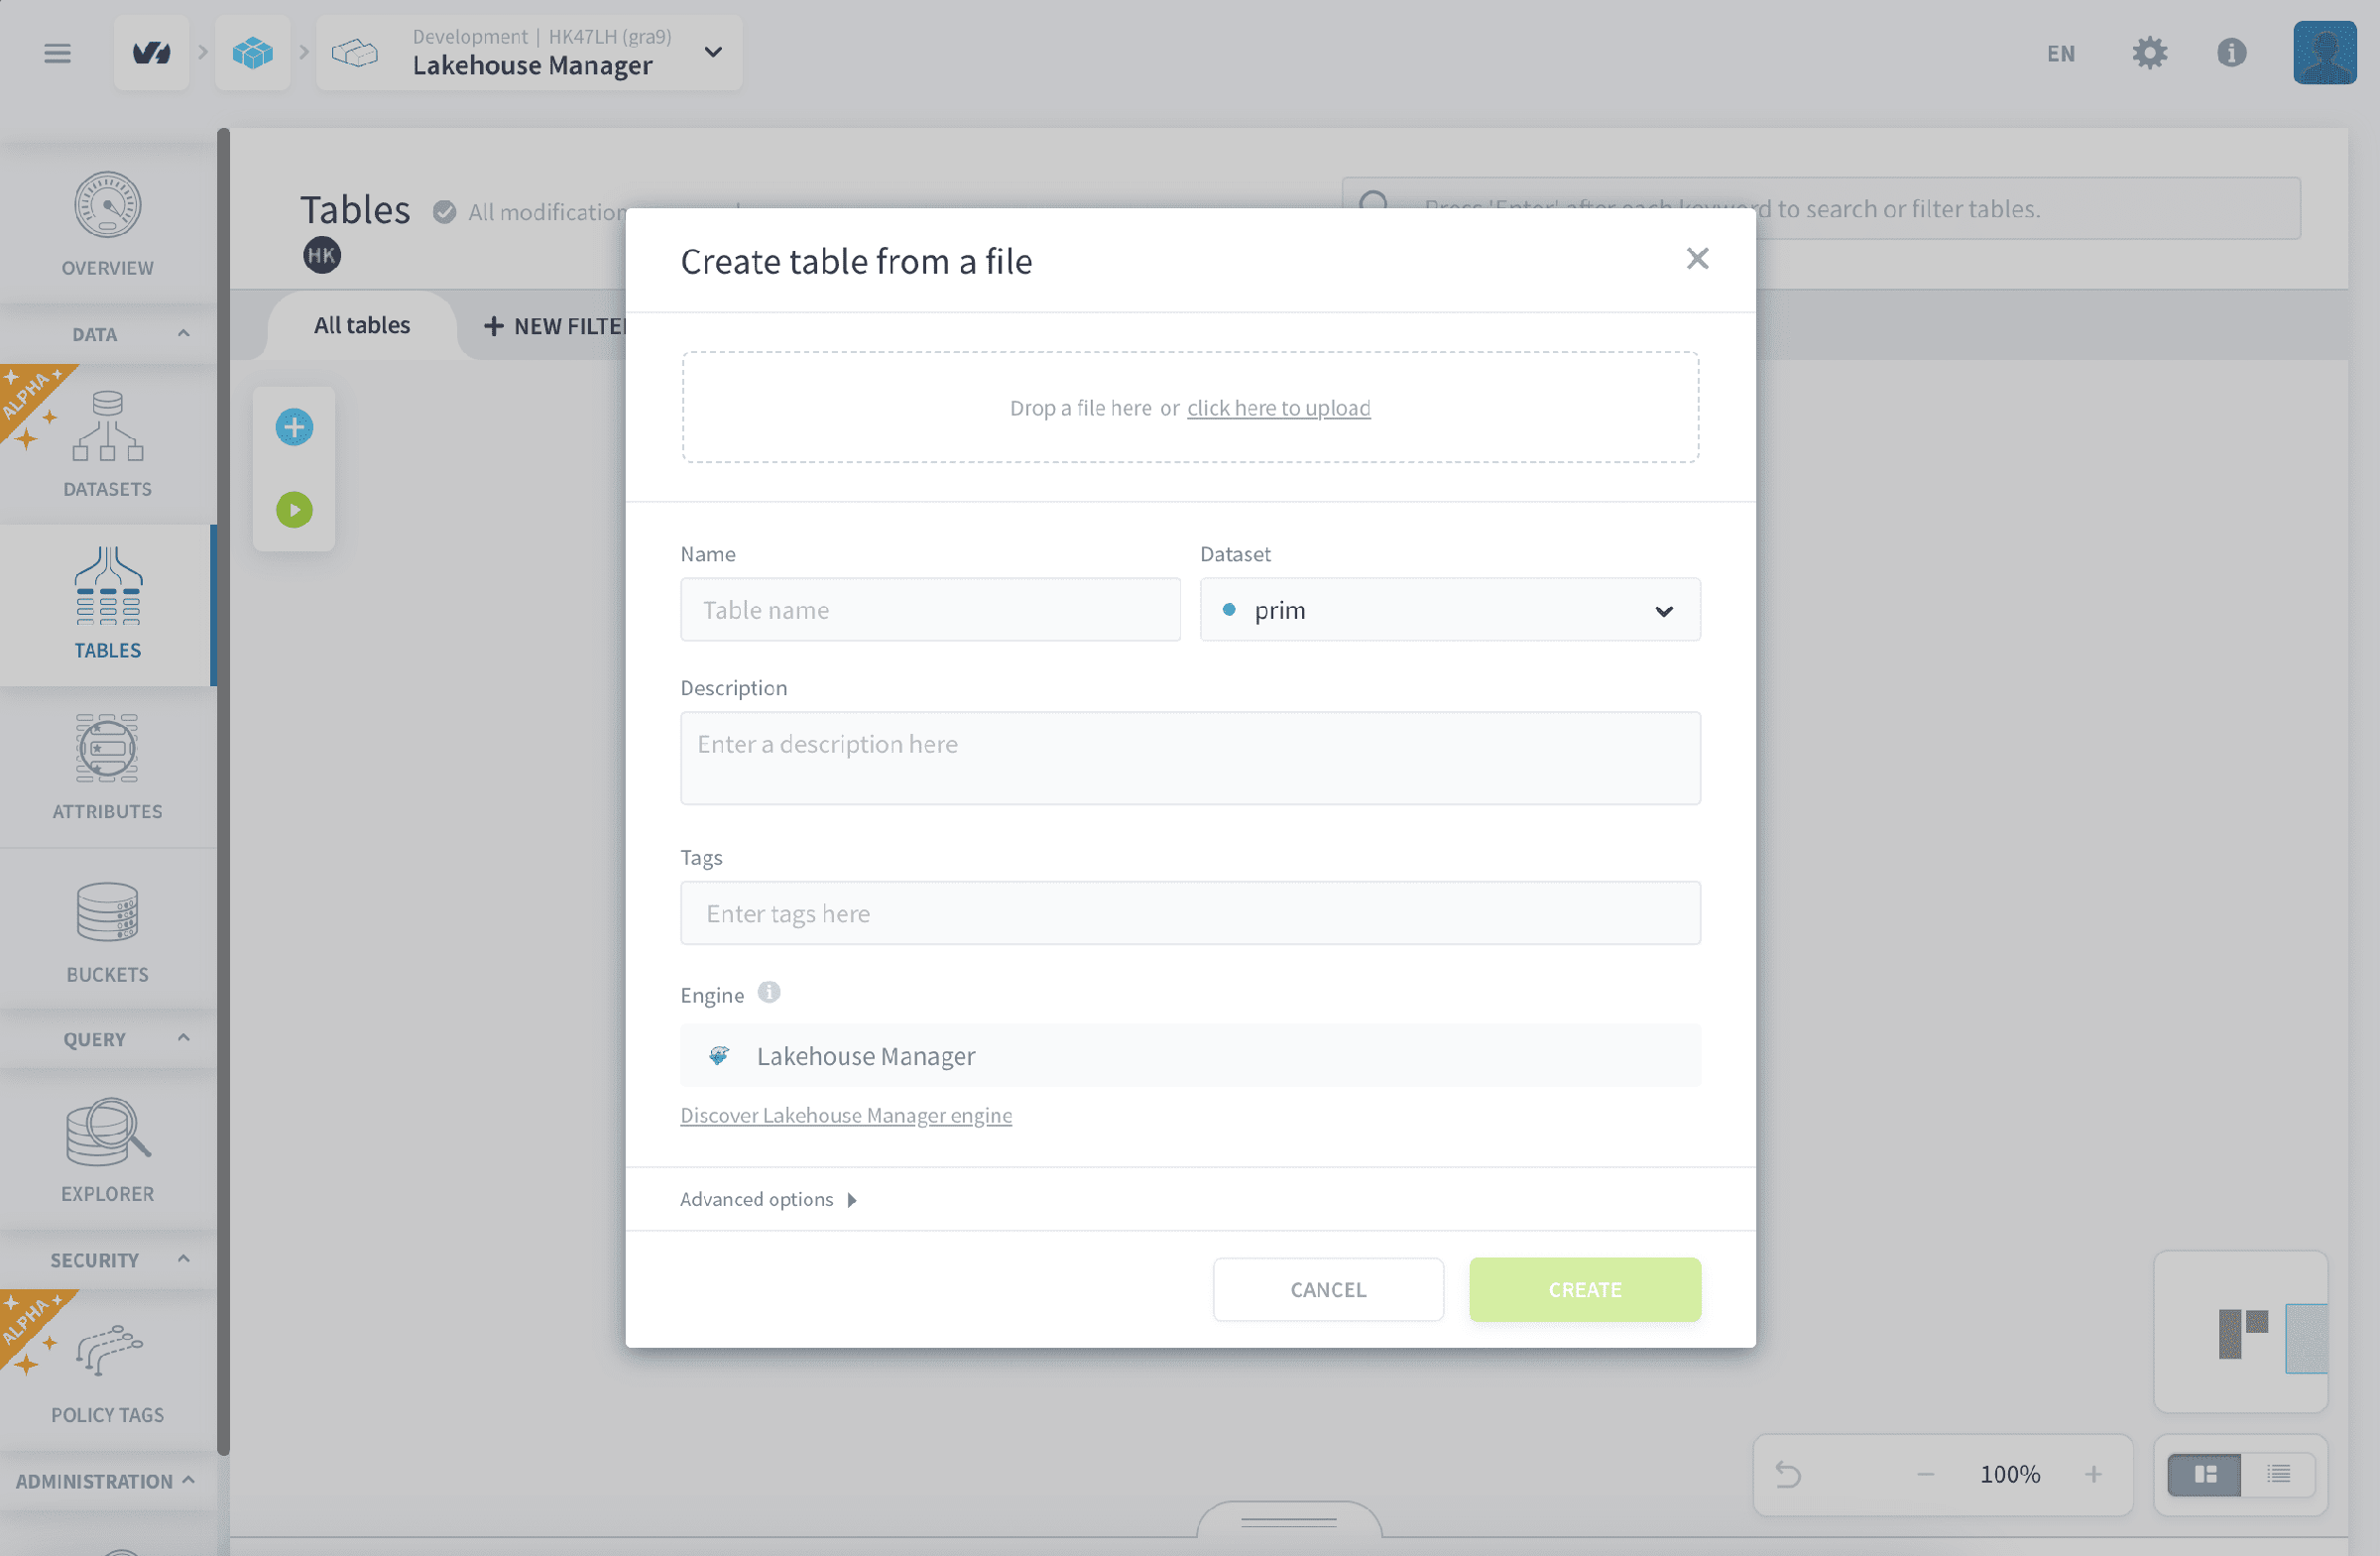
- Set the name and other parameters for the table and click and create.
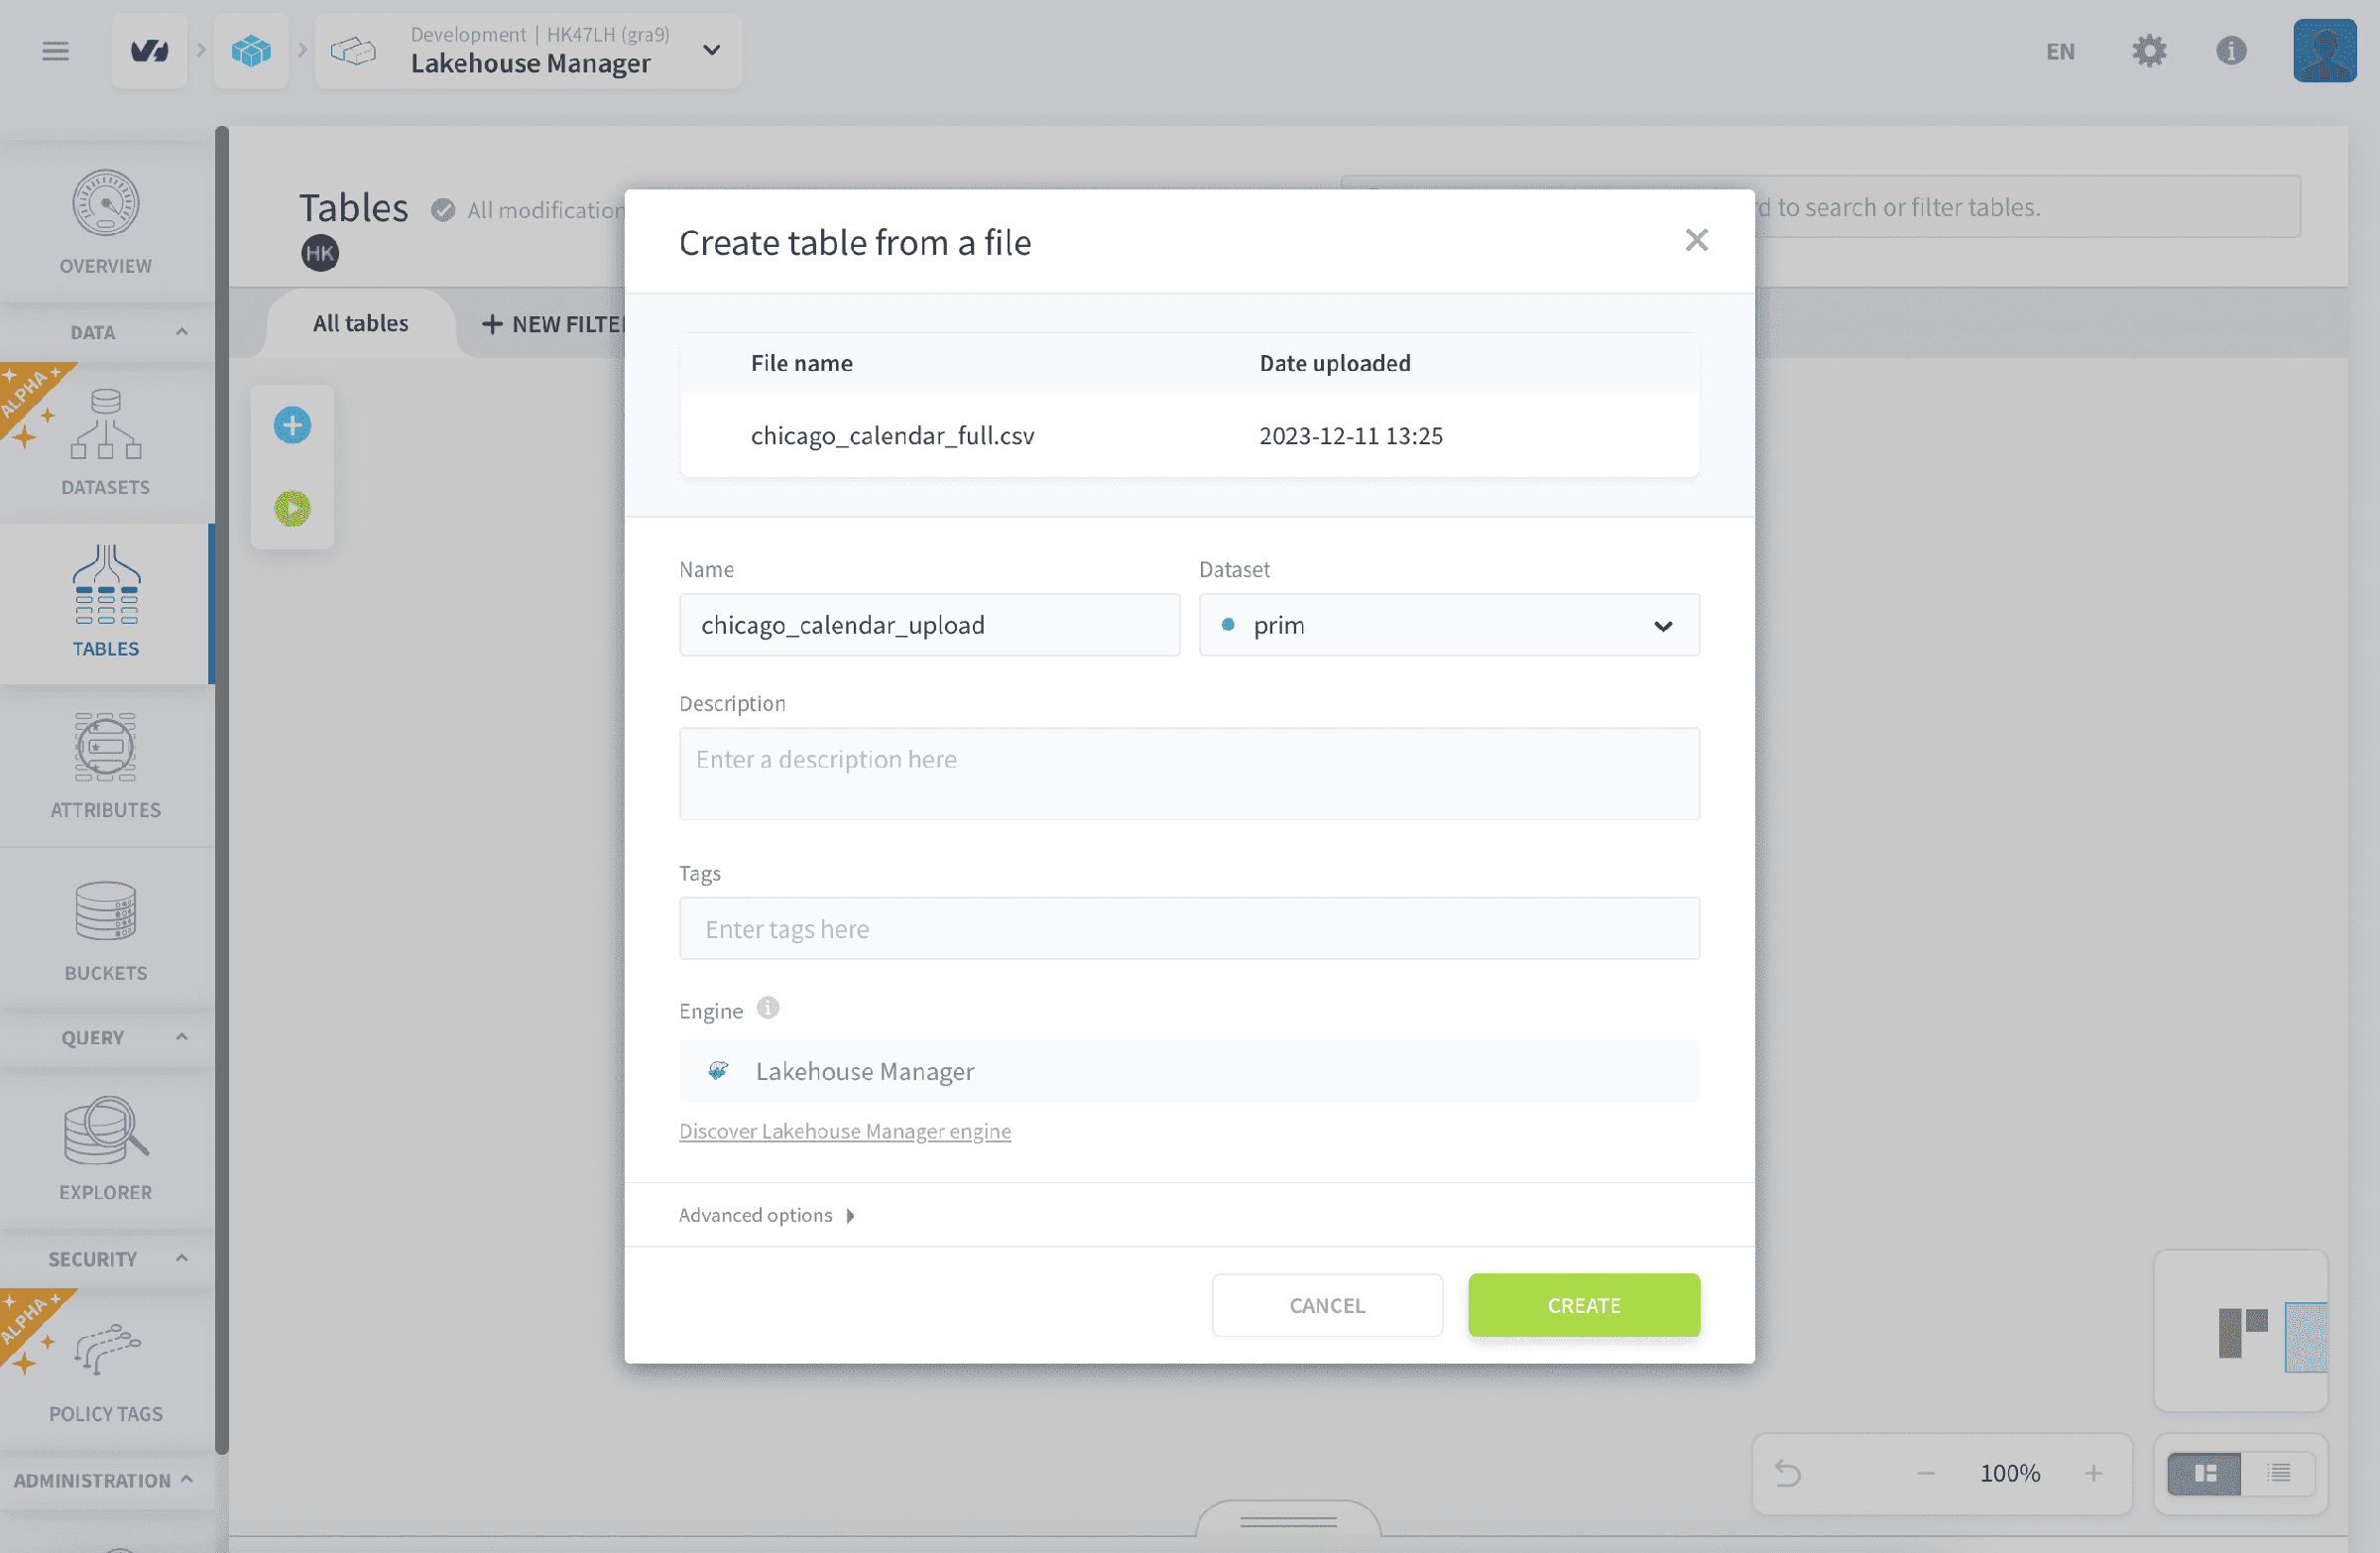
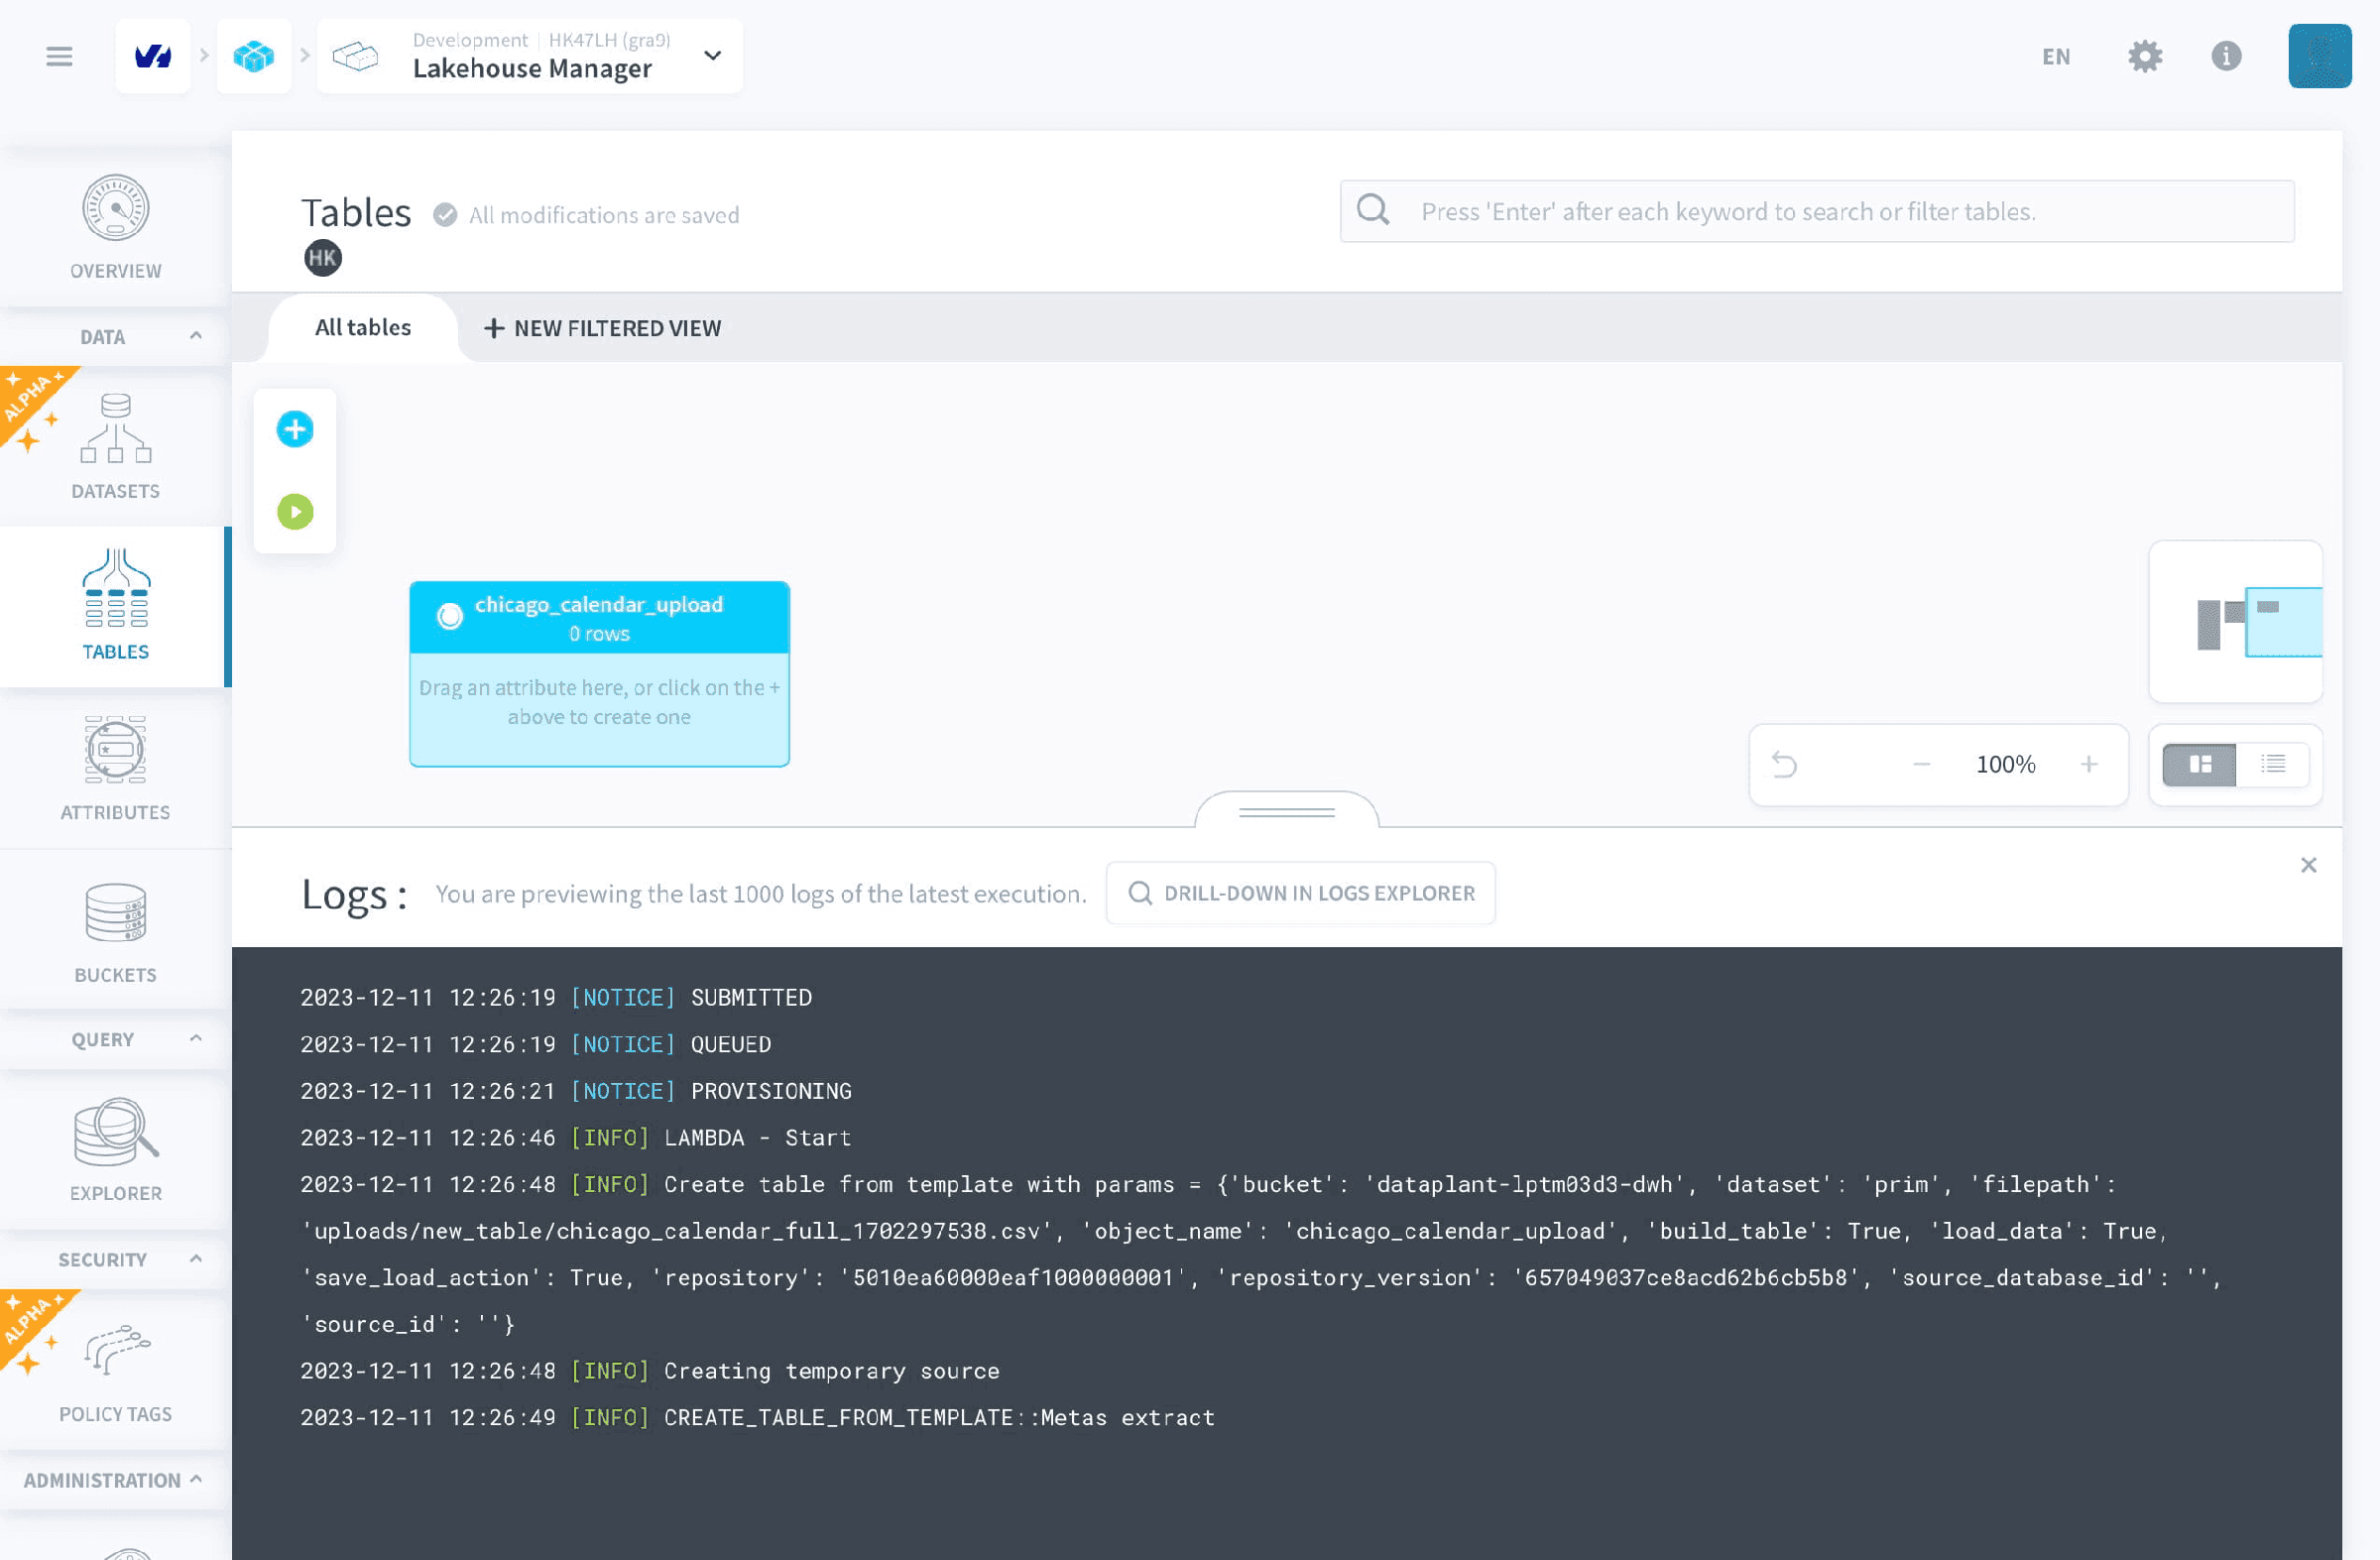
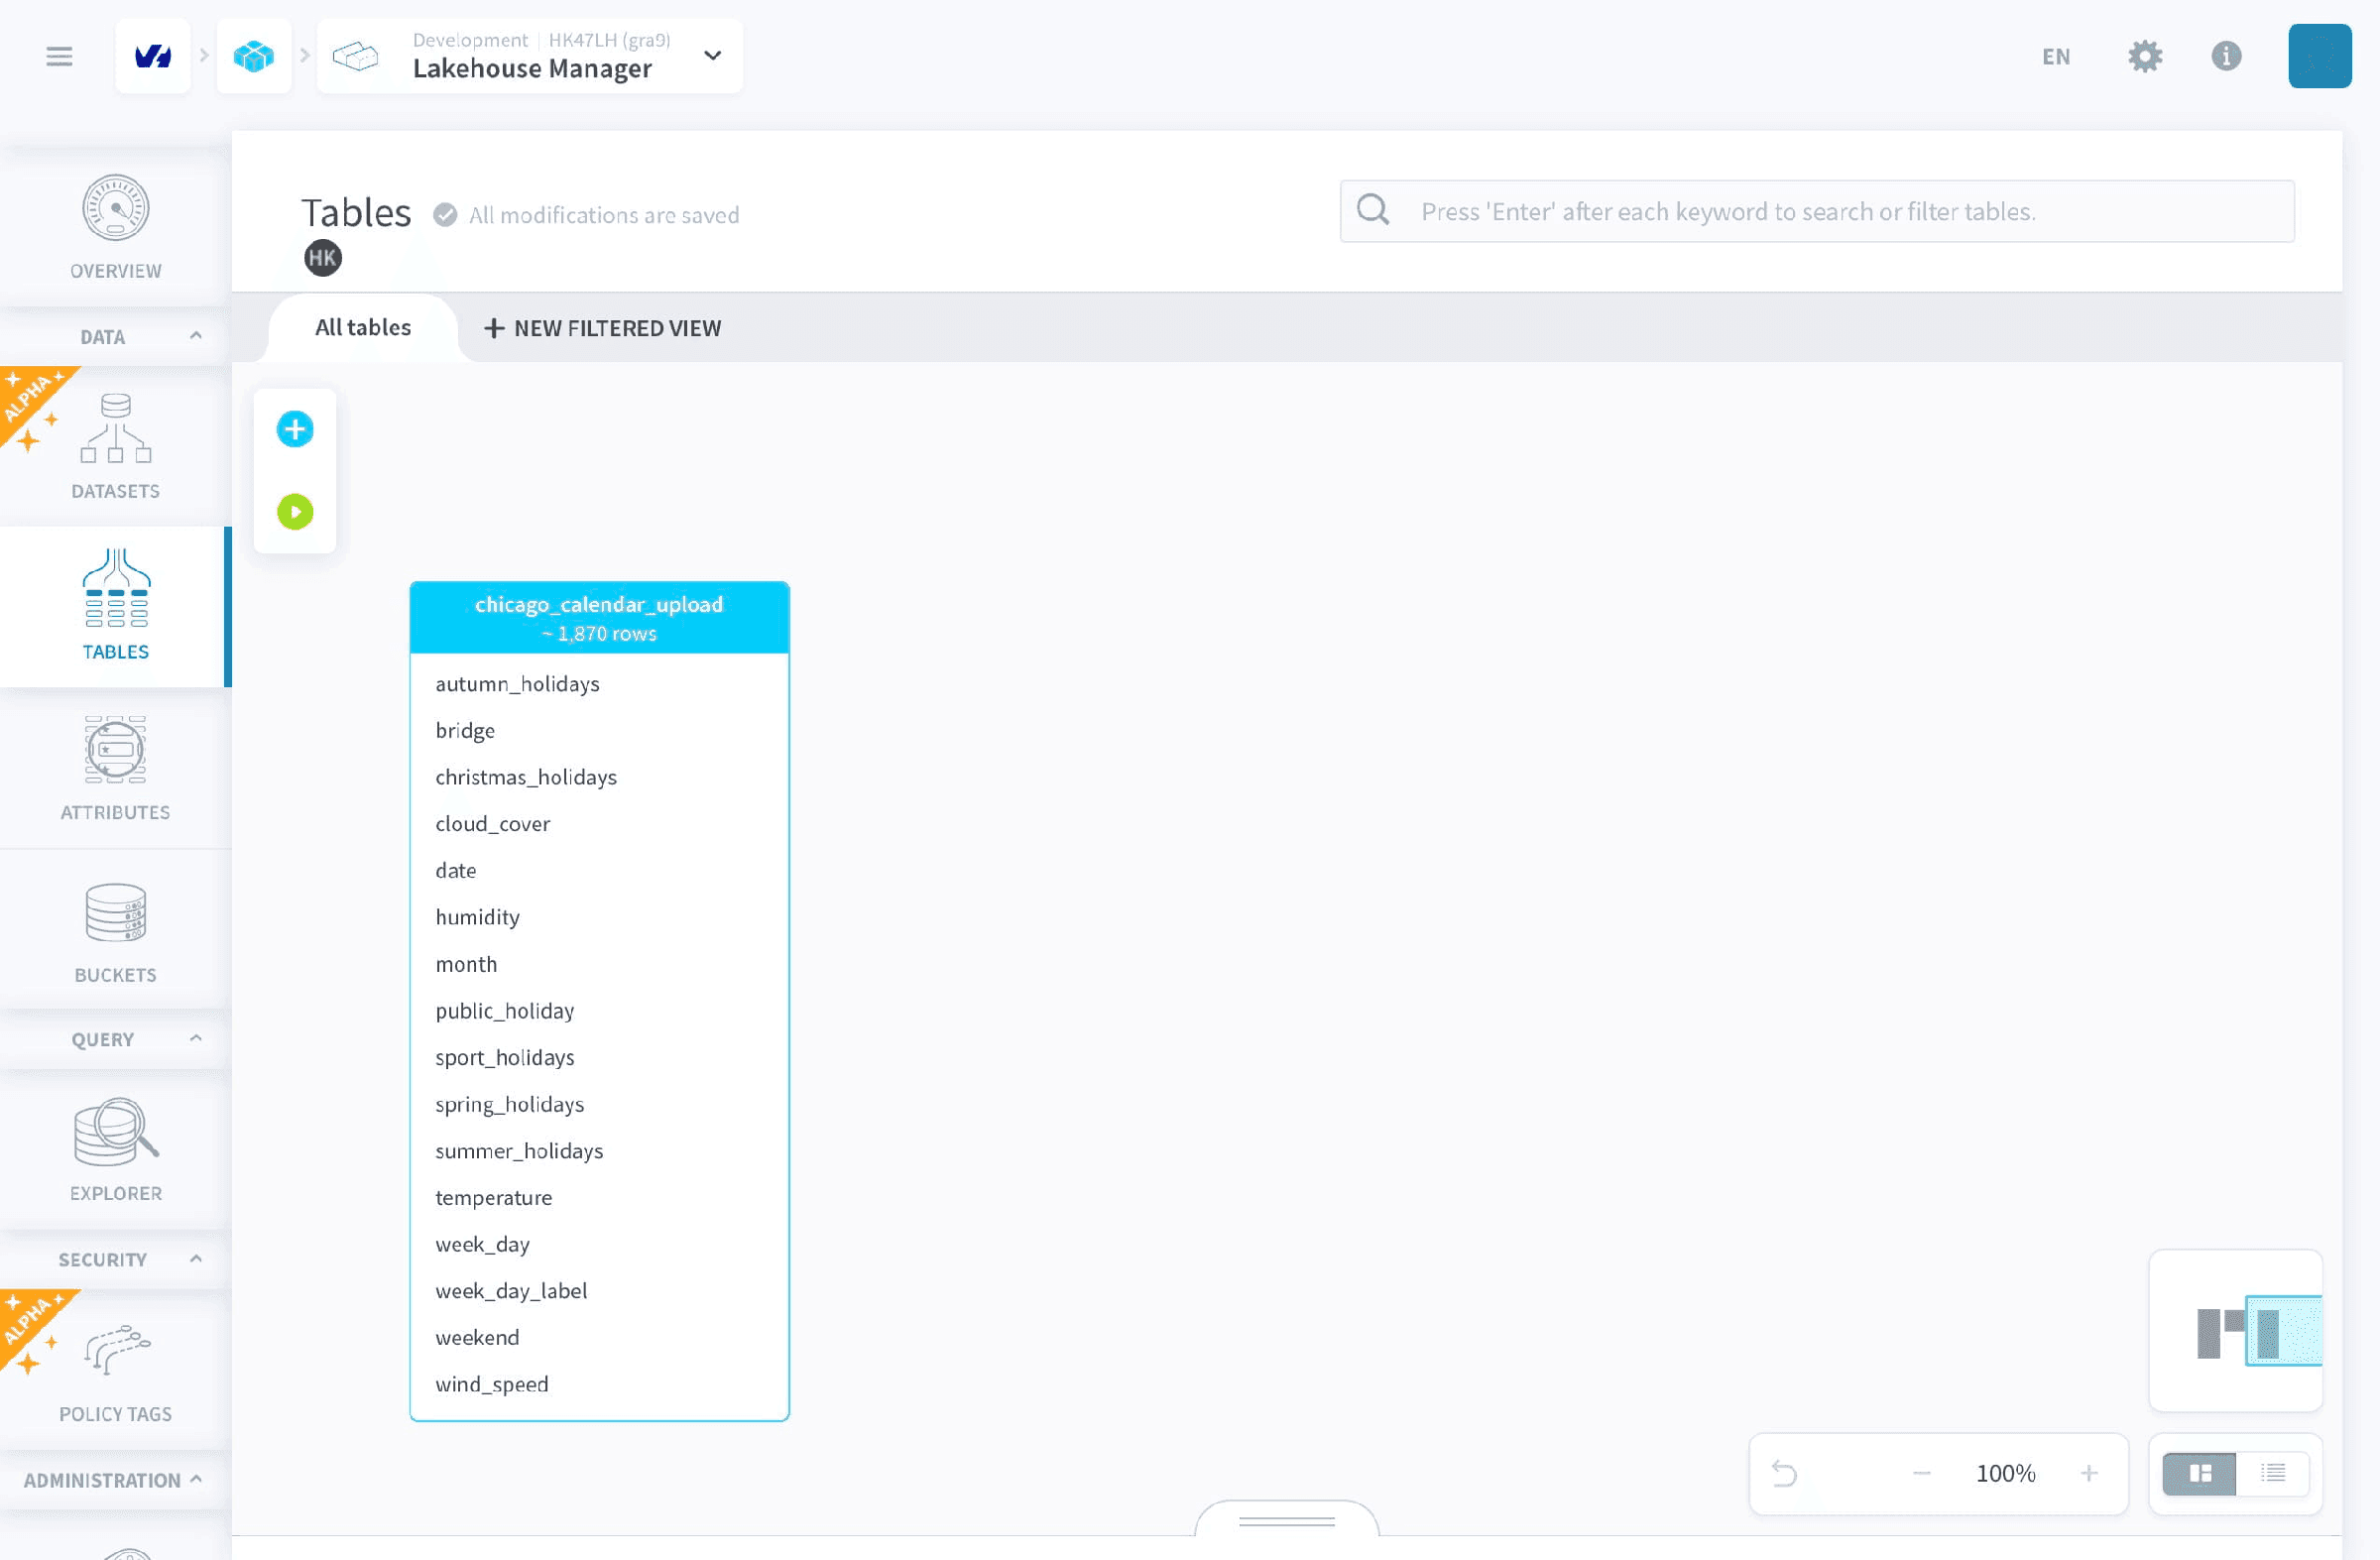
Now the uploaded file will go through the analyzer and a meta extract process and a job will be triggered which will build the table and load it with data.
Why declare a table in the logical catalog
The Tables tab is not a cosmetic wrapper over Iceberg: it is the single source of metadata the rest of the platform relies on.
- Identity Access Manager: policy tags and CEL conditions (Advanced Data Access Control)
- Cross-component lineage: the Attributes page
- Business semantics: dimensions and measures, dictionaries, parent/children links
- Discovery: the Explorer and the canvas
- Integrations: Analytics Manager and Machine Learning Manager
A table created with a direct CREATE TABLE (from Superset or a SQL Custom action) does exist in Iceberg, but stays orphaned on the platform side: invisible in the UIs, outside governance, and outside lineage.
Making an externally-created table visible
To bring such a table into the logical catalog, either:
- Declare it in Tables before writing: create the empty table (or set it as the logical target of your action), then write into it; or
- Run an Update Metadata after the fact to pick up an already-written table.
We are investigating whether this step can be simplified through a unified catalog. In the meantime, declaring the table up front is the reliable path.
Tables
Lakehouse Manager was built with the mindset of encouraging users to adopt the best practices regarding data management. Tables in Lakehouse Manager are almost the same as your regular SQL-database tables (in fact they are implemented using SQL).
On Lakehouse Manager interface, when you hover over a table (List-view) or click on it (Canvas-view) you will see that a series of buttons are displayed. You can use them to interact with the table; some common interactions are :
-
➕ - add an attribute (can be a dimension or measure).
-
🔍 - preview the table within Explorer.
-
✏️ - edit the table.
-
▶️ - build the table.
-
🗑 - delete the table.
Check out the complete detailed documentation here
Link parent and children tables
This feature is only available in the canvas mode.
Linking tables is on possible for tables of external datasets
Lakehouse Manager allows you to link a table (the parent) to other tables (children tables) in order to model an 'inheritance-like' system for the information in your data warehouse.
Concretely, this allows you to centralize information in one single referential table - the parent table - which in turn is referenced in many other children table via IDs. Linking tables allows to automate the configuration of Aggregate actions (which allow you to join multiple tables into a single aggregated table when you execute them) when you create them in the Data Processing Engine
The primary key(s) of the parent table must be present in the children table - if they're not, they will be automatically created as you link both tables.
For example, if you are representing a news article in with your data. There is a table called articles with fields for article_id, headline, content, date and author. But instead of placing a name in the author field, you could have the ID value of a user in a separate authors table with fields such as author_id, first_name, and last_name. Therefore, if you need to update an author’s name, you only need to do so in the authors table (parent); because the articles table (child) only contains the ID of the corresponding author record.
Link a parent table to a child table by clicking on the white circle at the bottom of the parent table (1) and dragging the arrow to the child table (2).
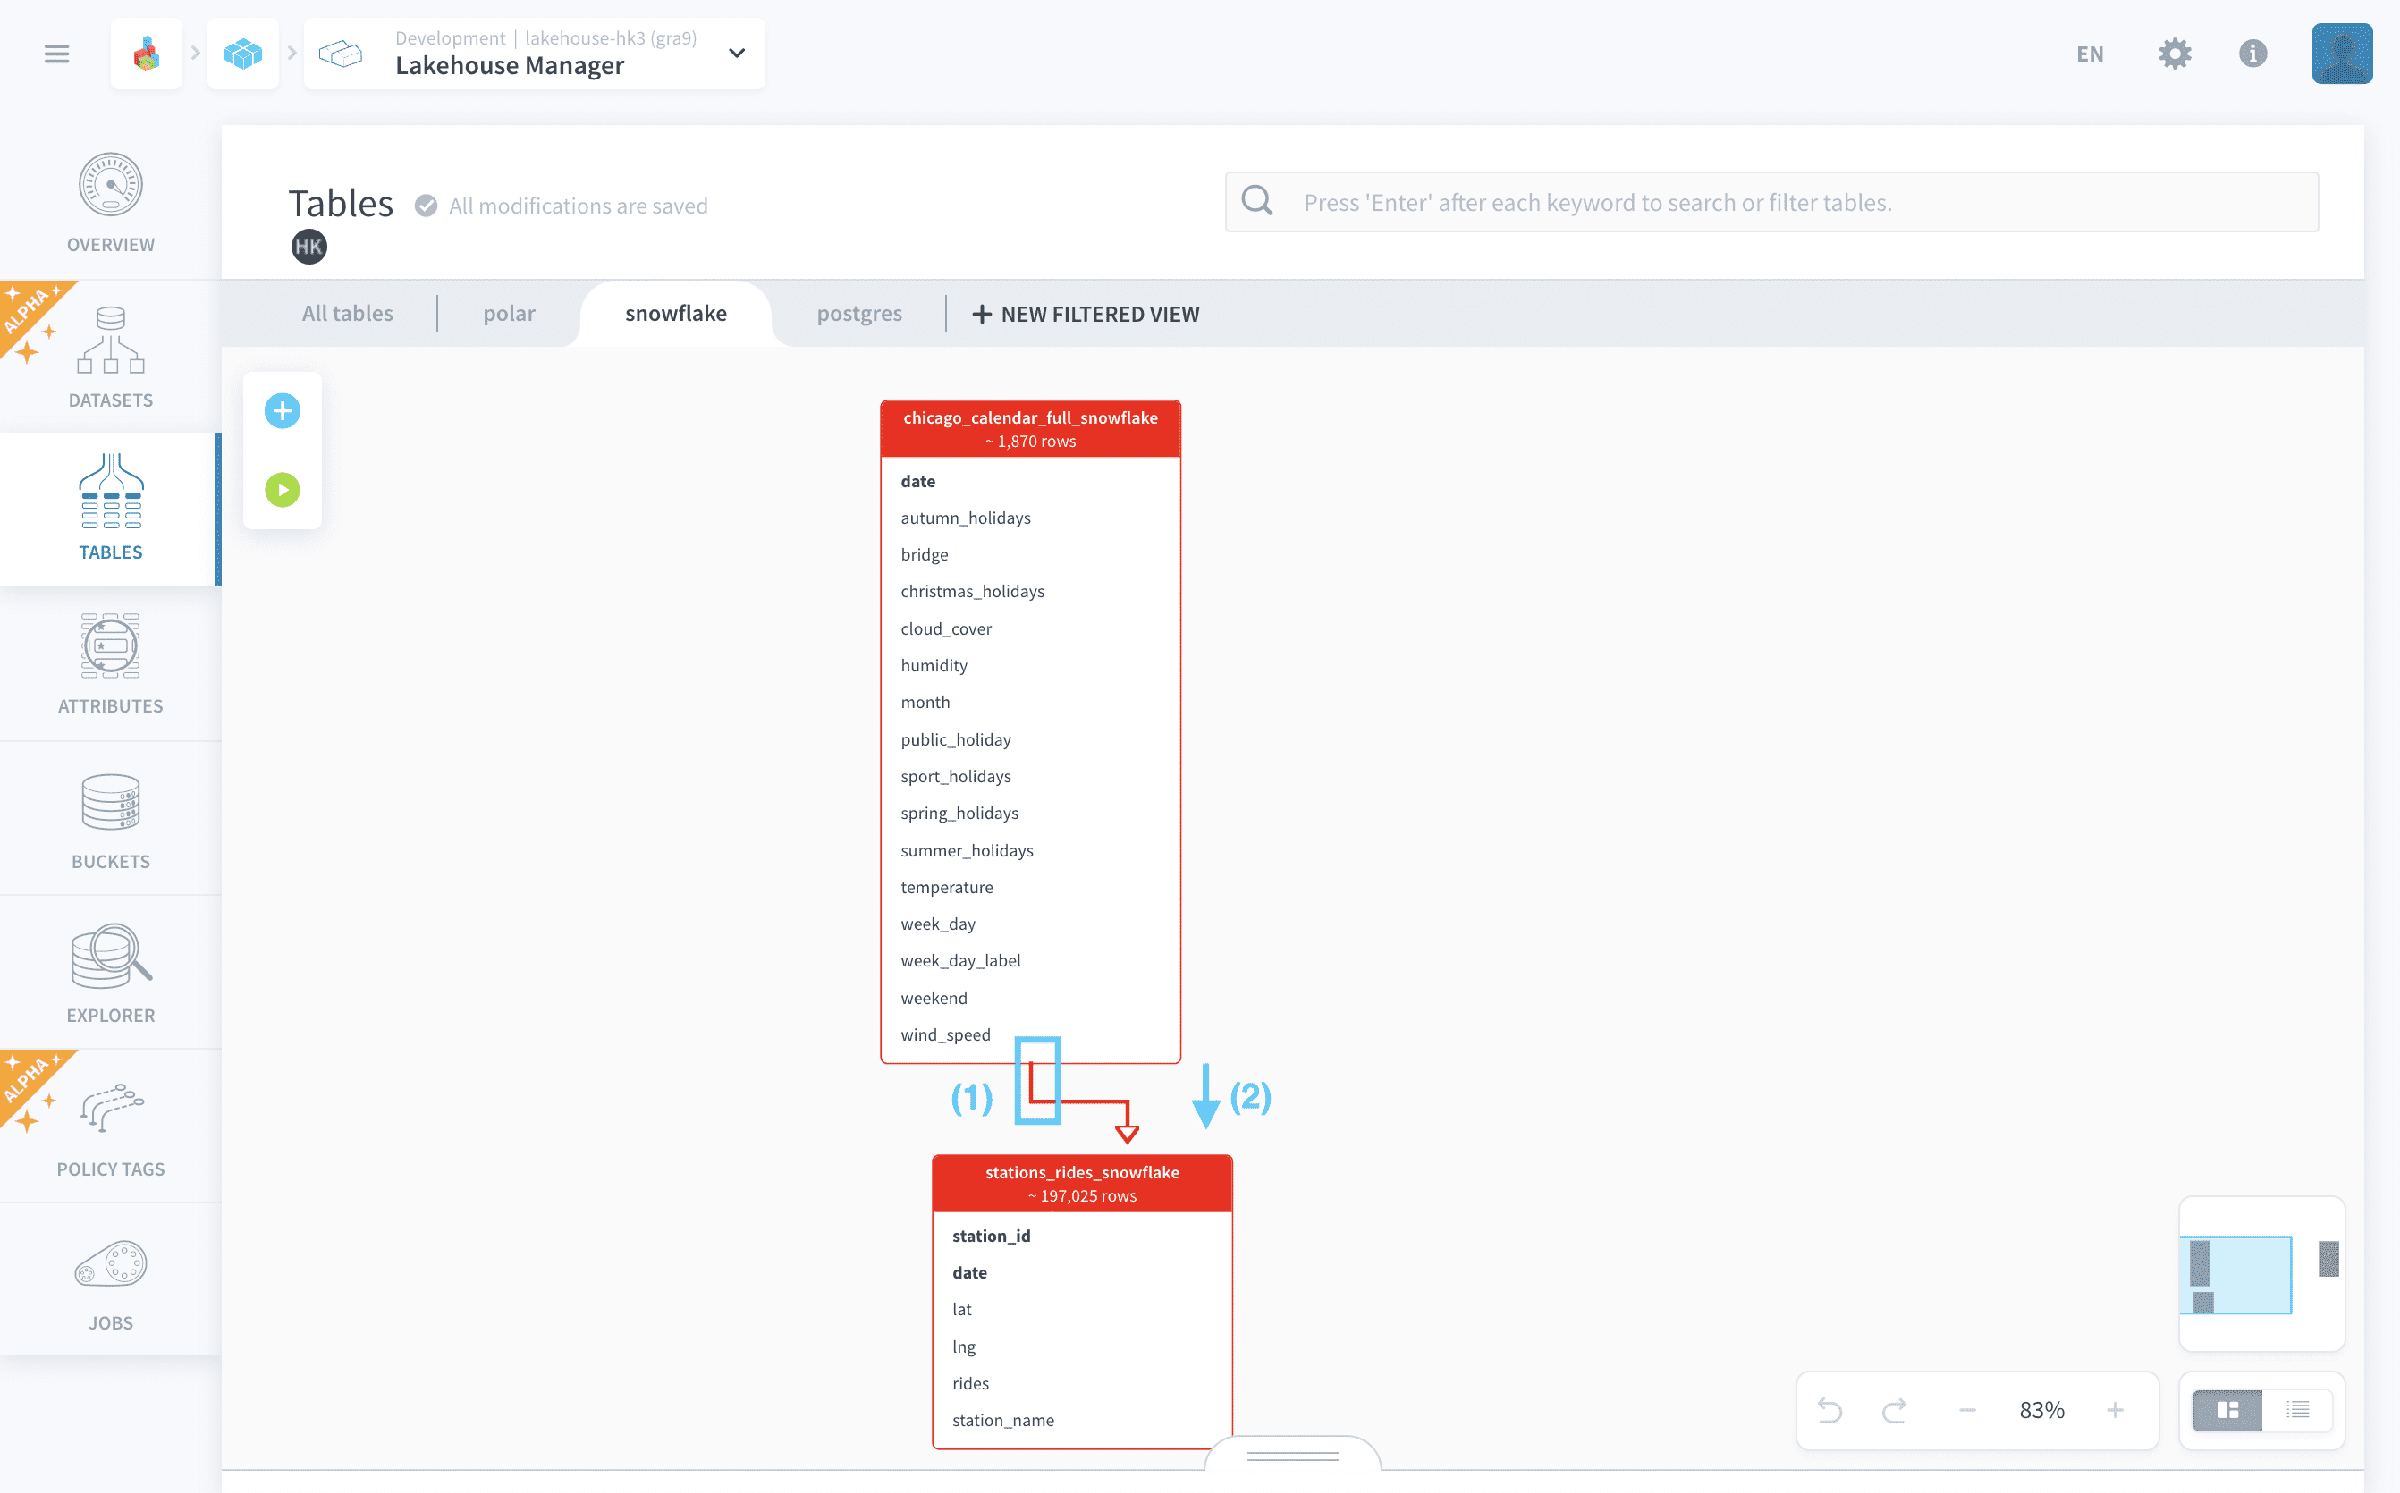
As a rule of thumb, you want to start from the table which contains all the reference data, a link it into a table which only has an ID referencing that initial table.
Naming Conventions
When naming tables and attributes in Lakehouse Manager, it's important to follow certain conventions and avoid specific reserved words to prevent unexpected issues. These restrictions primarily stem from underlying SQL implementations and best practices for data integrity.
- General Naming Guidelines:
- Case Sensitivity: It's generally recommended to use lowercase and underscores (e.g.,
my_table_name,column_id) for consistency and to avoid potential issues with case-sensitive databases. - Characters: Stick to alphanumeric characters (a-z, 0-9) and underscores (
_). Avoid special characters, spaces, or hyphens, as these can cause problems in queries or integrations. - Start with a Letter: Table and attribute names should ideally start with a letter.
- Descriptive Names: Choose names that clearly describe the data they contain.
- Case Sensitivity: It's generally recommended to use lowercase and underscores (e.g.,
Reserved Words
There are words reserved by the underlying database system or that have special meaning within Lakehouse Manager. Using these words alone as a table name or attribute name can lead to errors. However, they can typically be used as part of a larger name (e.g., count_records is allowed, but COUNT is not).
To ensure compatibility, avoid using the following reserved words:
If you encounter an error related to a table or attribute name, consult the table above. If in doubt, try using a more descriptive name that includes a prefix or suffix (e.g., user_count instead of COUNT).
Discover the canvas mode
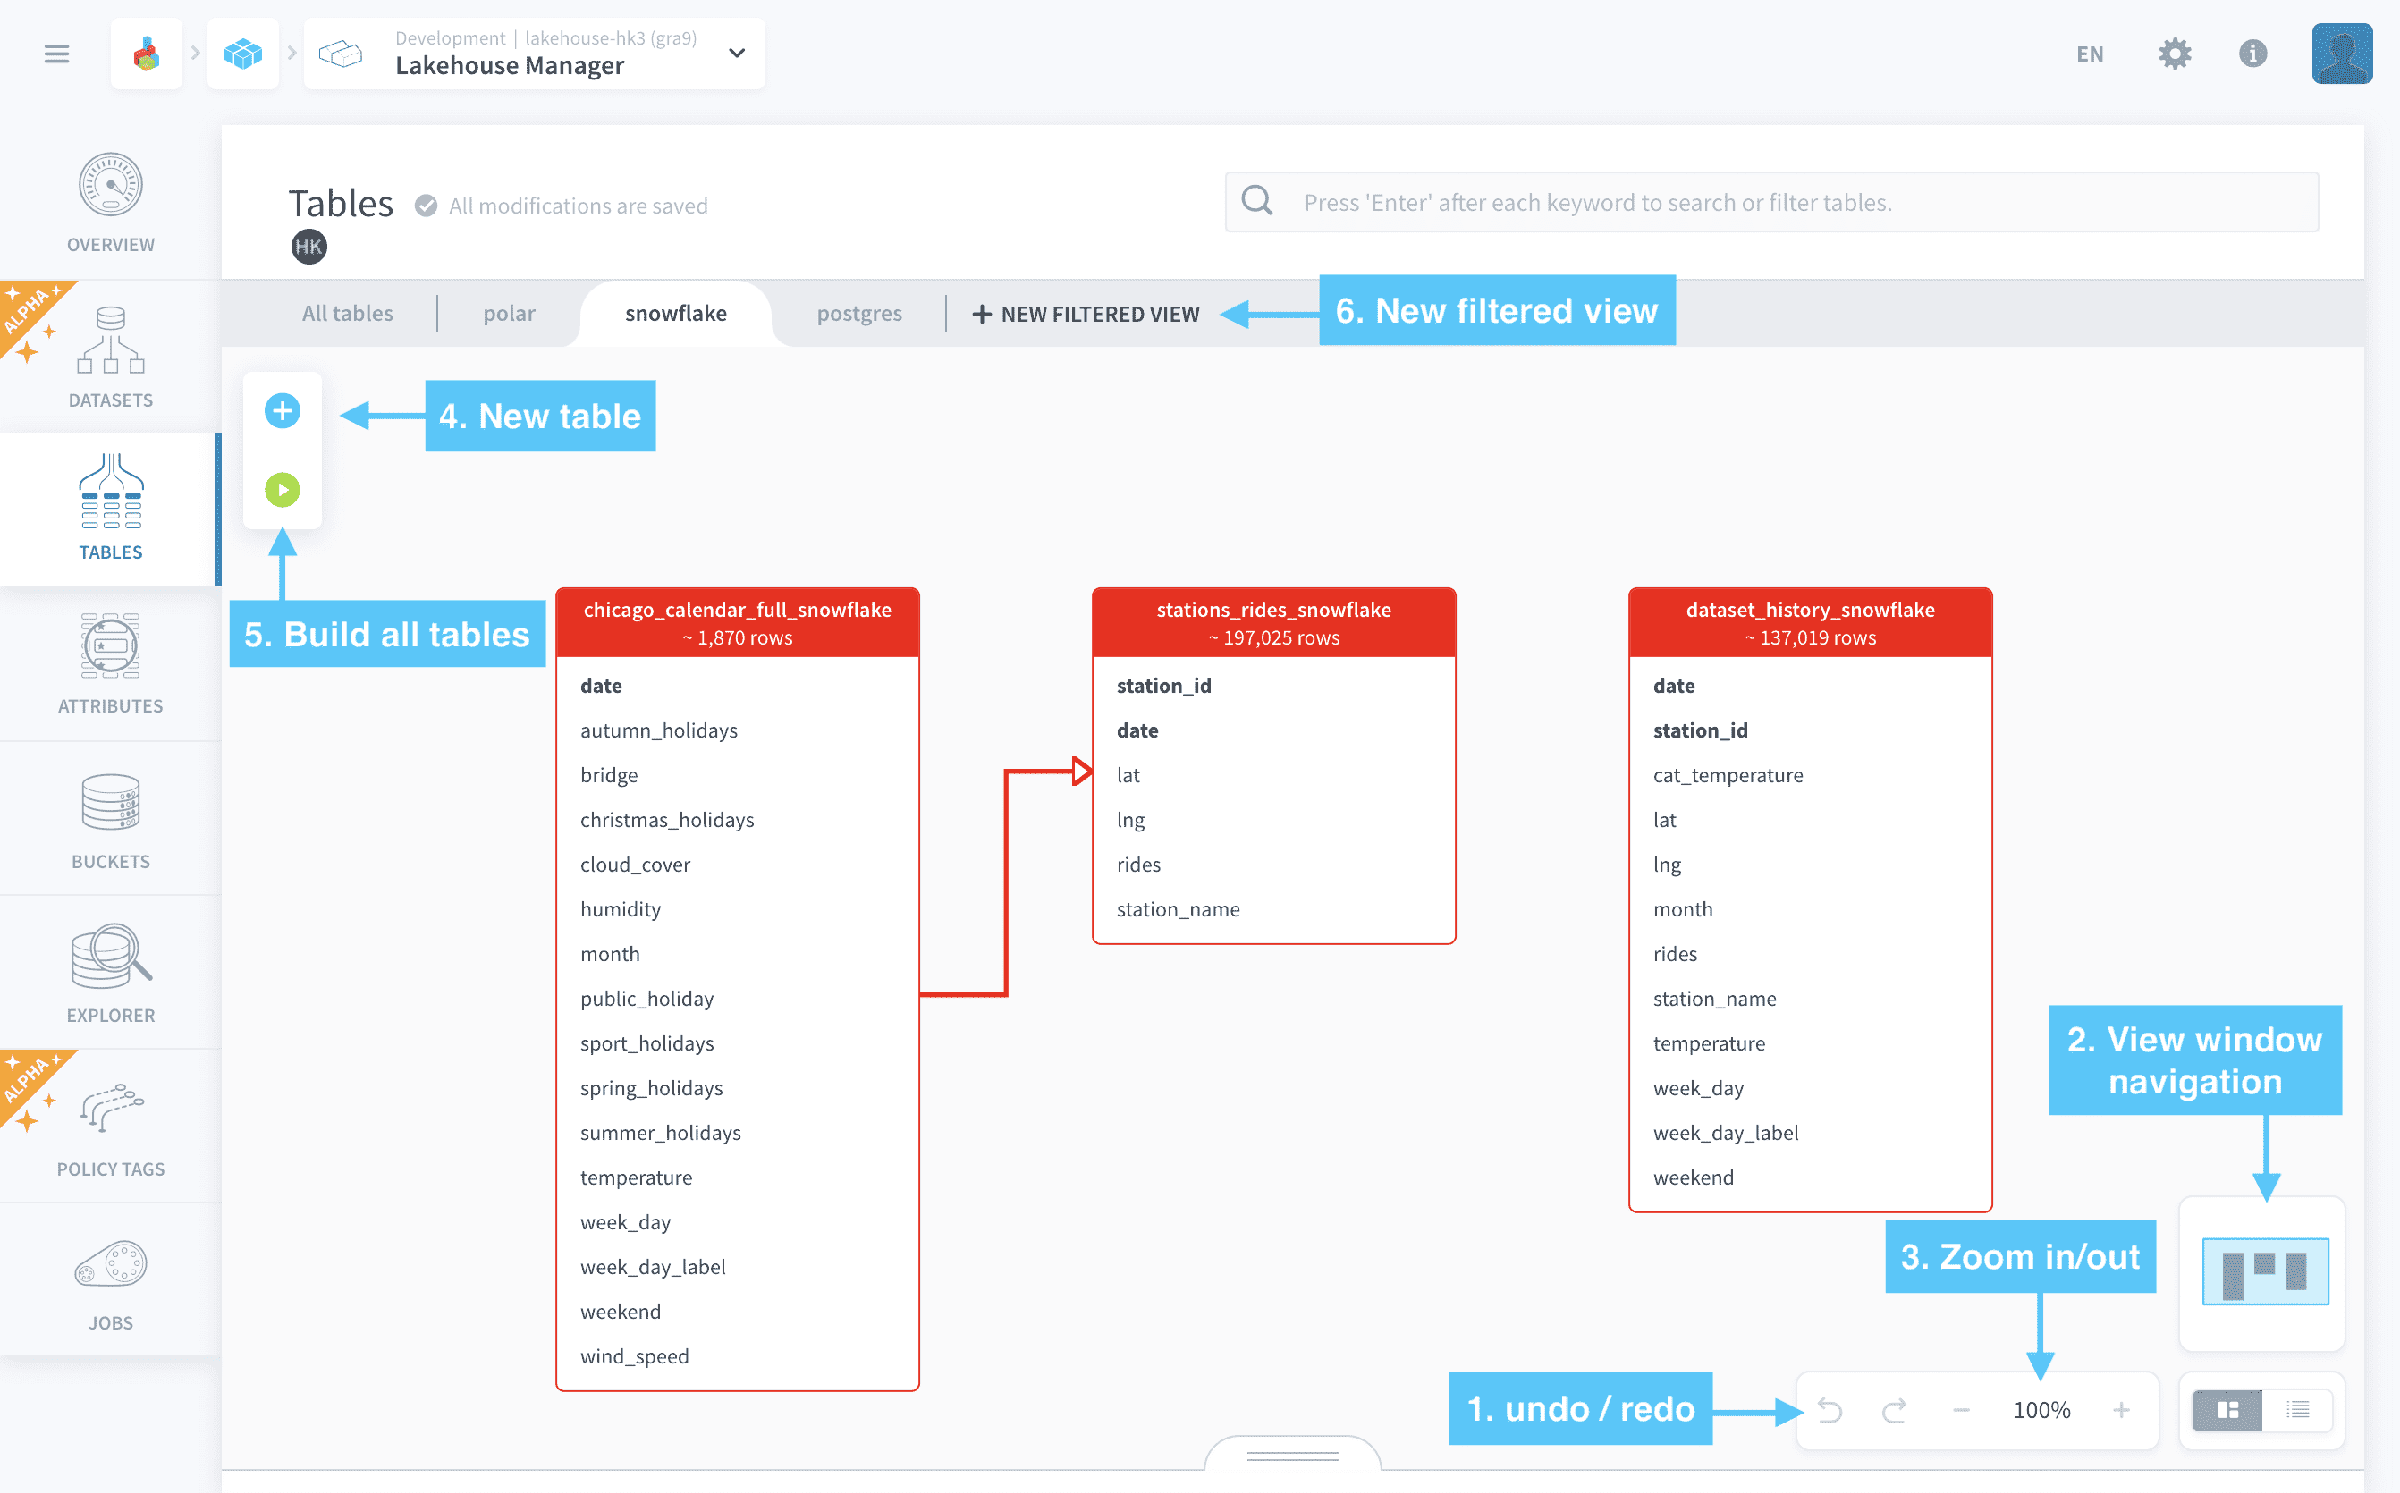
You can navigate the schema by clicking on any blank space in the schema and then moving your cursor. If there are a lot of tables, you can move the view window navigation (indicated by 2) by clicking on it and moving your cursor. Additionally, you can zoom in/out on your data schema (indicated by 3).
At any point of organizing your tables, Lakehouse Manager autosaves all the visual modifications of your data schema.
Use the undo-redo options (indicated by 1) to move back/forward on any change you just made in the schema. You will go back/forward to an immediate previous state of your work.
Filtered tabs
the platform allows you to choose to work on a selected set of tables (which could be specific to a team or Project within your organization). You can add a New Filtered Tab for doing this (indicated by 6).
Note - The default tab has All Tables with All Users. 💡
Interact with a table
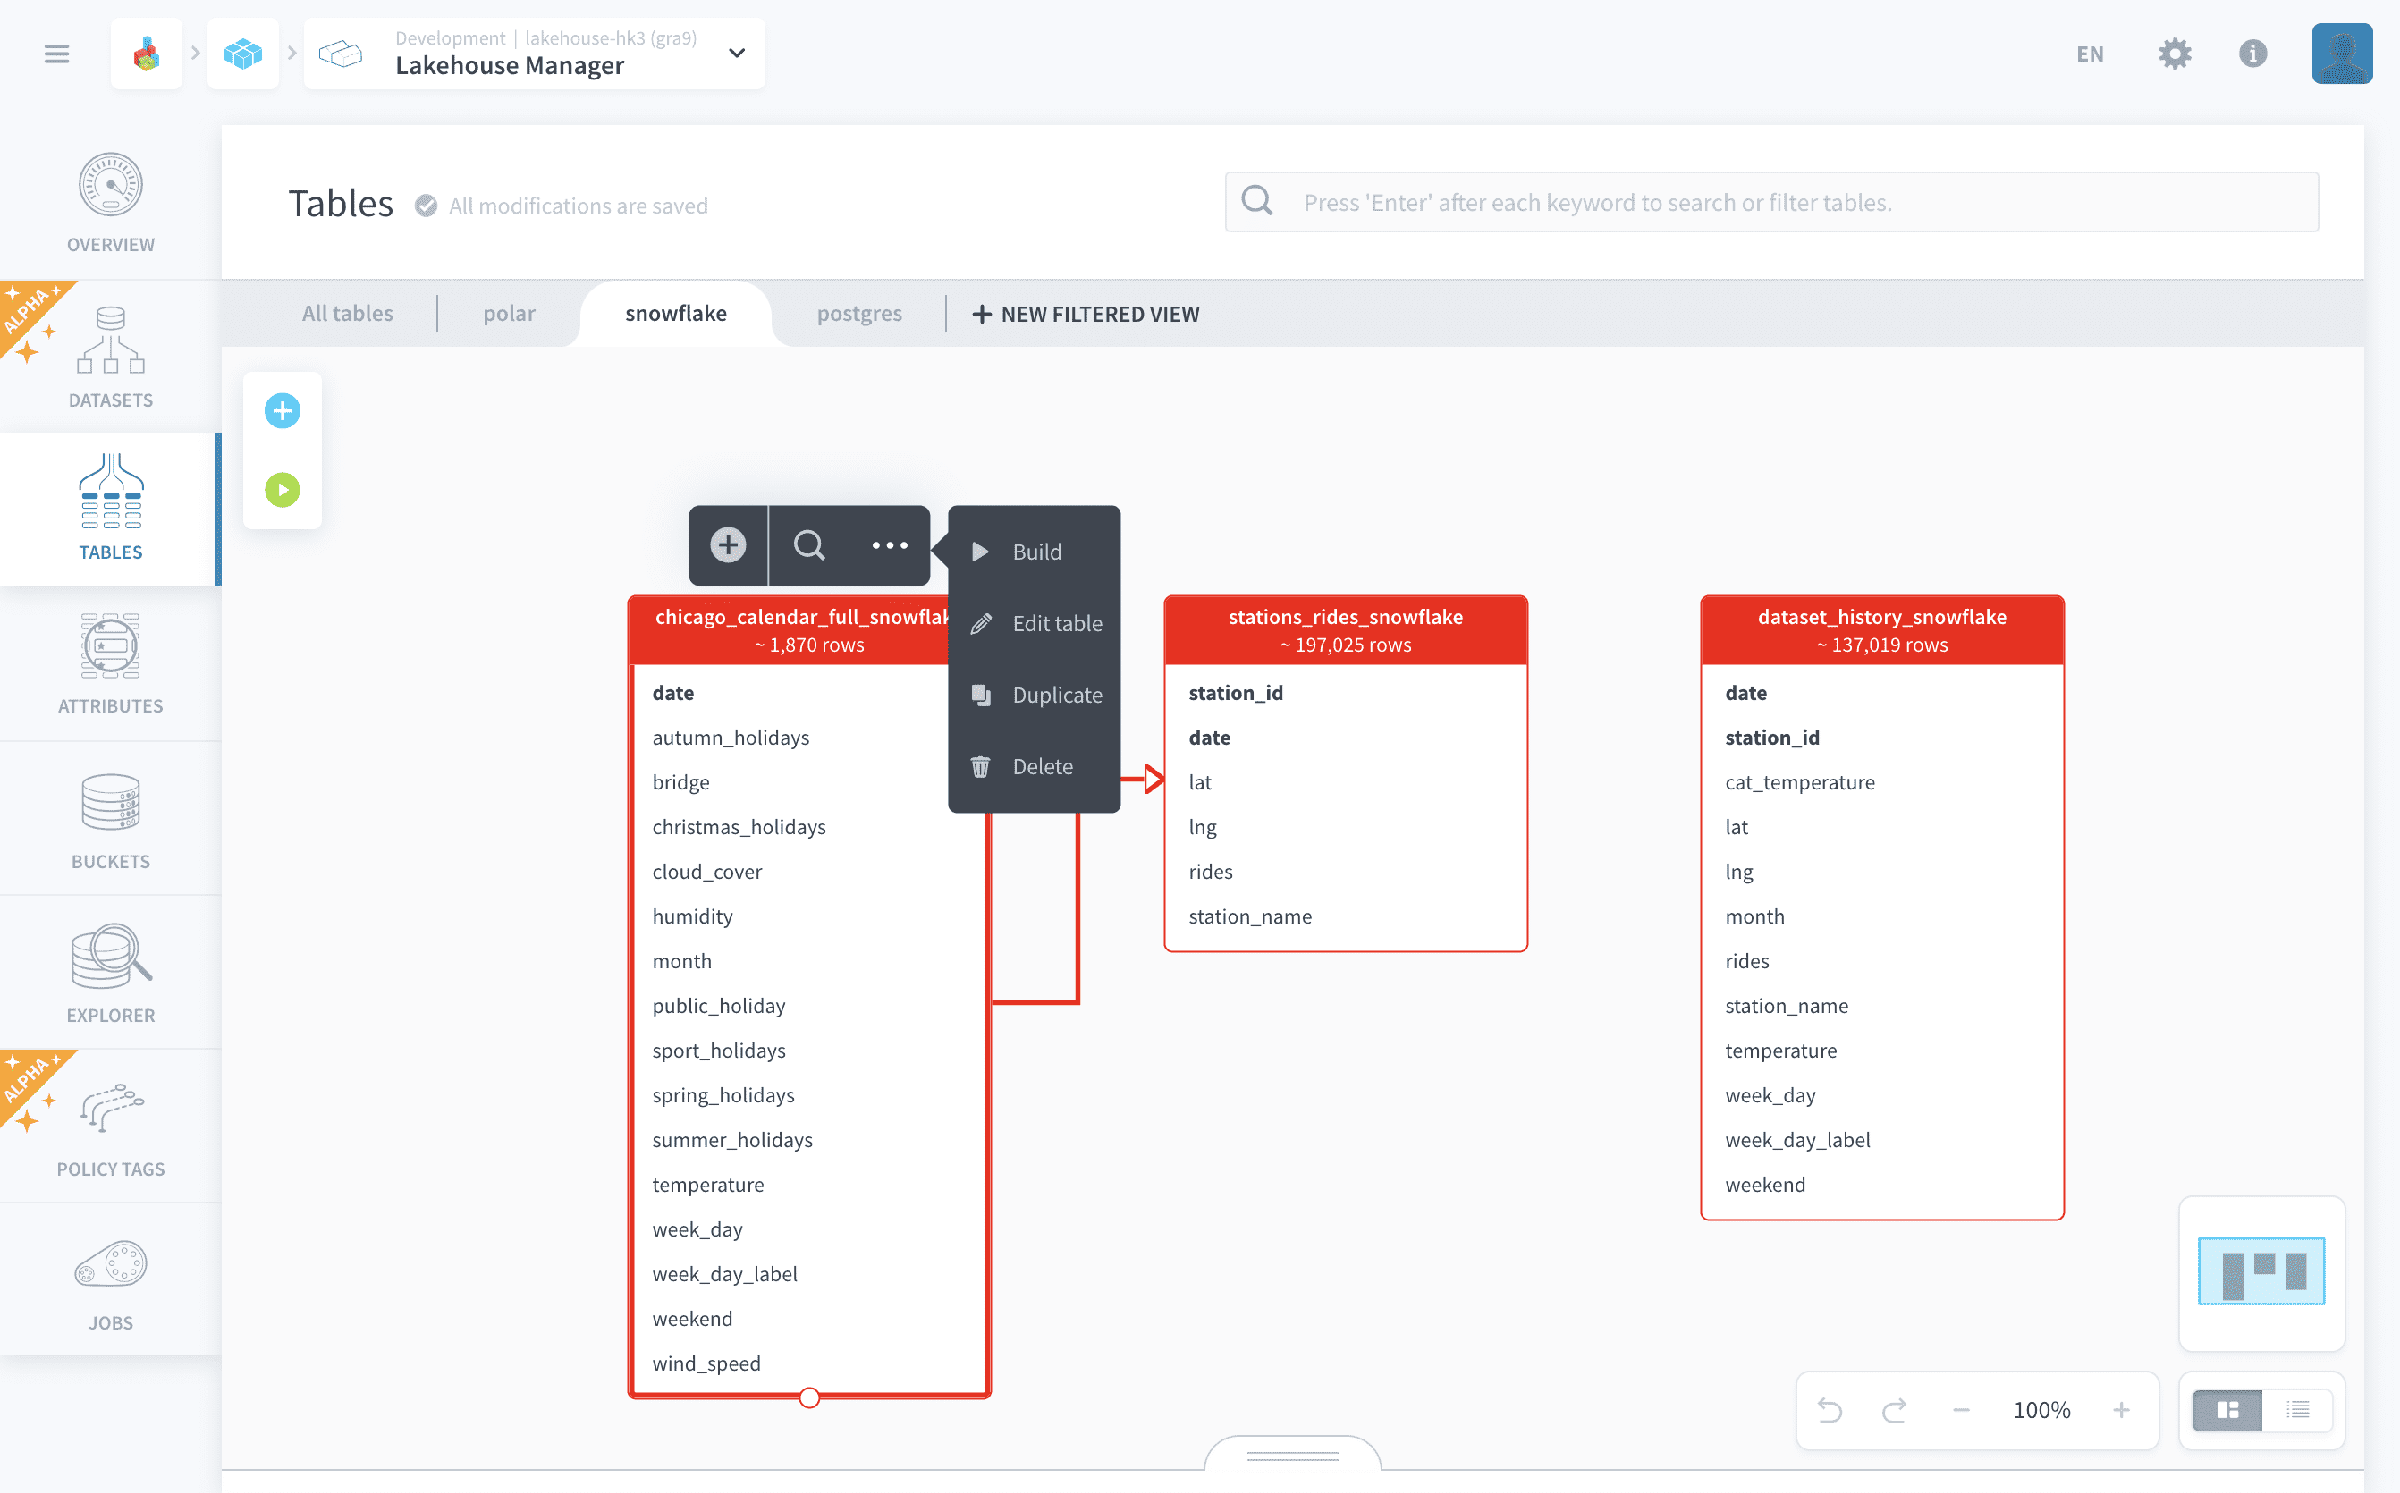
Hover your mouse over a table to display some table interactions and hover over the ... icon to display the rest.
Access our table interactions documentation to find out more about actions available on a table.
Interact with an attribute
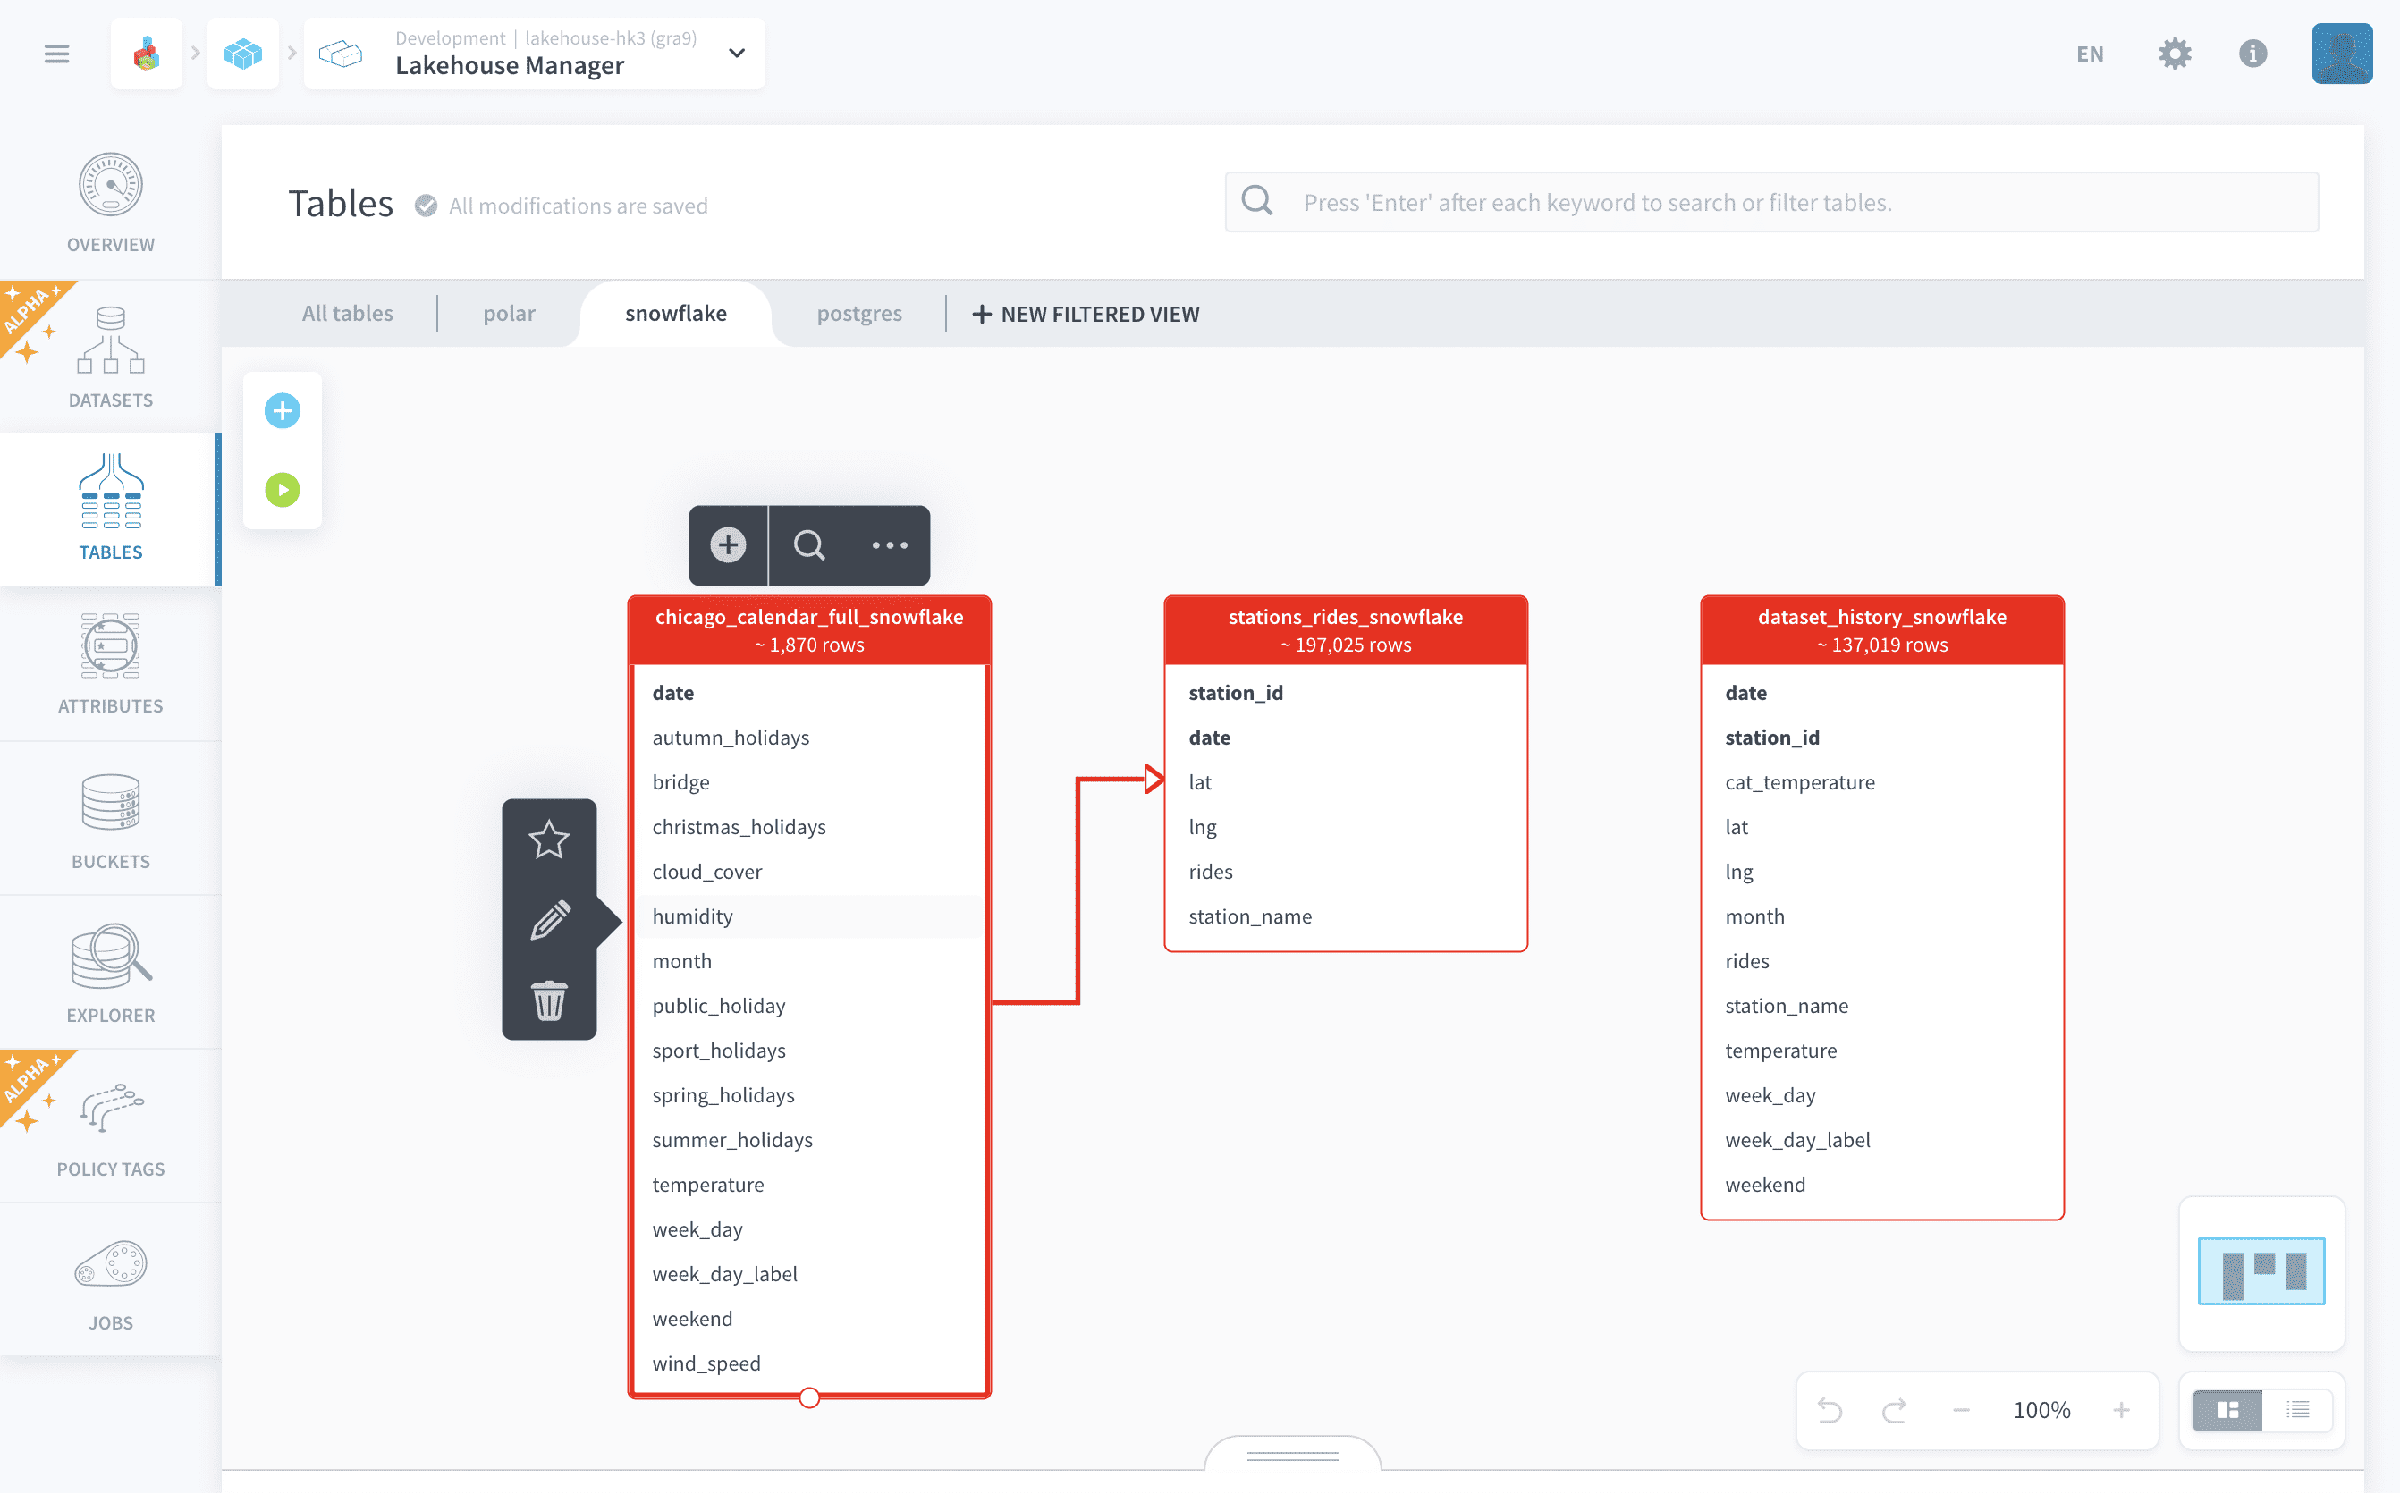
In the Canvas view-mode you can also easily manipulate the attributes of each table. Hovering your cursor over an attribute will display attribute interactions:
-
Set it as a Primary key by clicking on ⭐️ (only available for tables in external datasets)
-
Edit the attribute by clicking on ✏️
-
Delete the attribute 🗑
Go further
If you need training or technical assistance to implement our solutions, contact your sales representative or click on this link to get a quote and ask our Professional Services experts for a custom analysis of your project.
Ask questions, give your feedback and interact directly with the team building the Data Platform on the dedicated Discord channel.
If you need support with your OVHcloud services, create a request in our Help Centre.
Join our community of users.