

Extract project data with Trino
This tutorial demonstrates how to use the Trino Connector to extract data from one project into another on the Platform
Objective
This tutorial demonstrates how to use the Trino Connector to extract data from one project into another on the Platform.
Introduction
Requirements
To follow this tutorial, you need to be familiar with the Connectors, Analytics Manager, Identity Access Manager and you should preferably have done the Getting Started guide. The essential is that you know what Sources are for and how to use them.
Concepts Overview
It is common to have multiple projects running across the platform. In the scenario where you would want to extract and transfer data from an existing project into another, the Trino Connector does the work.
This is made possible thanks to the managed Trino query engine which is part of the Analytics Manager service. It allows to query the datasets of the project - and can be connected to from the external world.
This tutorial will follow a two-step process:
- Make the required changes at the source project to allow the extraction of data.
- Use the Trino Connector at the destination project as a source to move the data.
Now let's see how all of this works in practice!
Use the Trino Connector
Steps to Follow at the Source Project
These initial steps leverage the Lakehouse Manager and the Identity Access Manager.
-
Identify Source Catalog and Schema: Find the catalog and schema you intend to connect to in Lakehouse Manager Explorer
Execute the following SQL commands to retrieve the available catalogs and schemas:
Copy and save the desired catalog name as
CATALOG_NAME.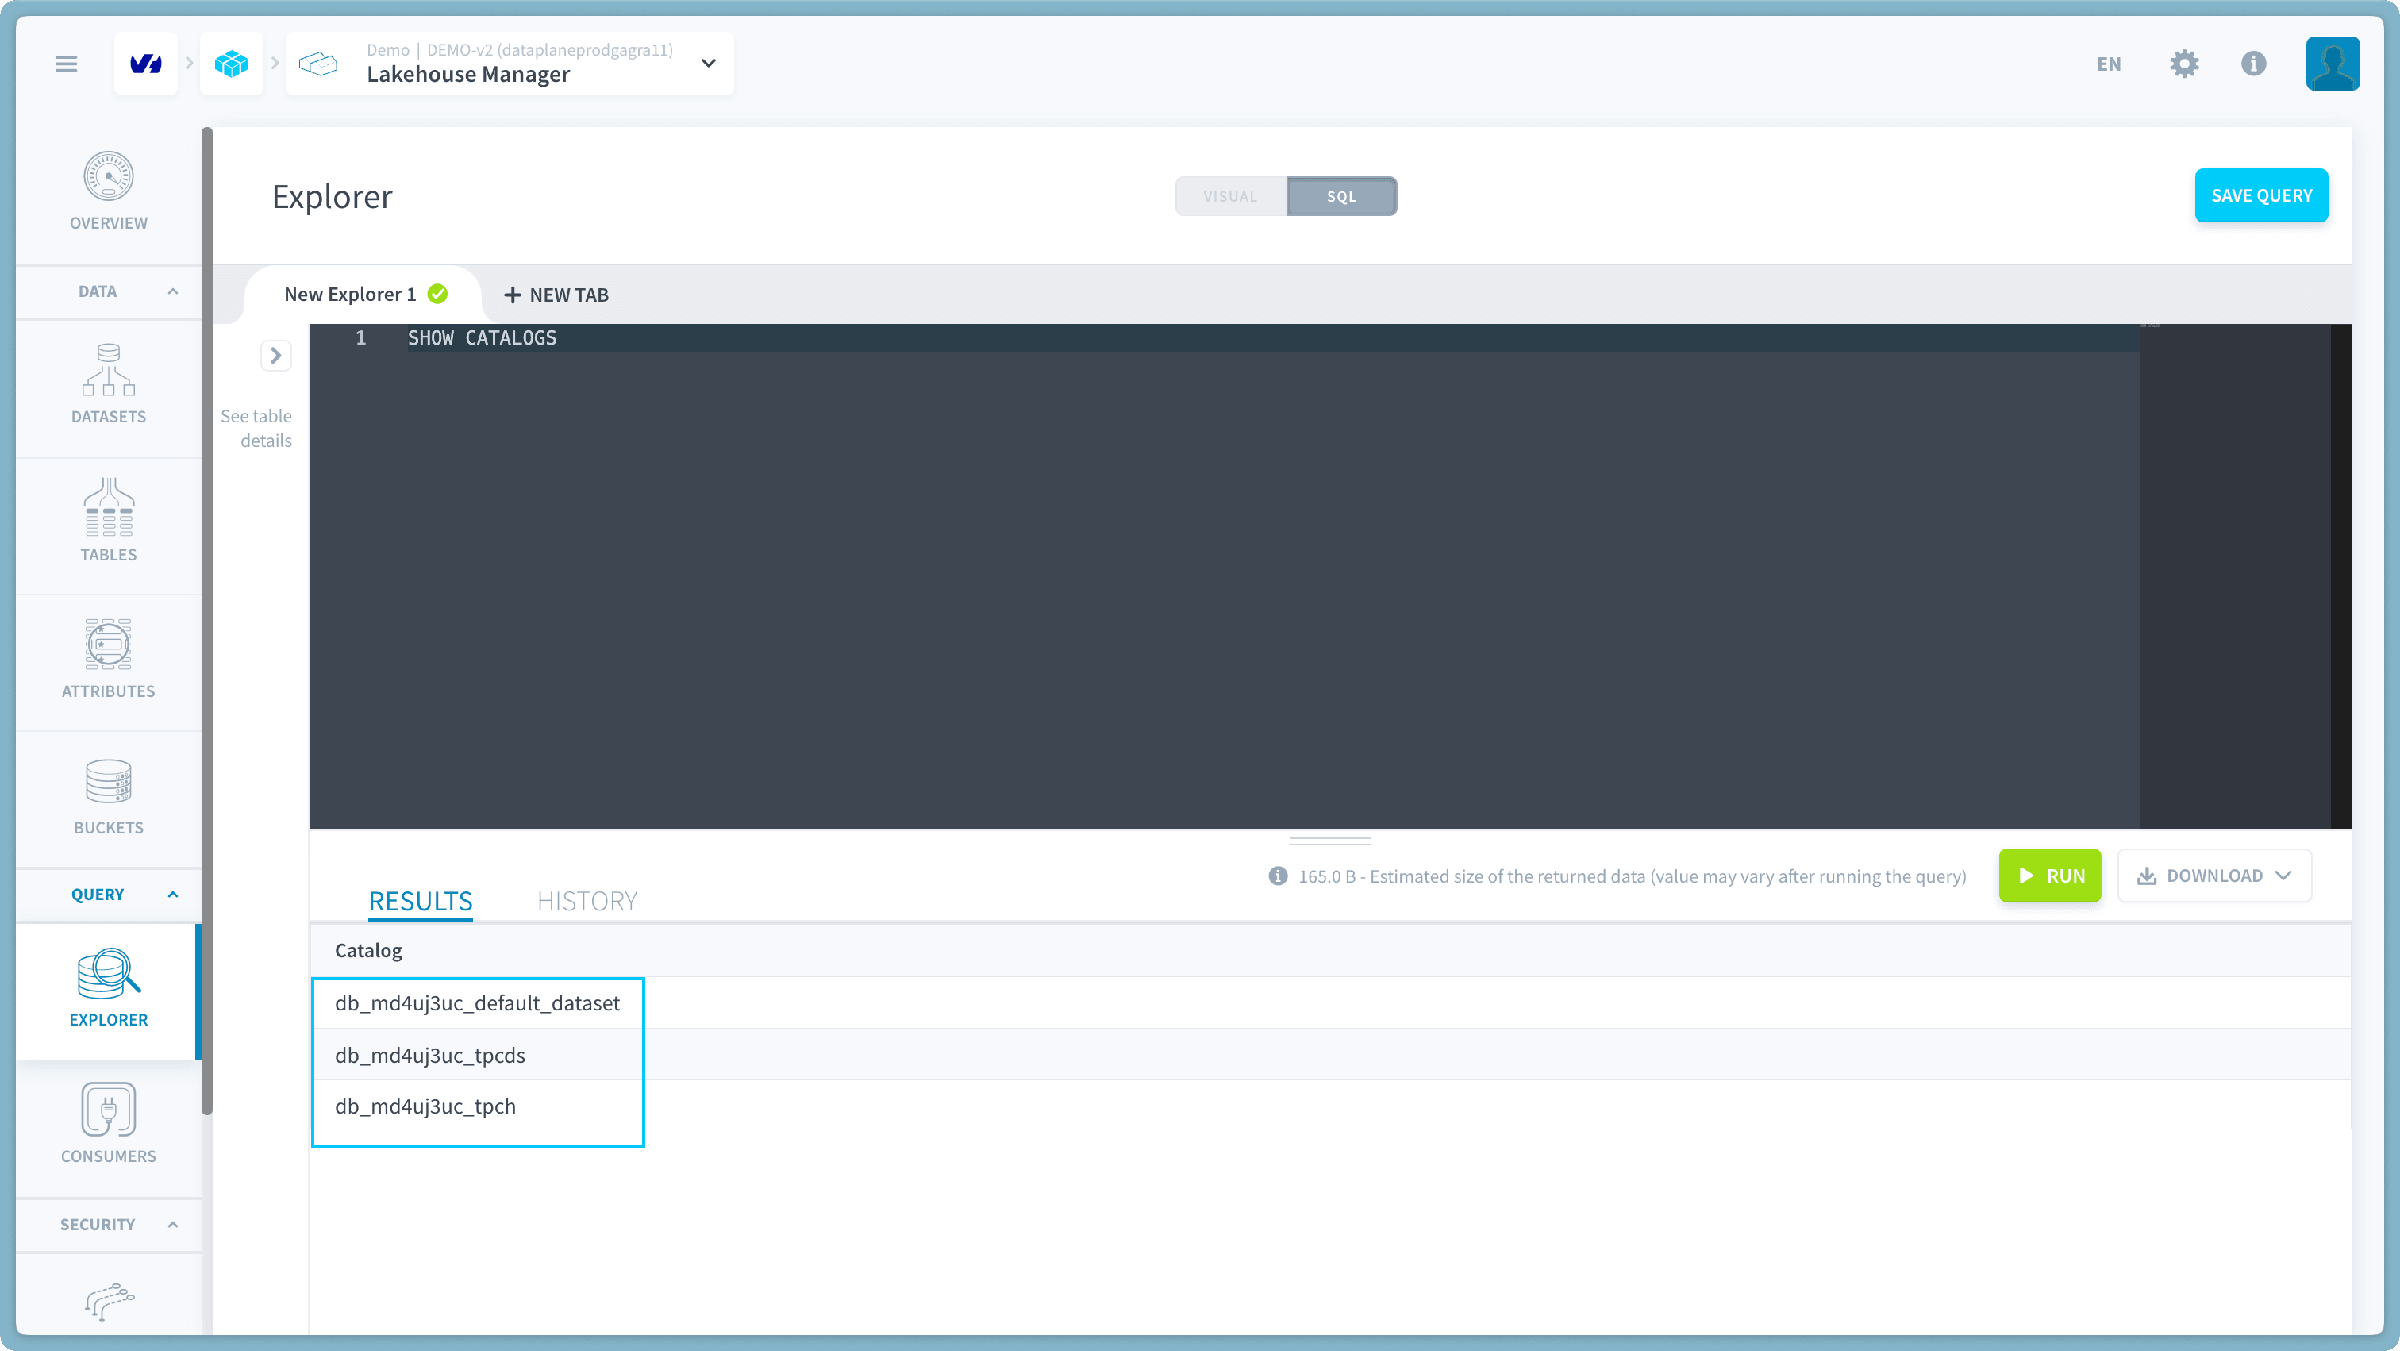
Note: Replace CATALOG_NAME with the actual catalog you selected in the previous step.
This command will display a list of available schemas within your chosen catalog.
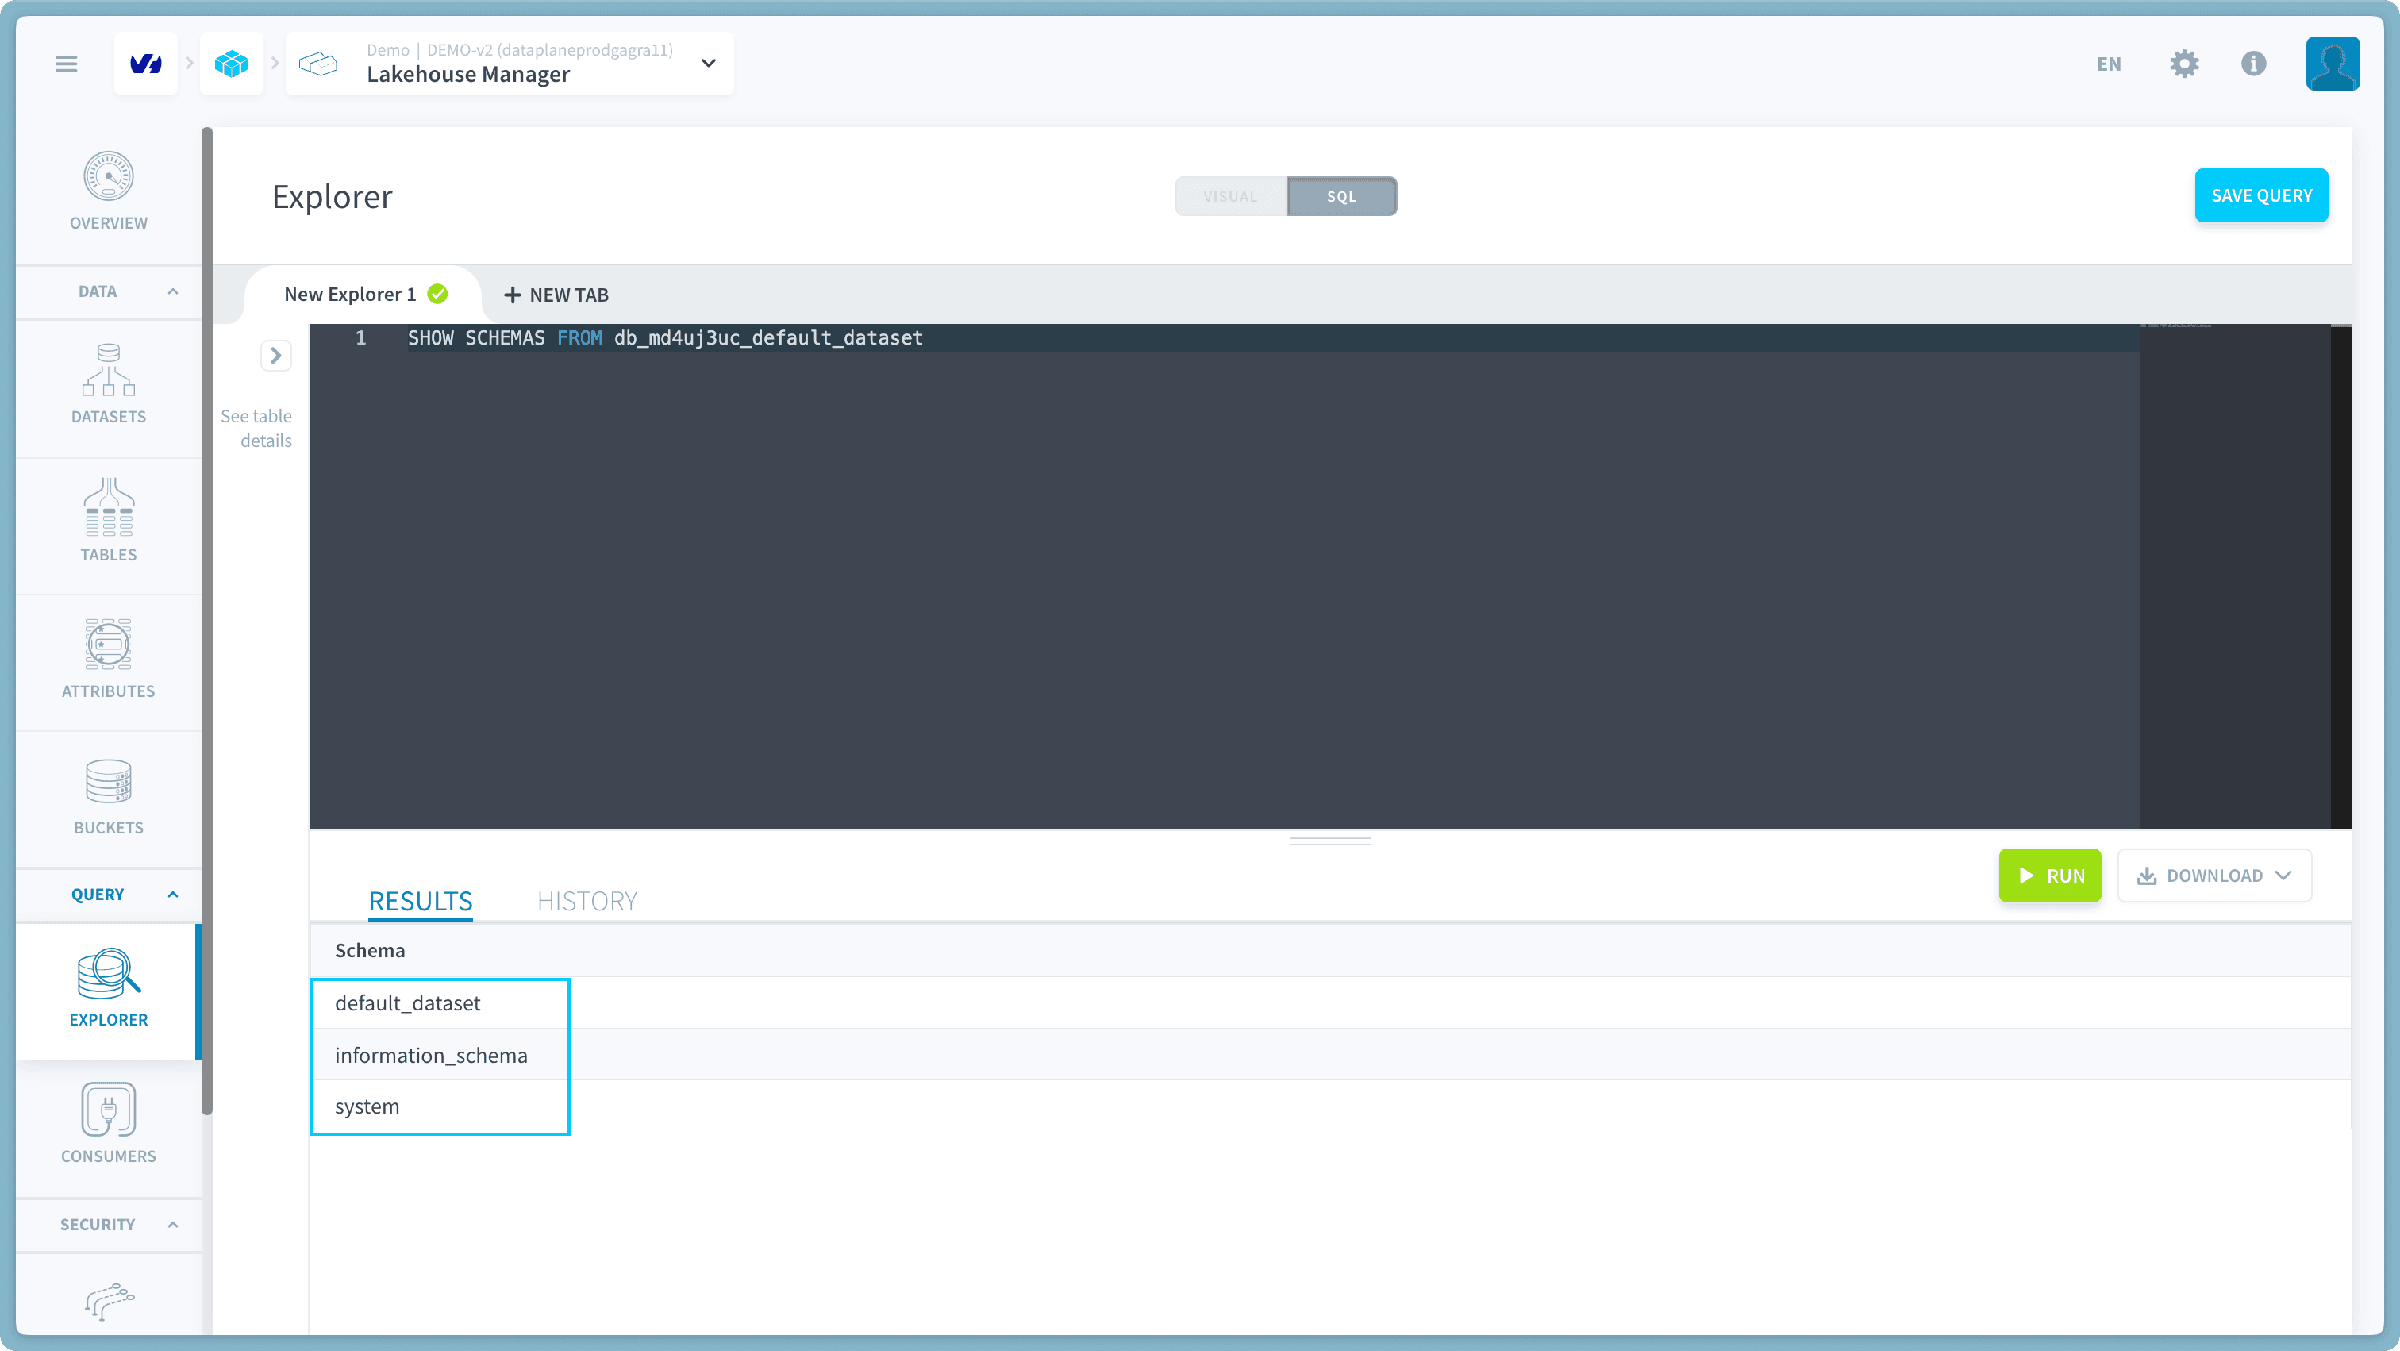
Copy and save the desired schema name as SCHEMA_NAME.
Upon creation of a new project, the default dataset is provided. If you have not established any additional datasets within your project, this is the appropriate selection.
-
Open the Identity Access Manager and create a new service account for the purpose of this transfer.
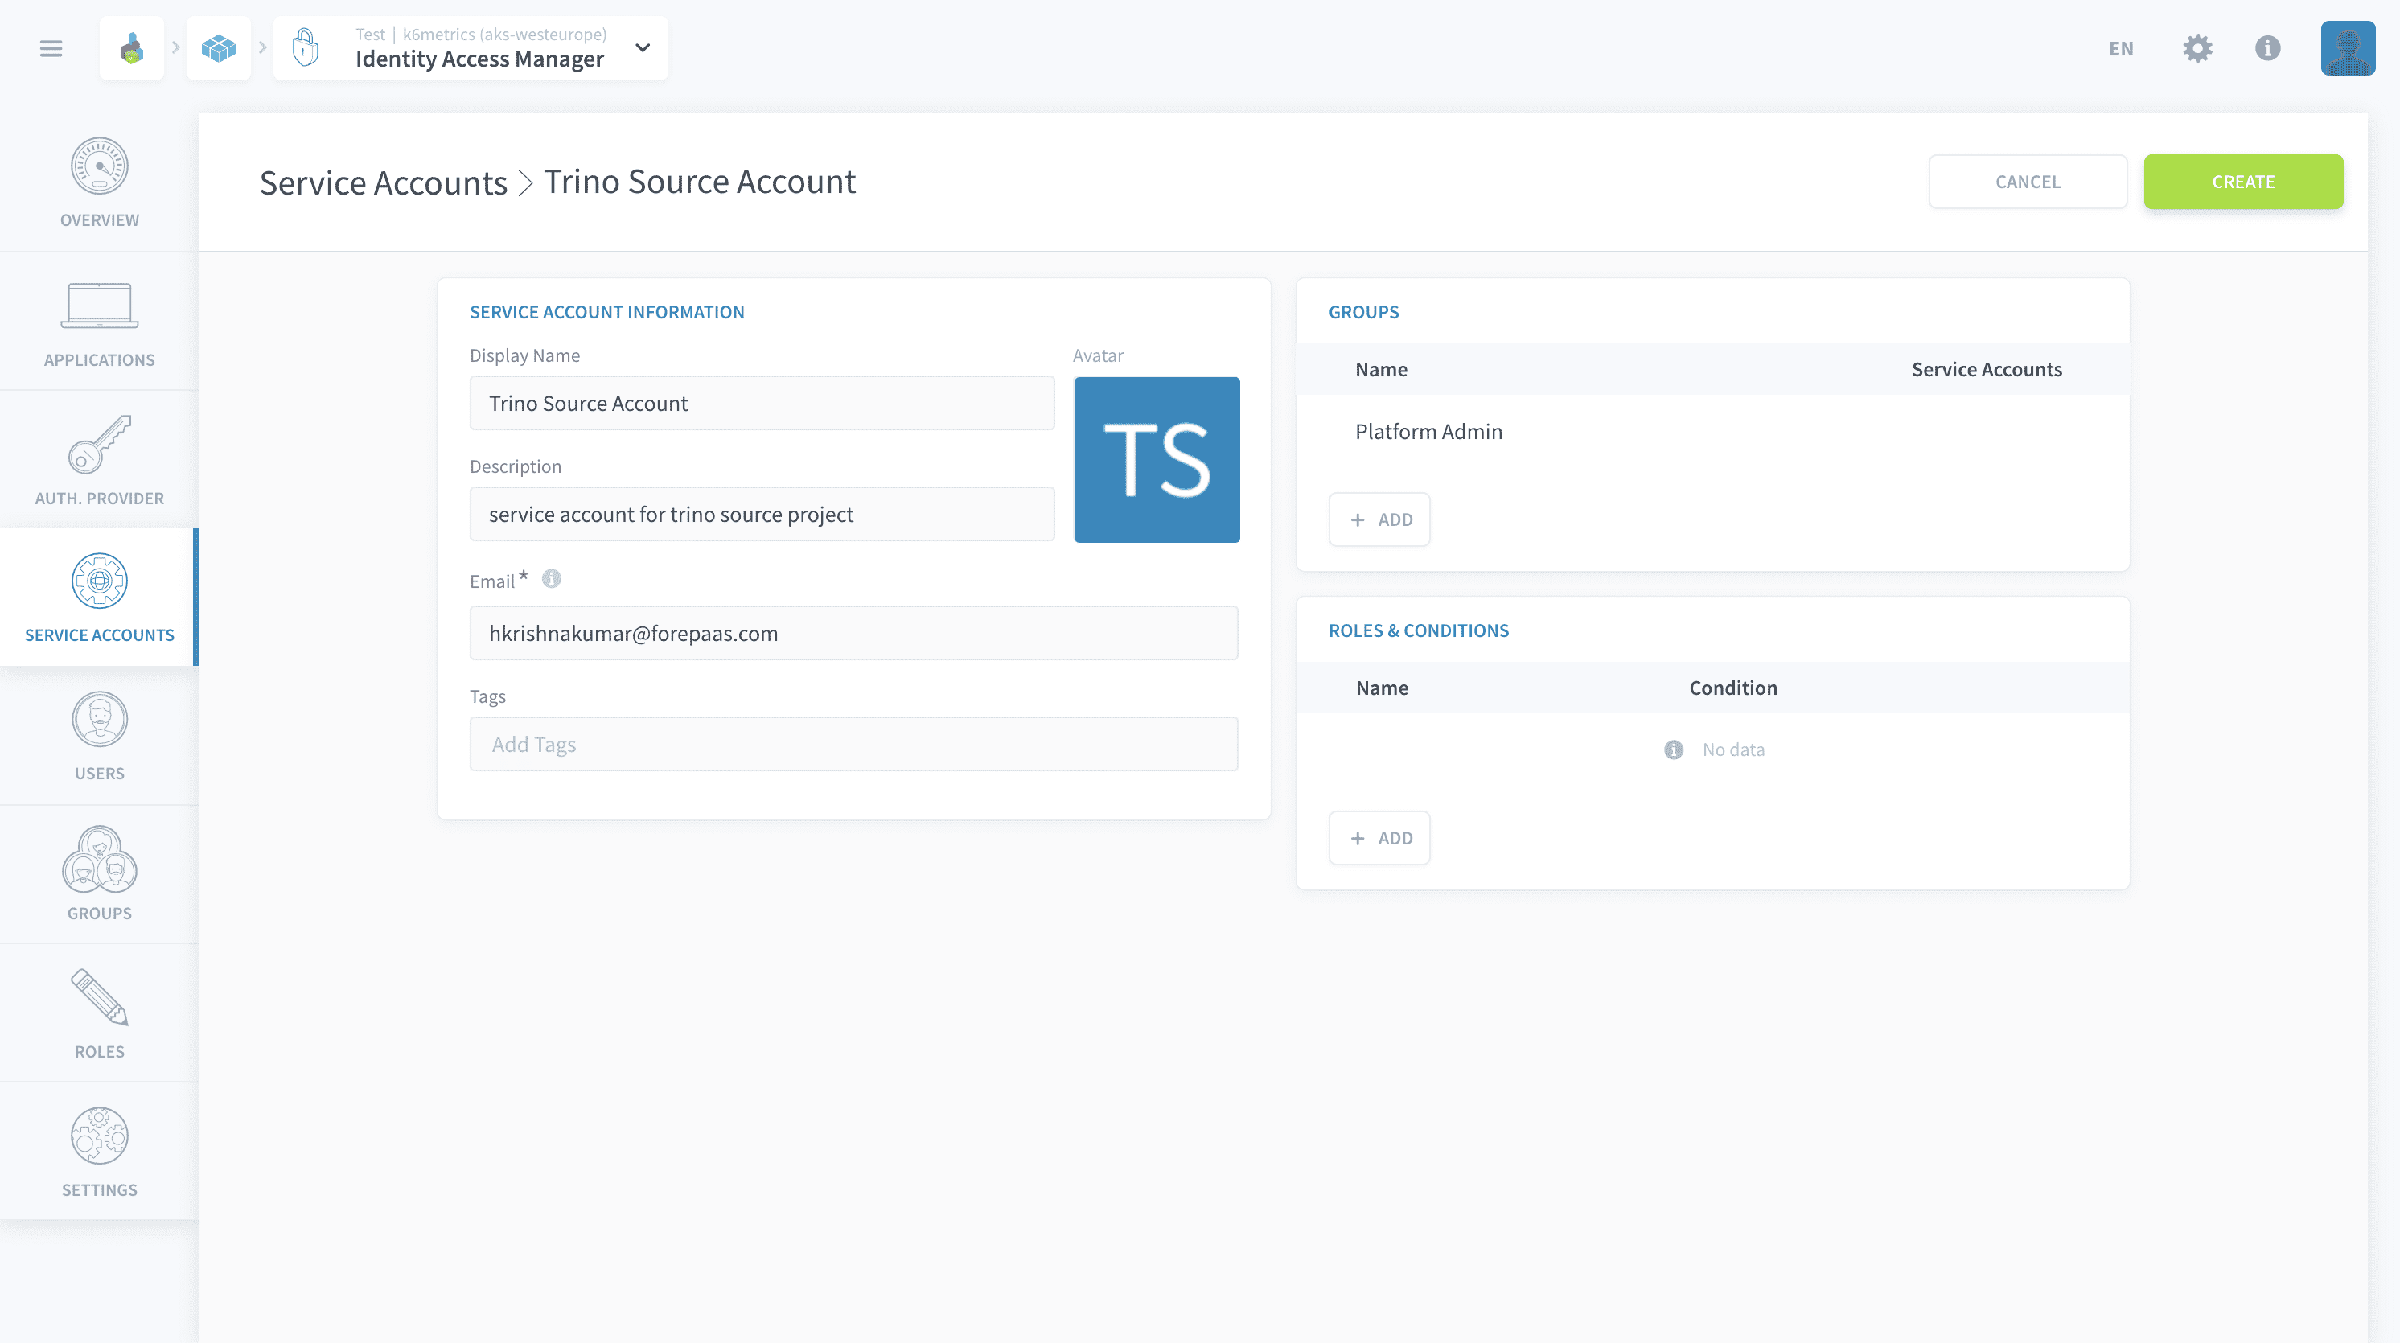
Make sure to add Platform Admin as the group for this service account
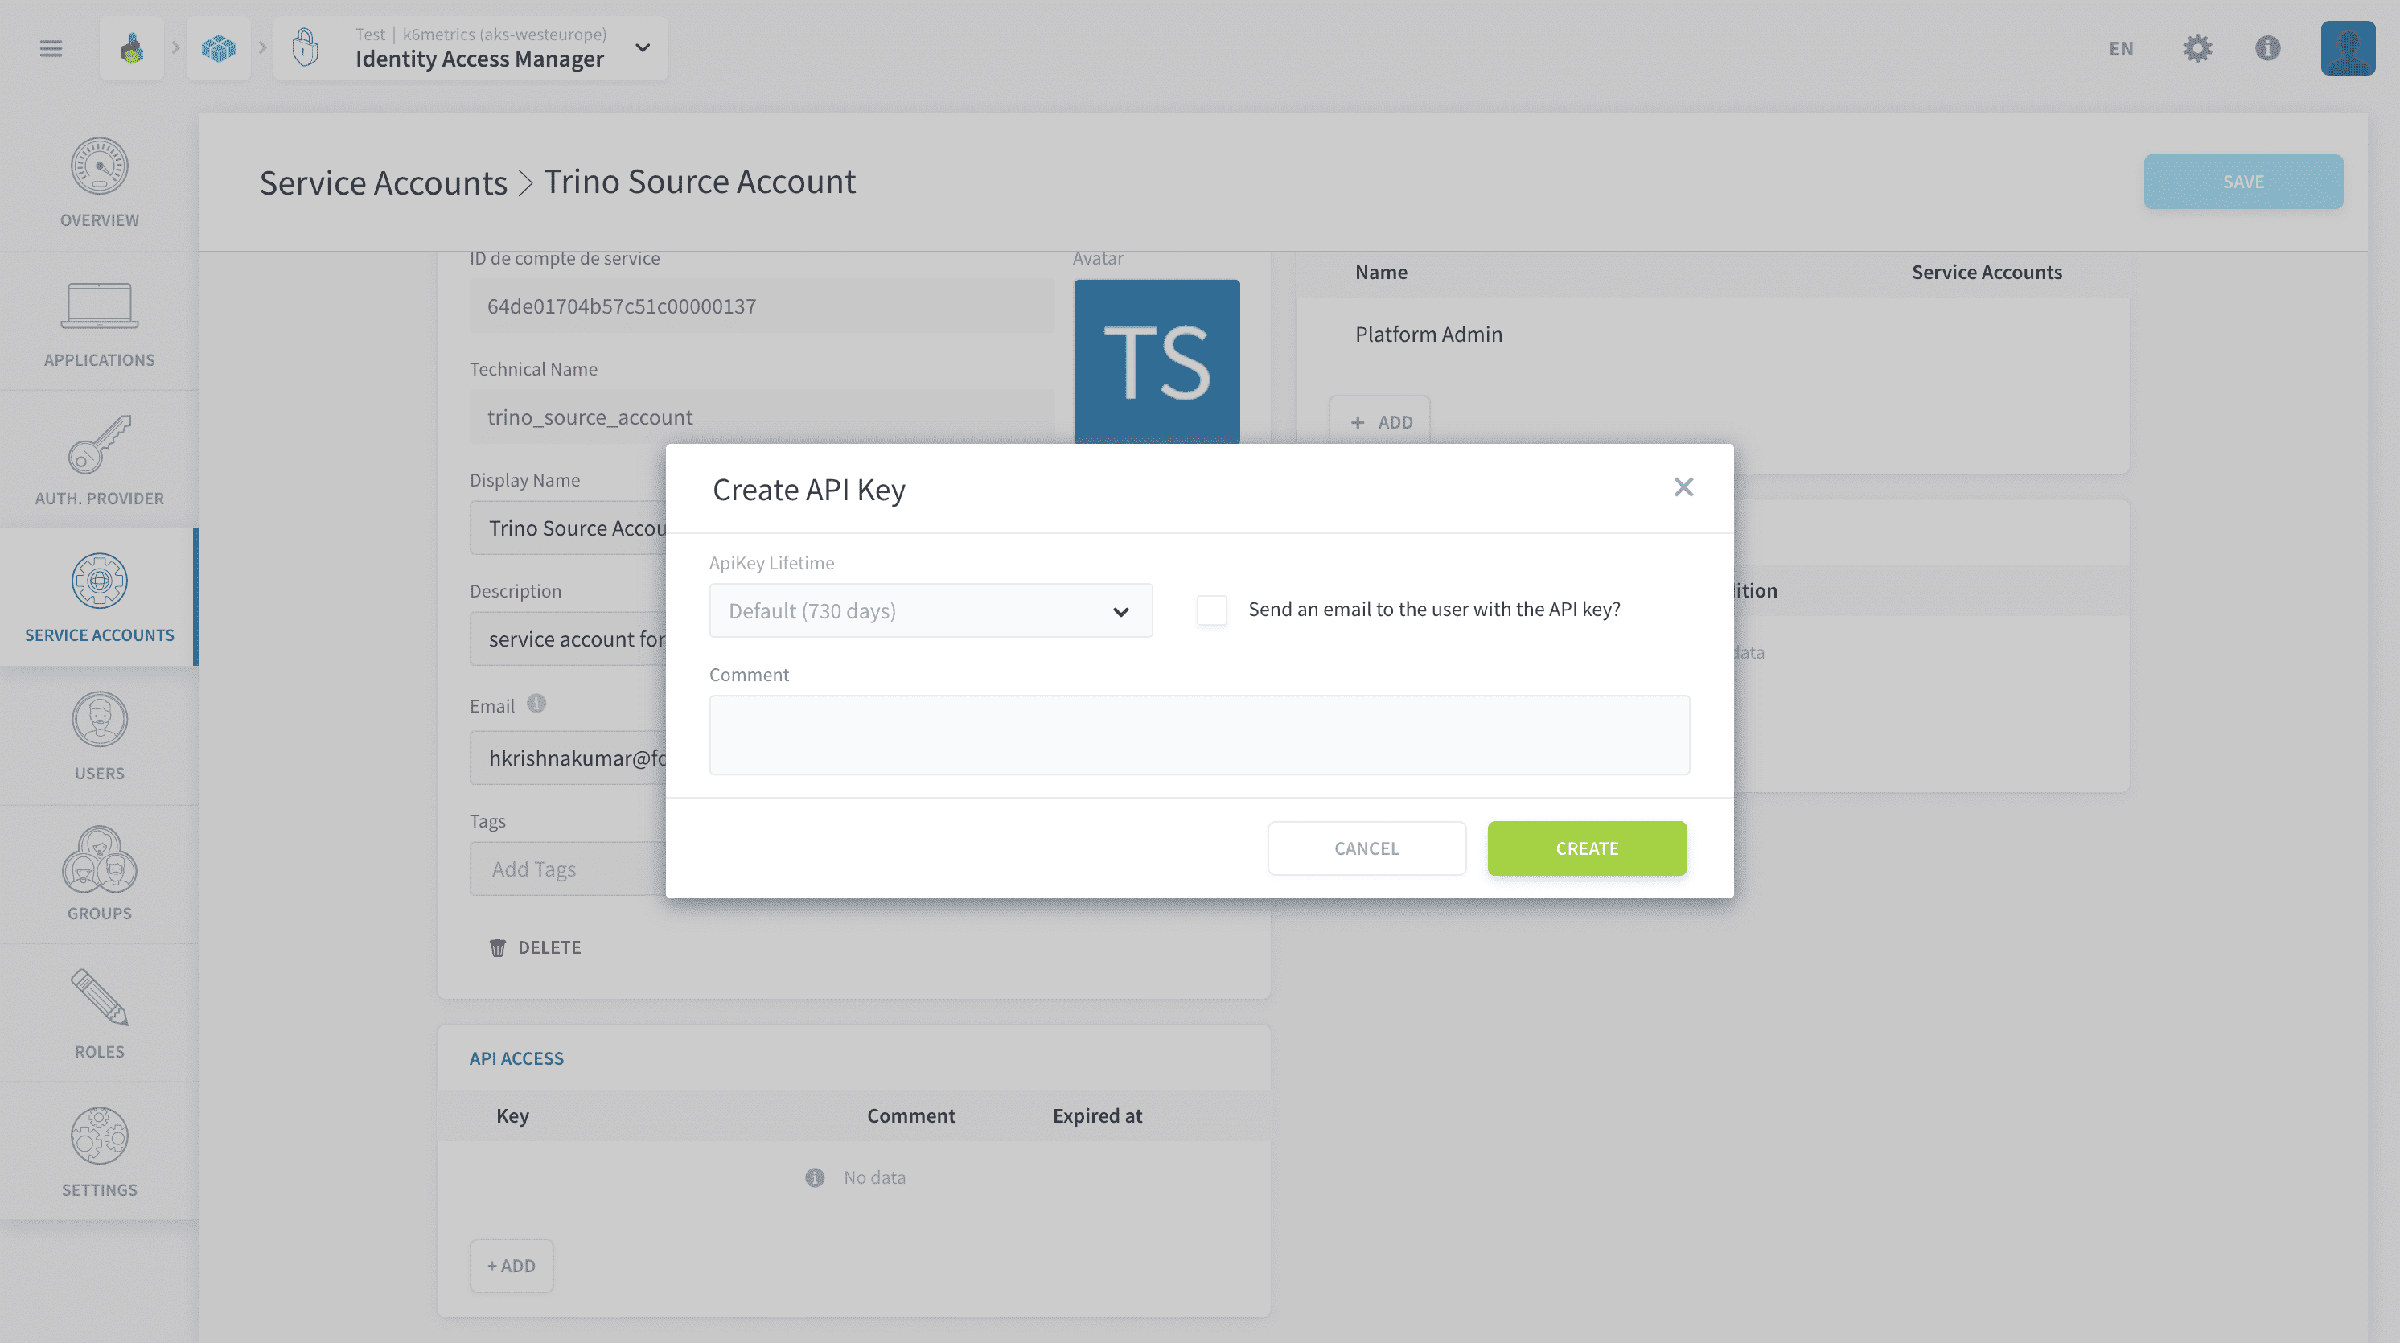
Once the service account has been successfully create, you need to generate a key for the API Access. Click on the add button as shown in the picture below, followed by create.
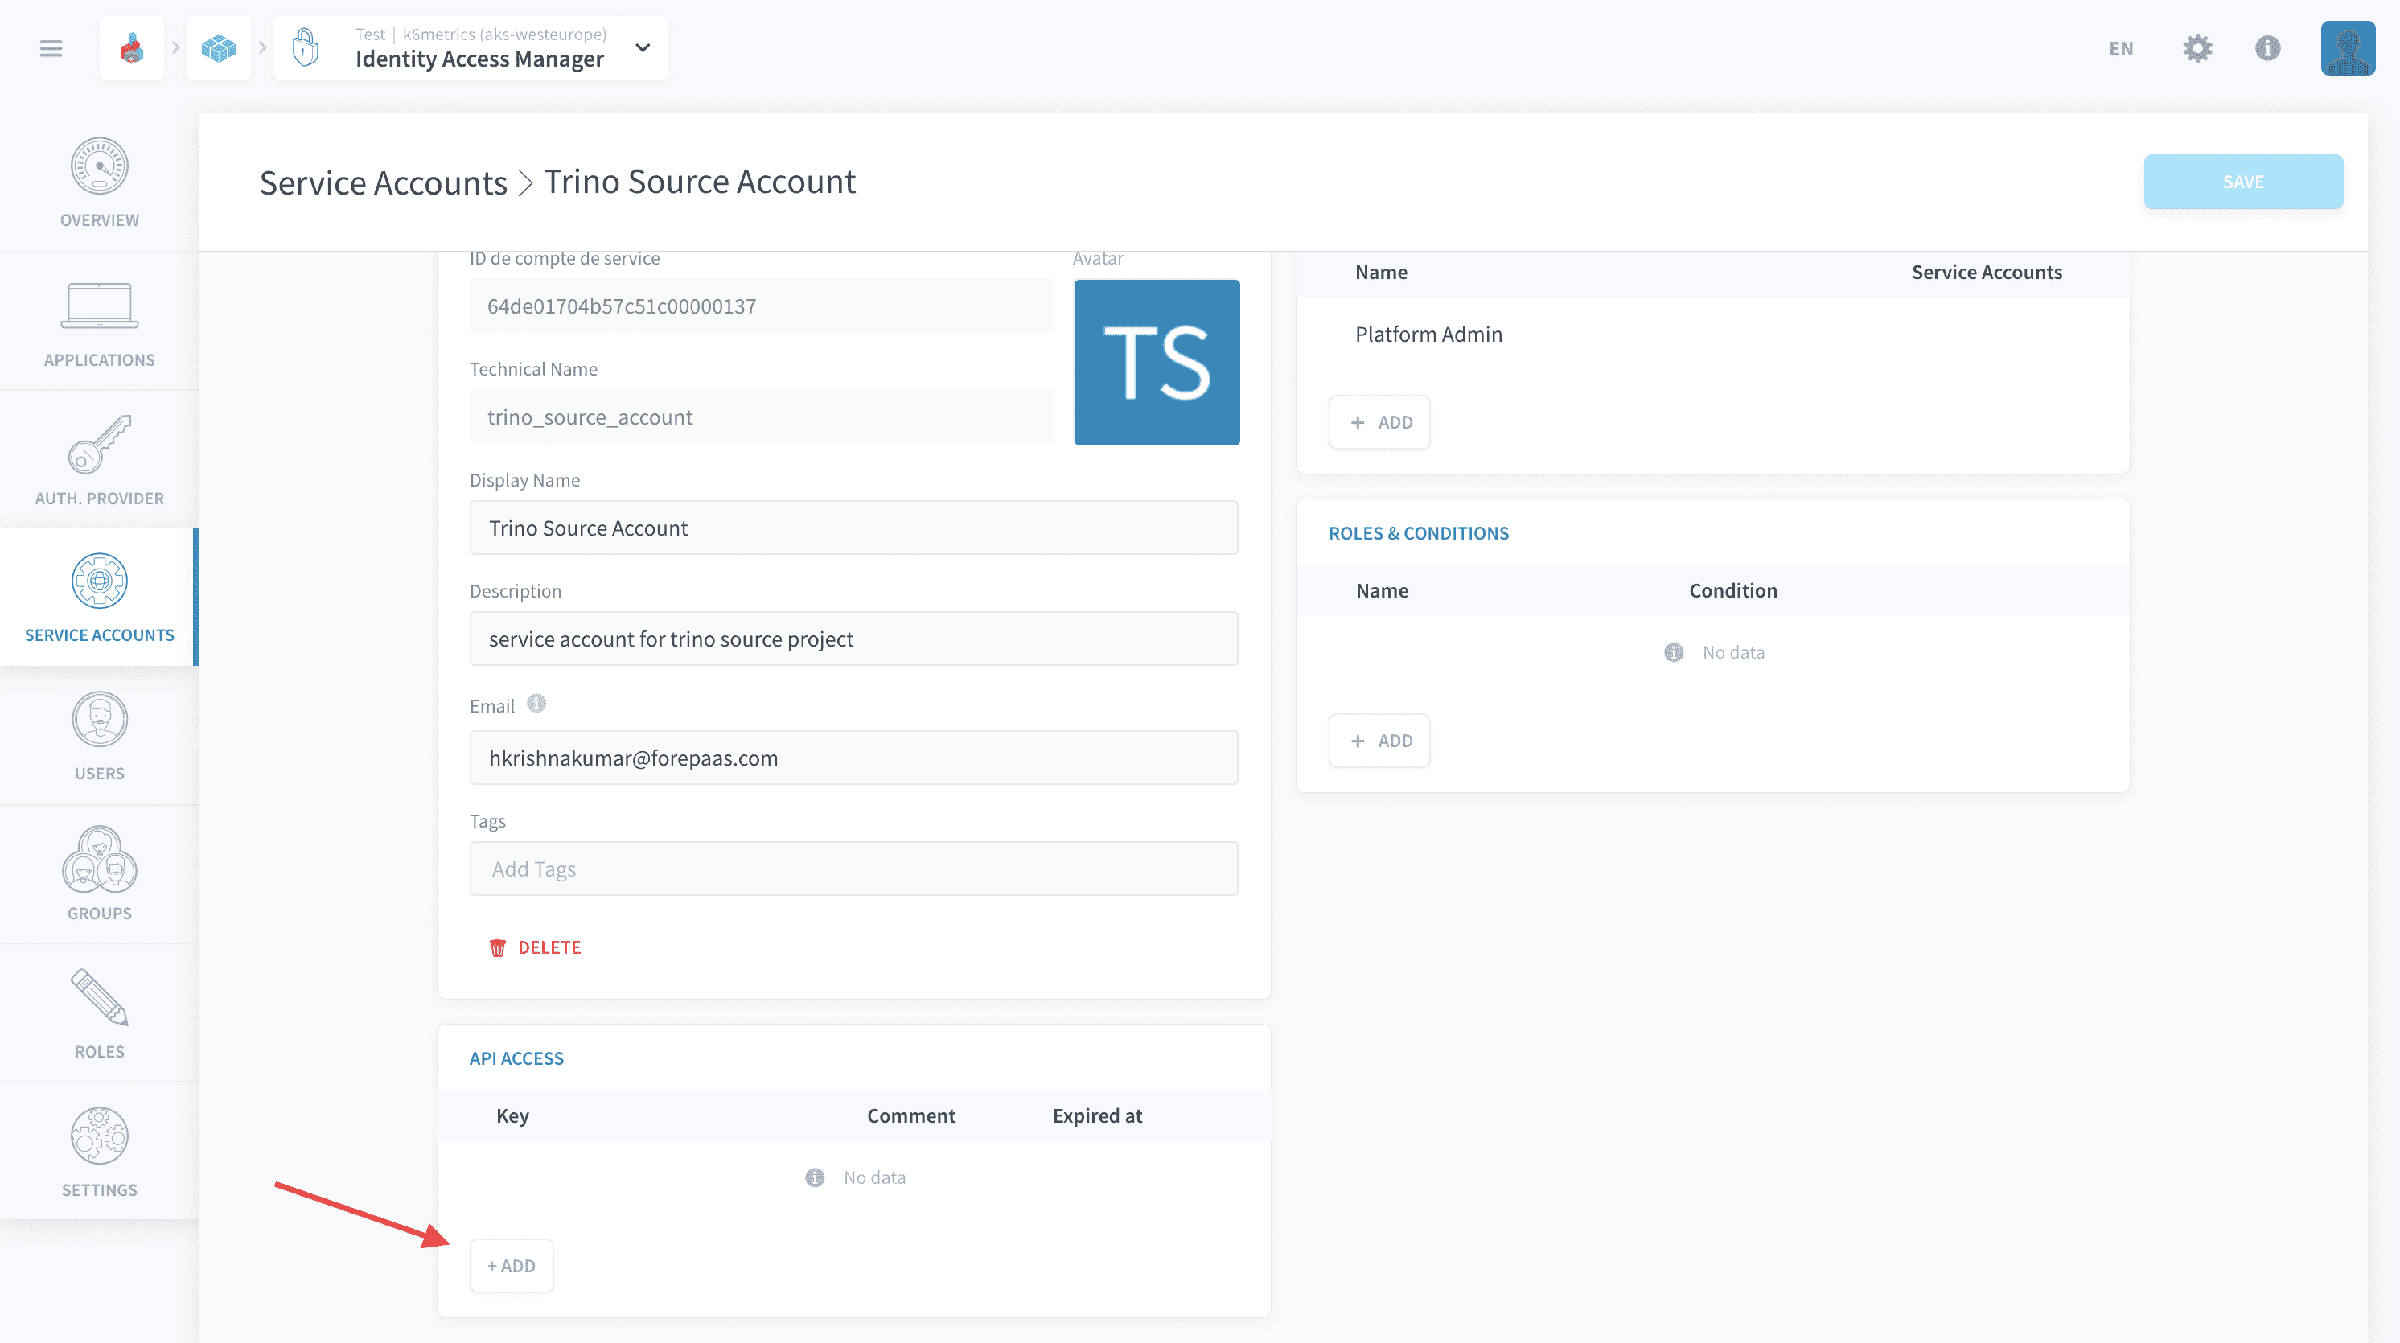
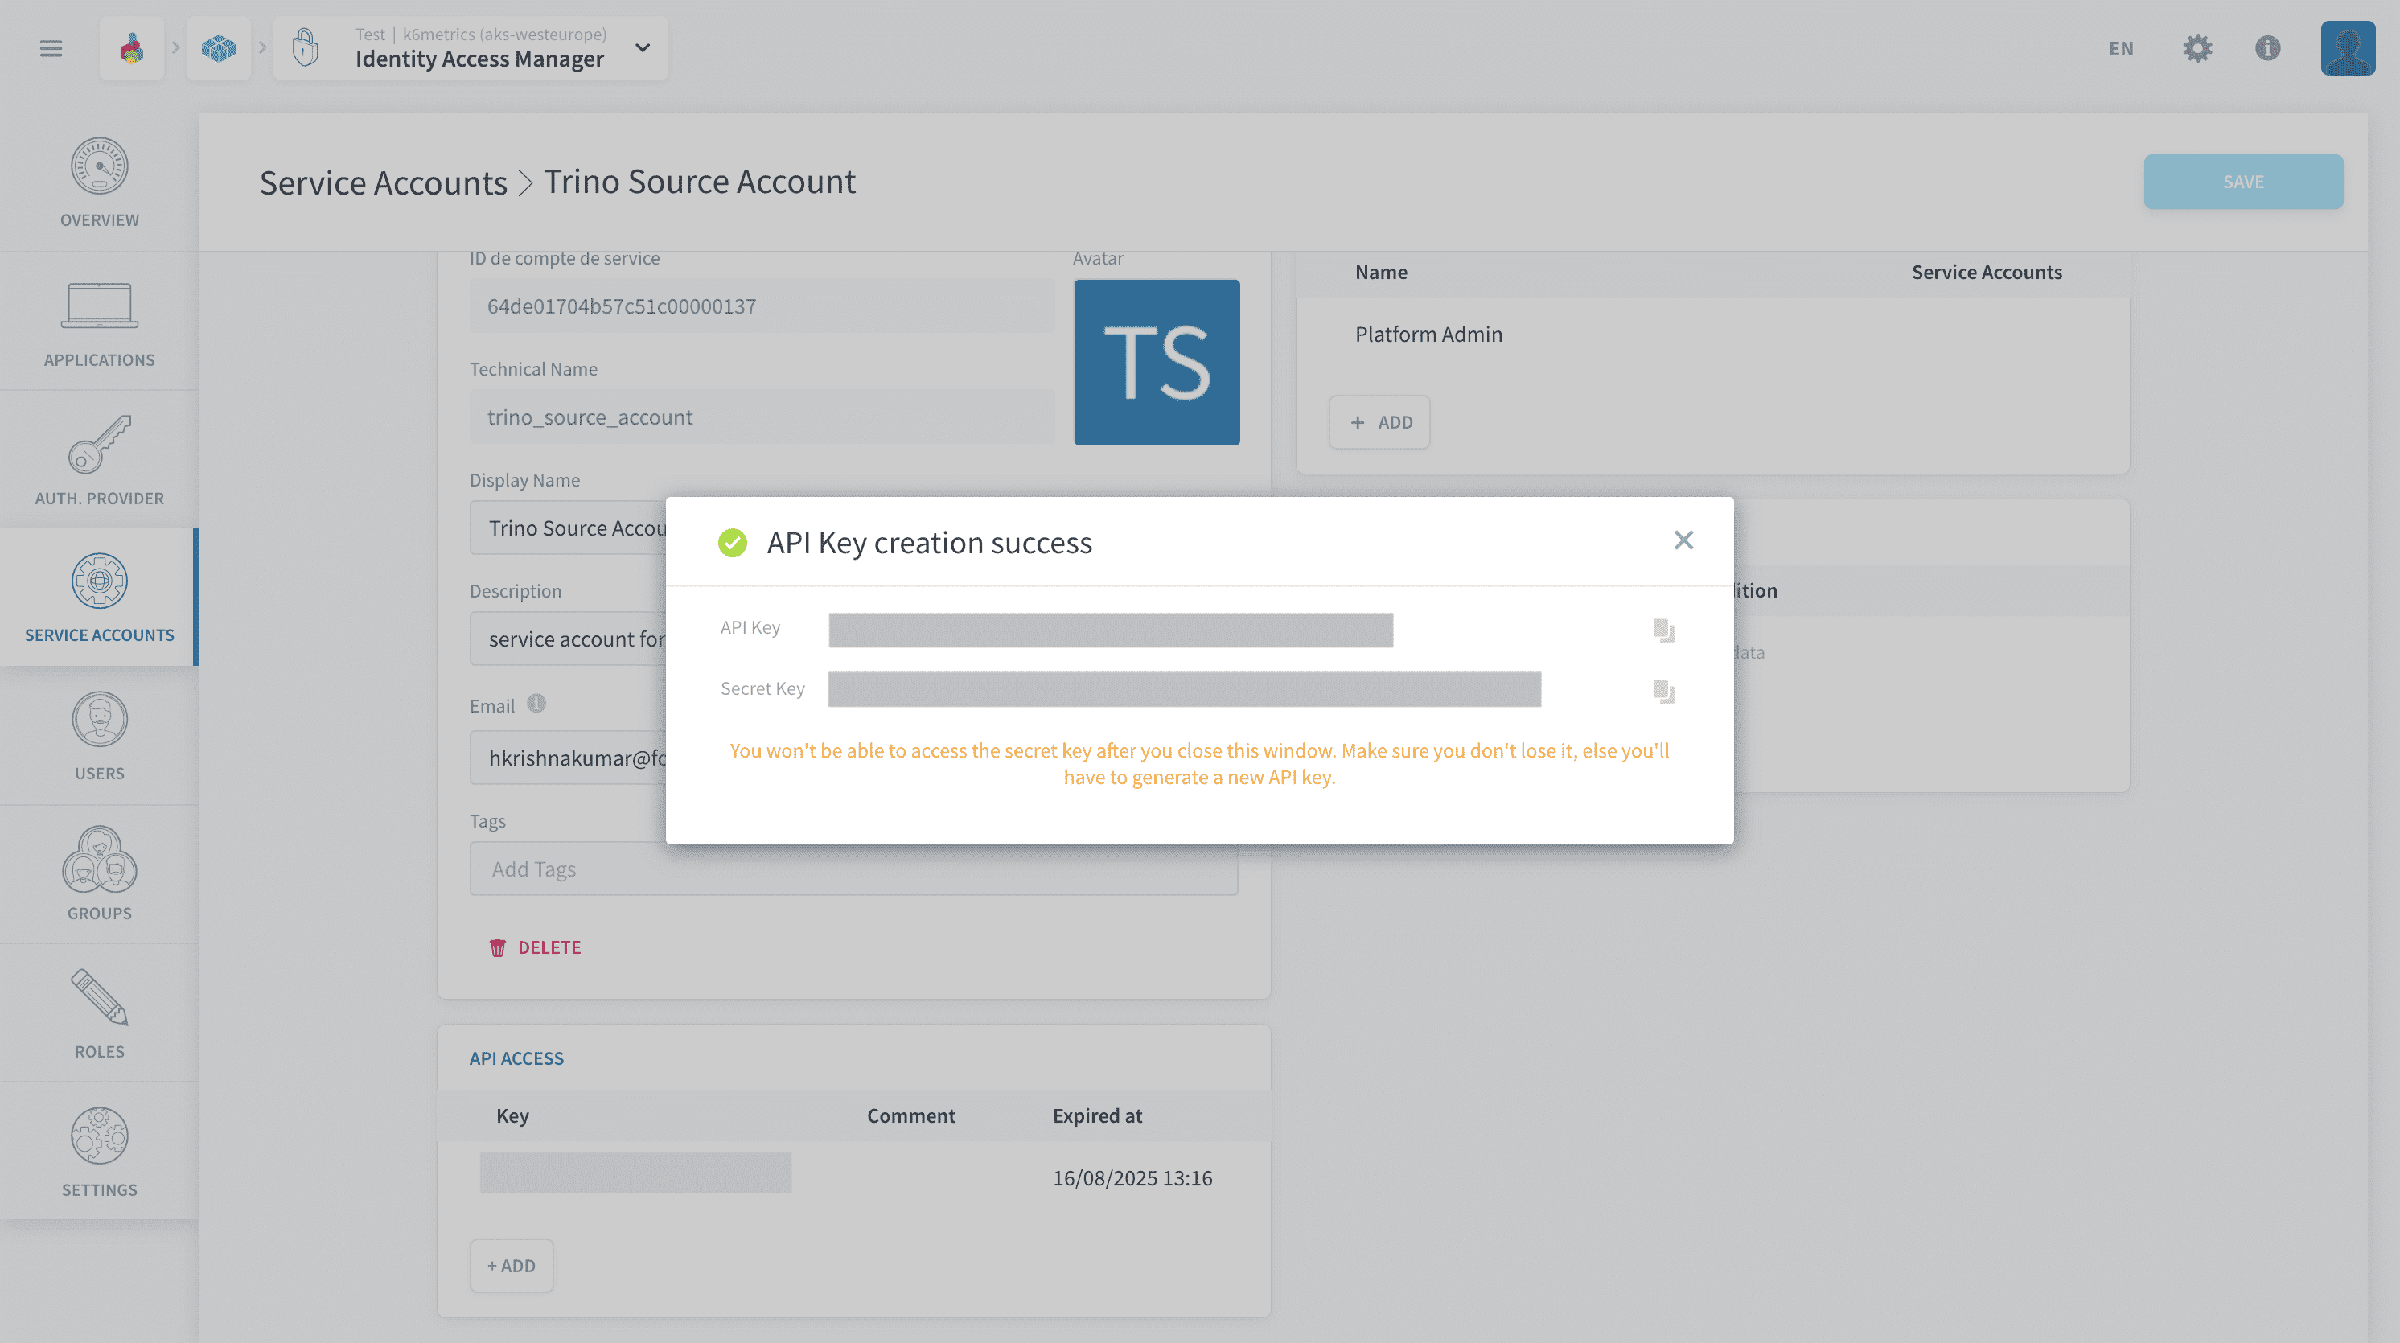
You will be provided with the API Key and the Secret Key. Make sure to copy and save them securely as you wont be able to access the Secret Key once you leave this page.
You have successfully completed all the steps required at the source project; the next part of the tutorial will continue on the destination project.
Steps to follow at destination project
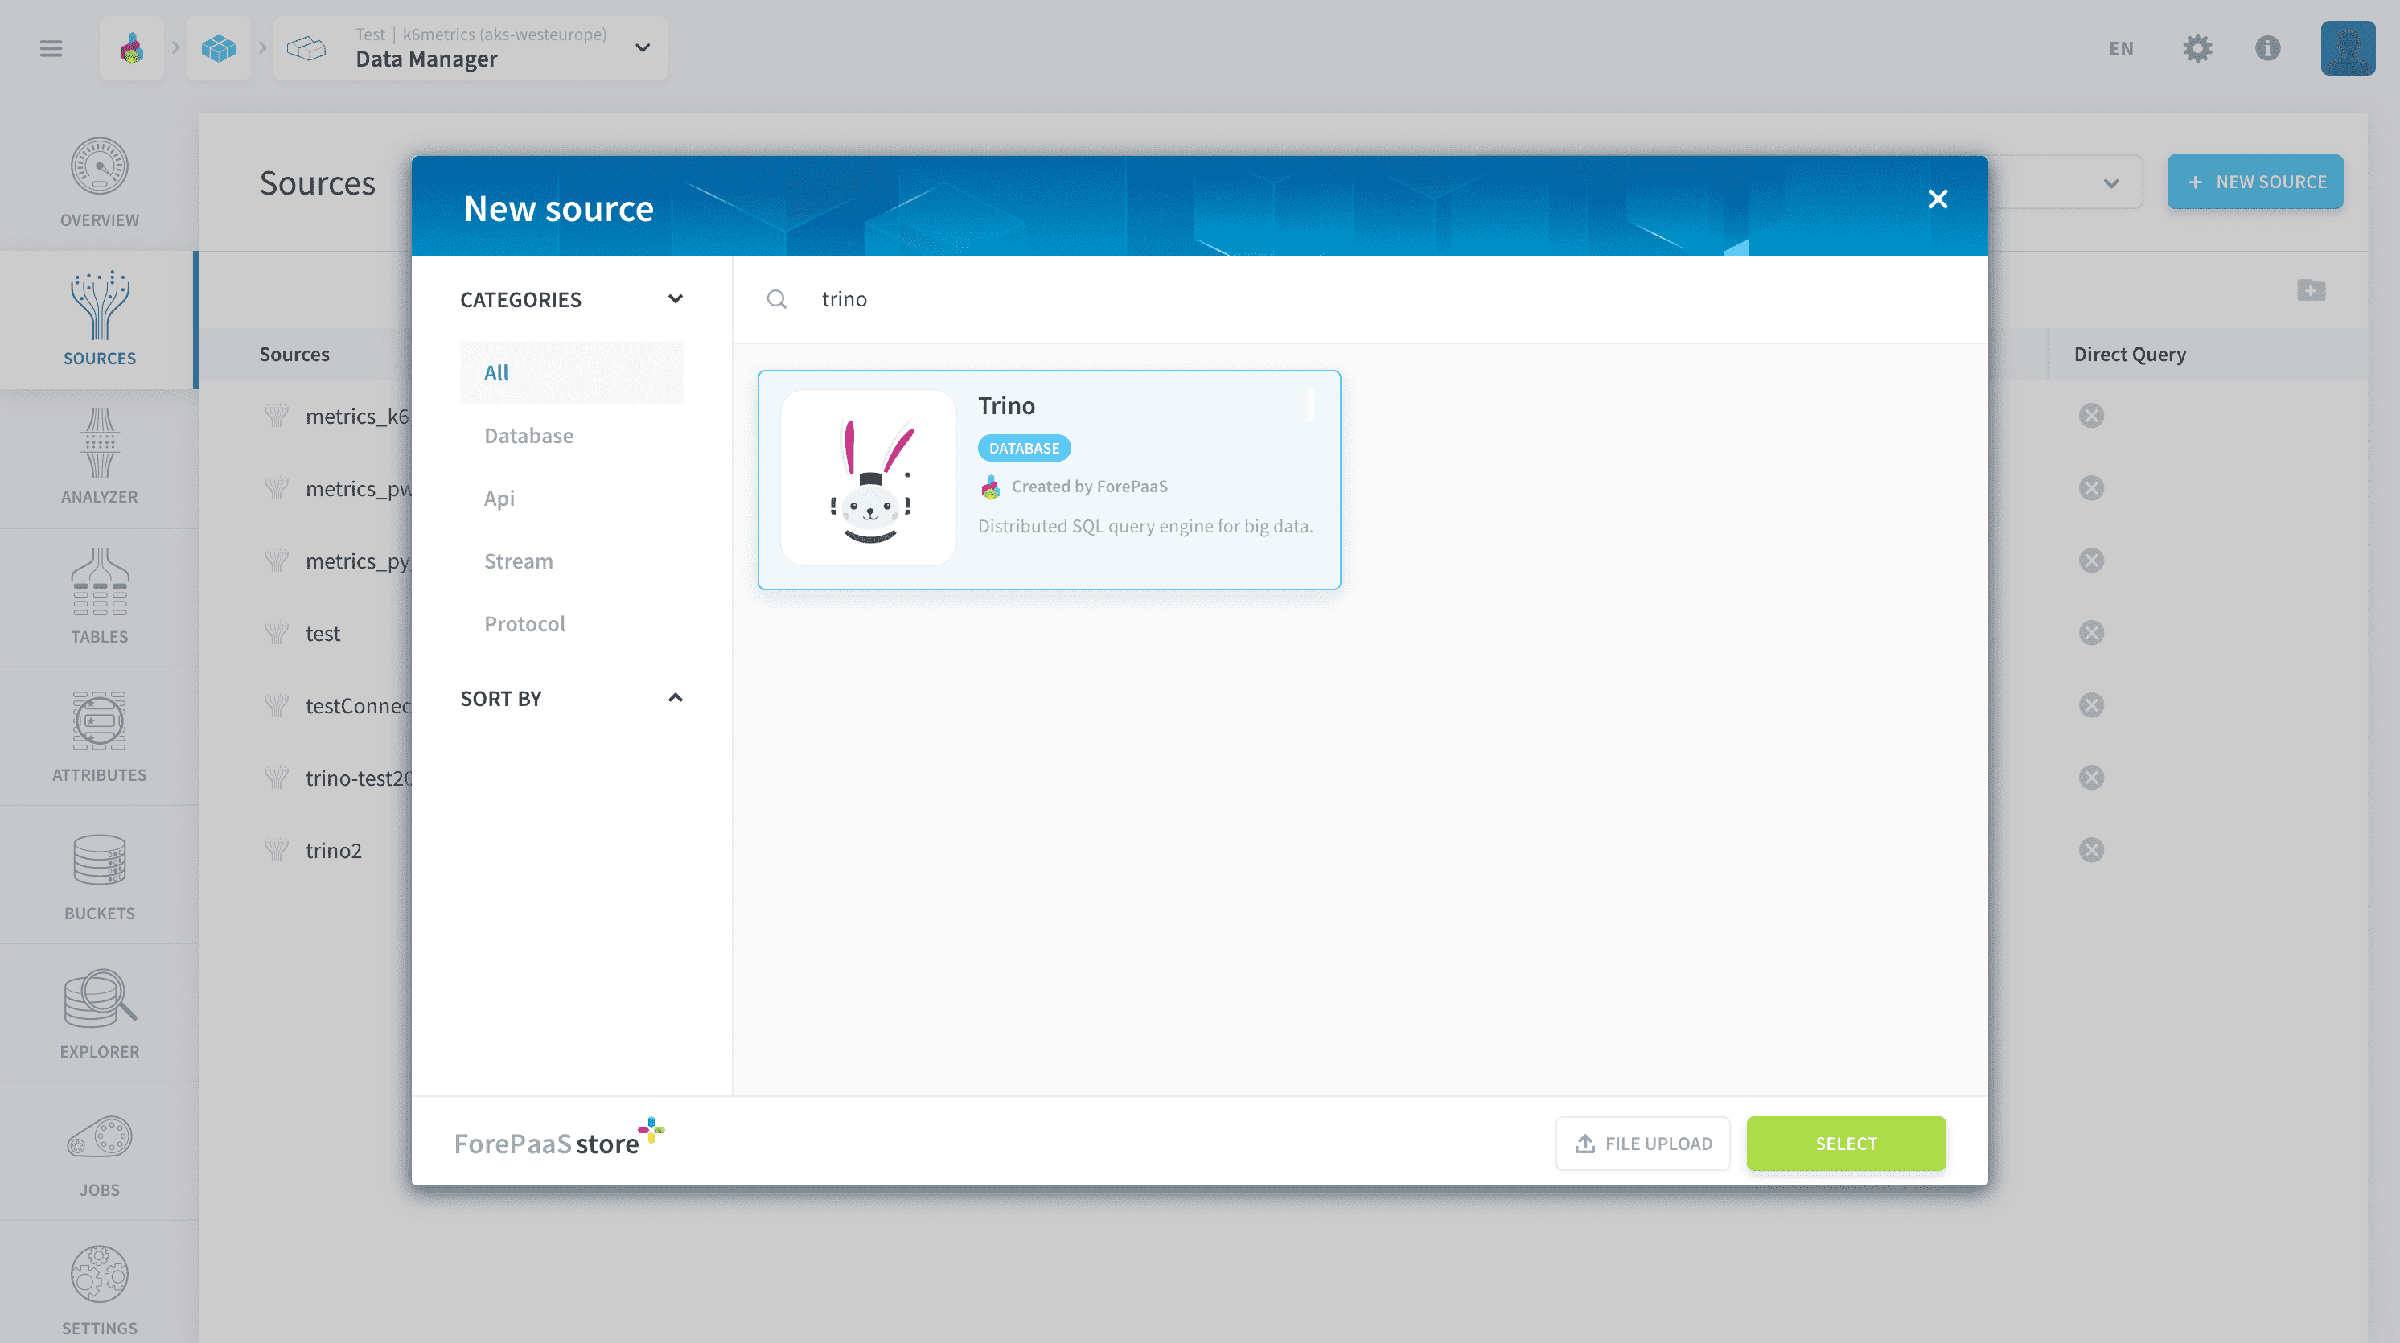
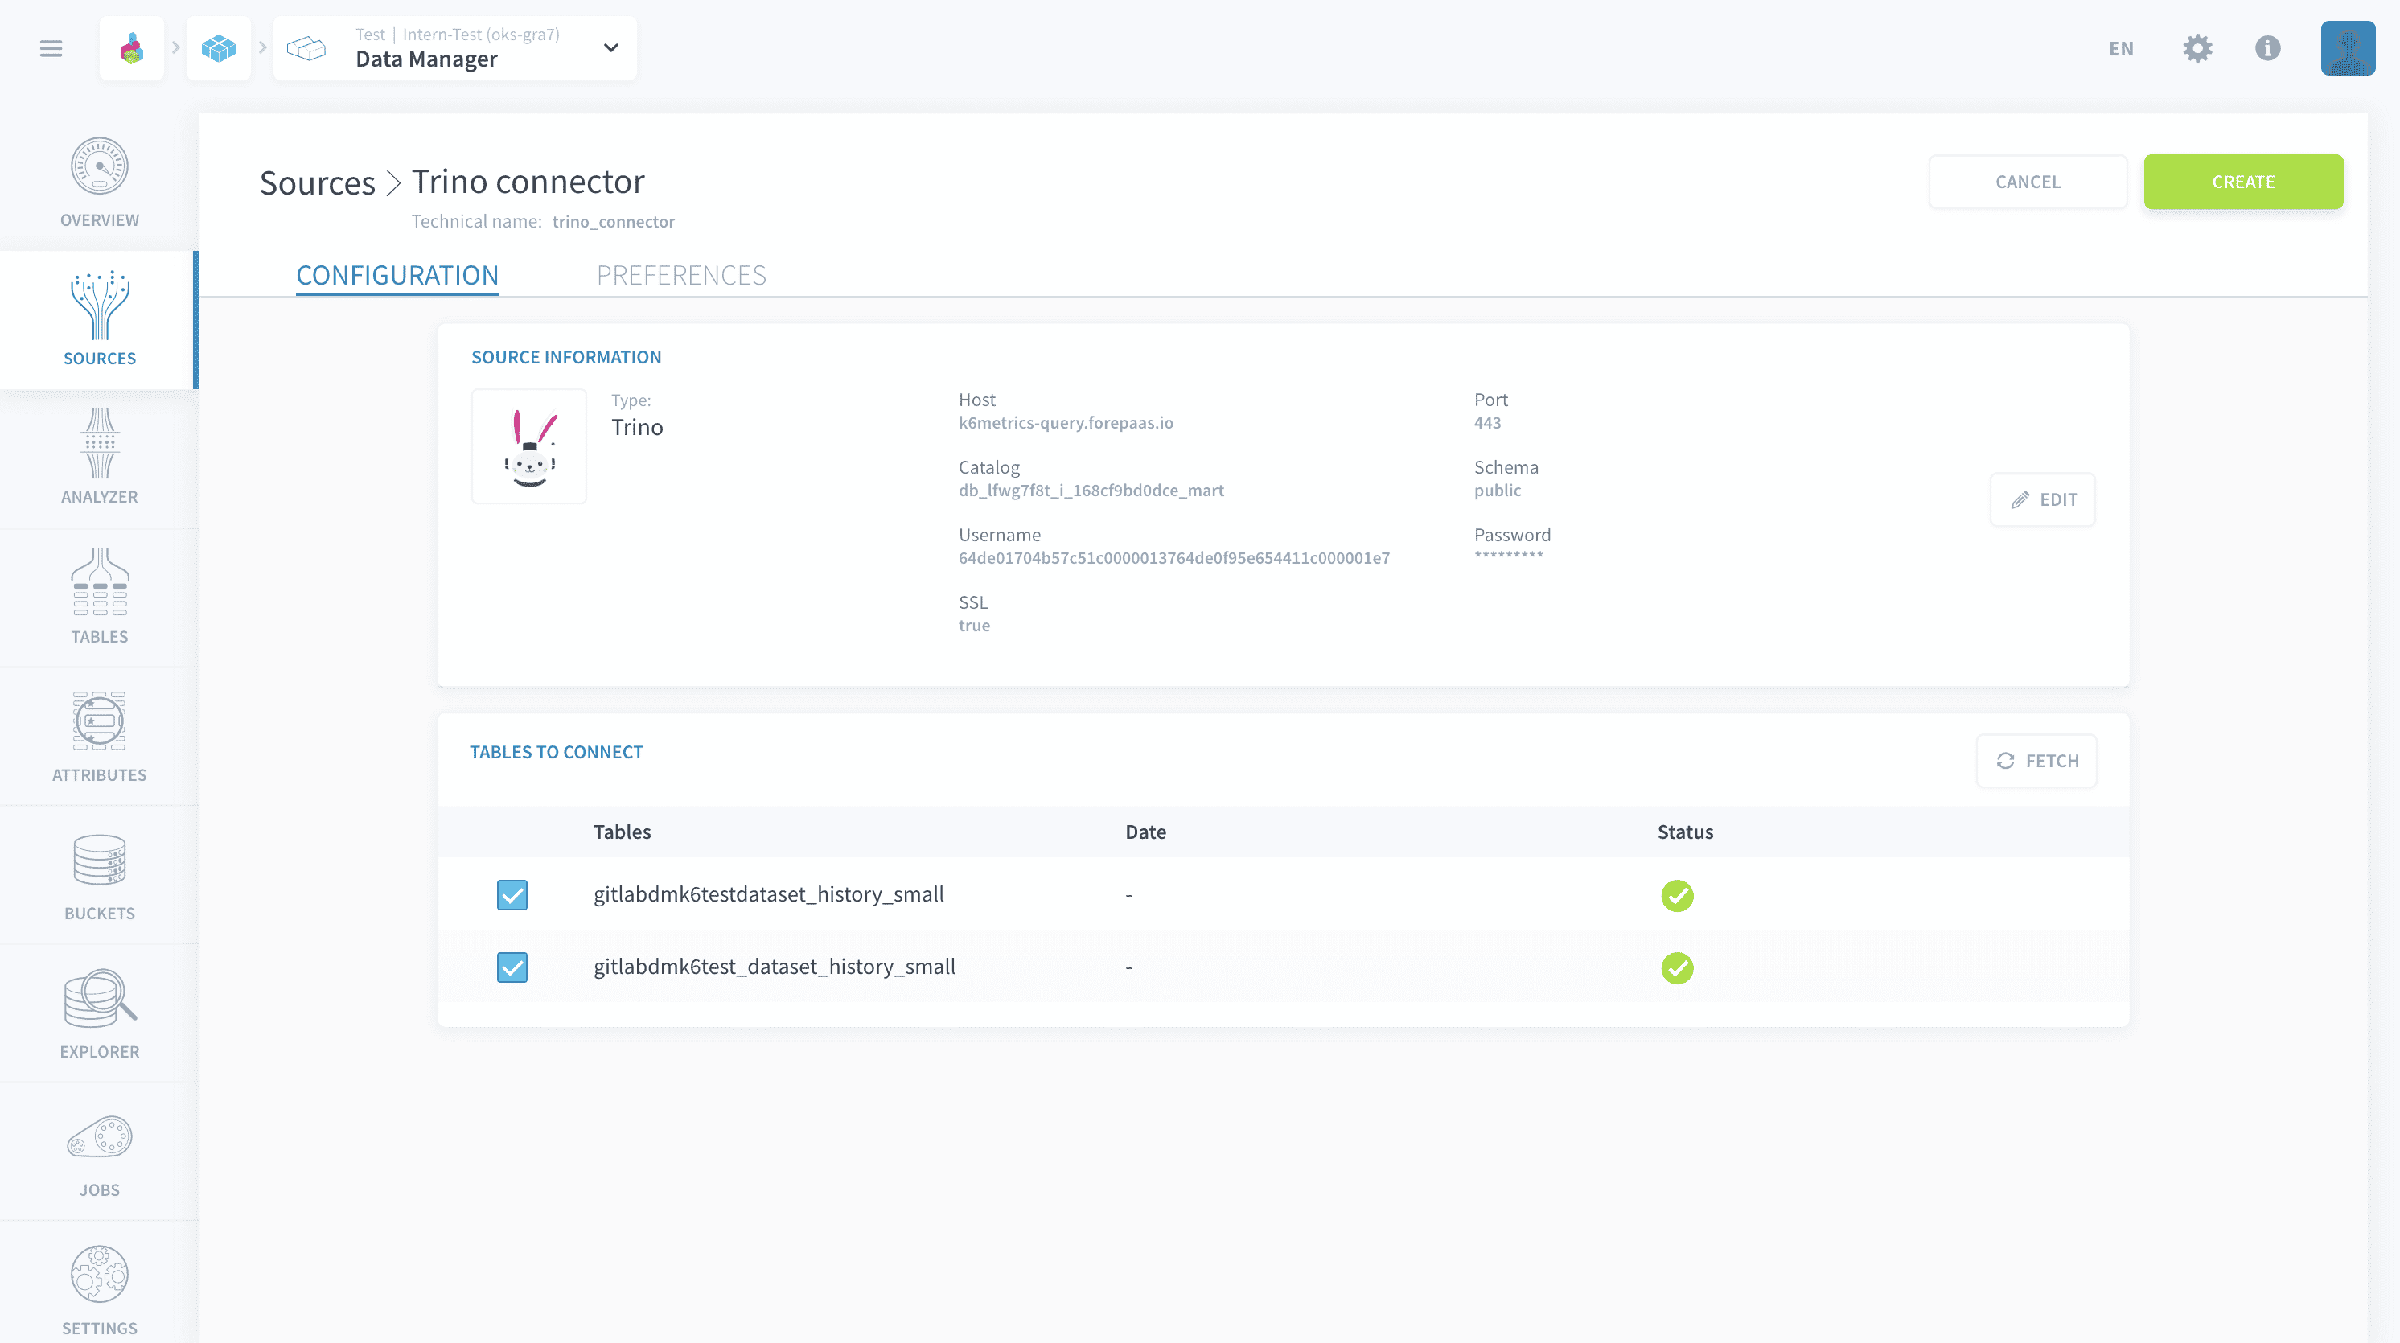
- Proceed to the Connectors and add a new Trino Source.
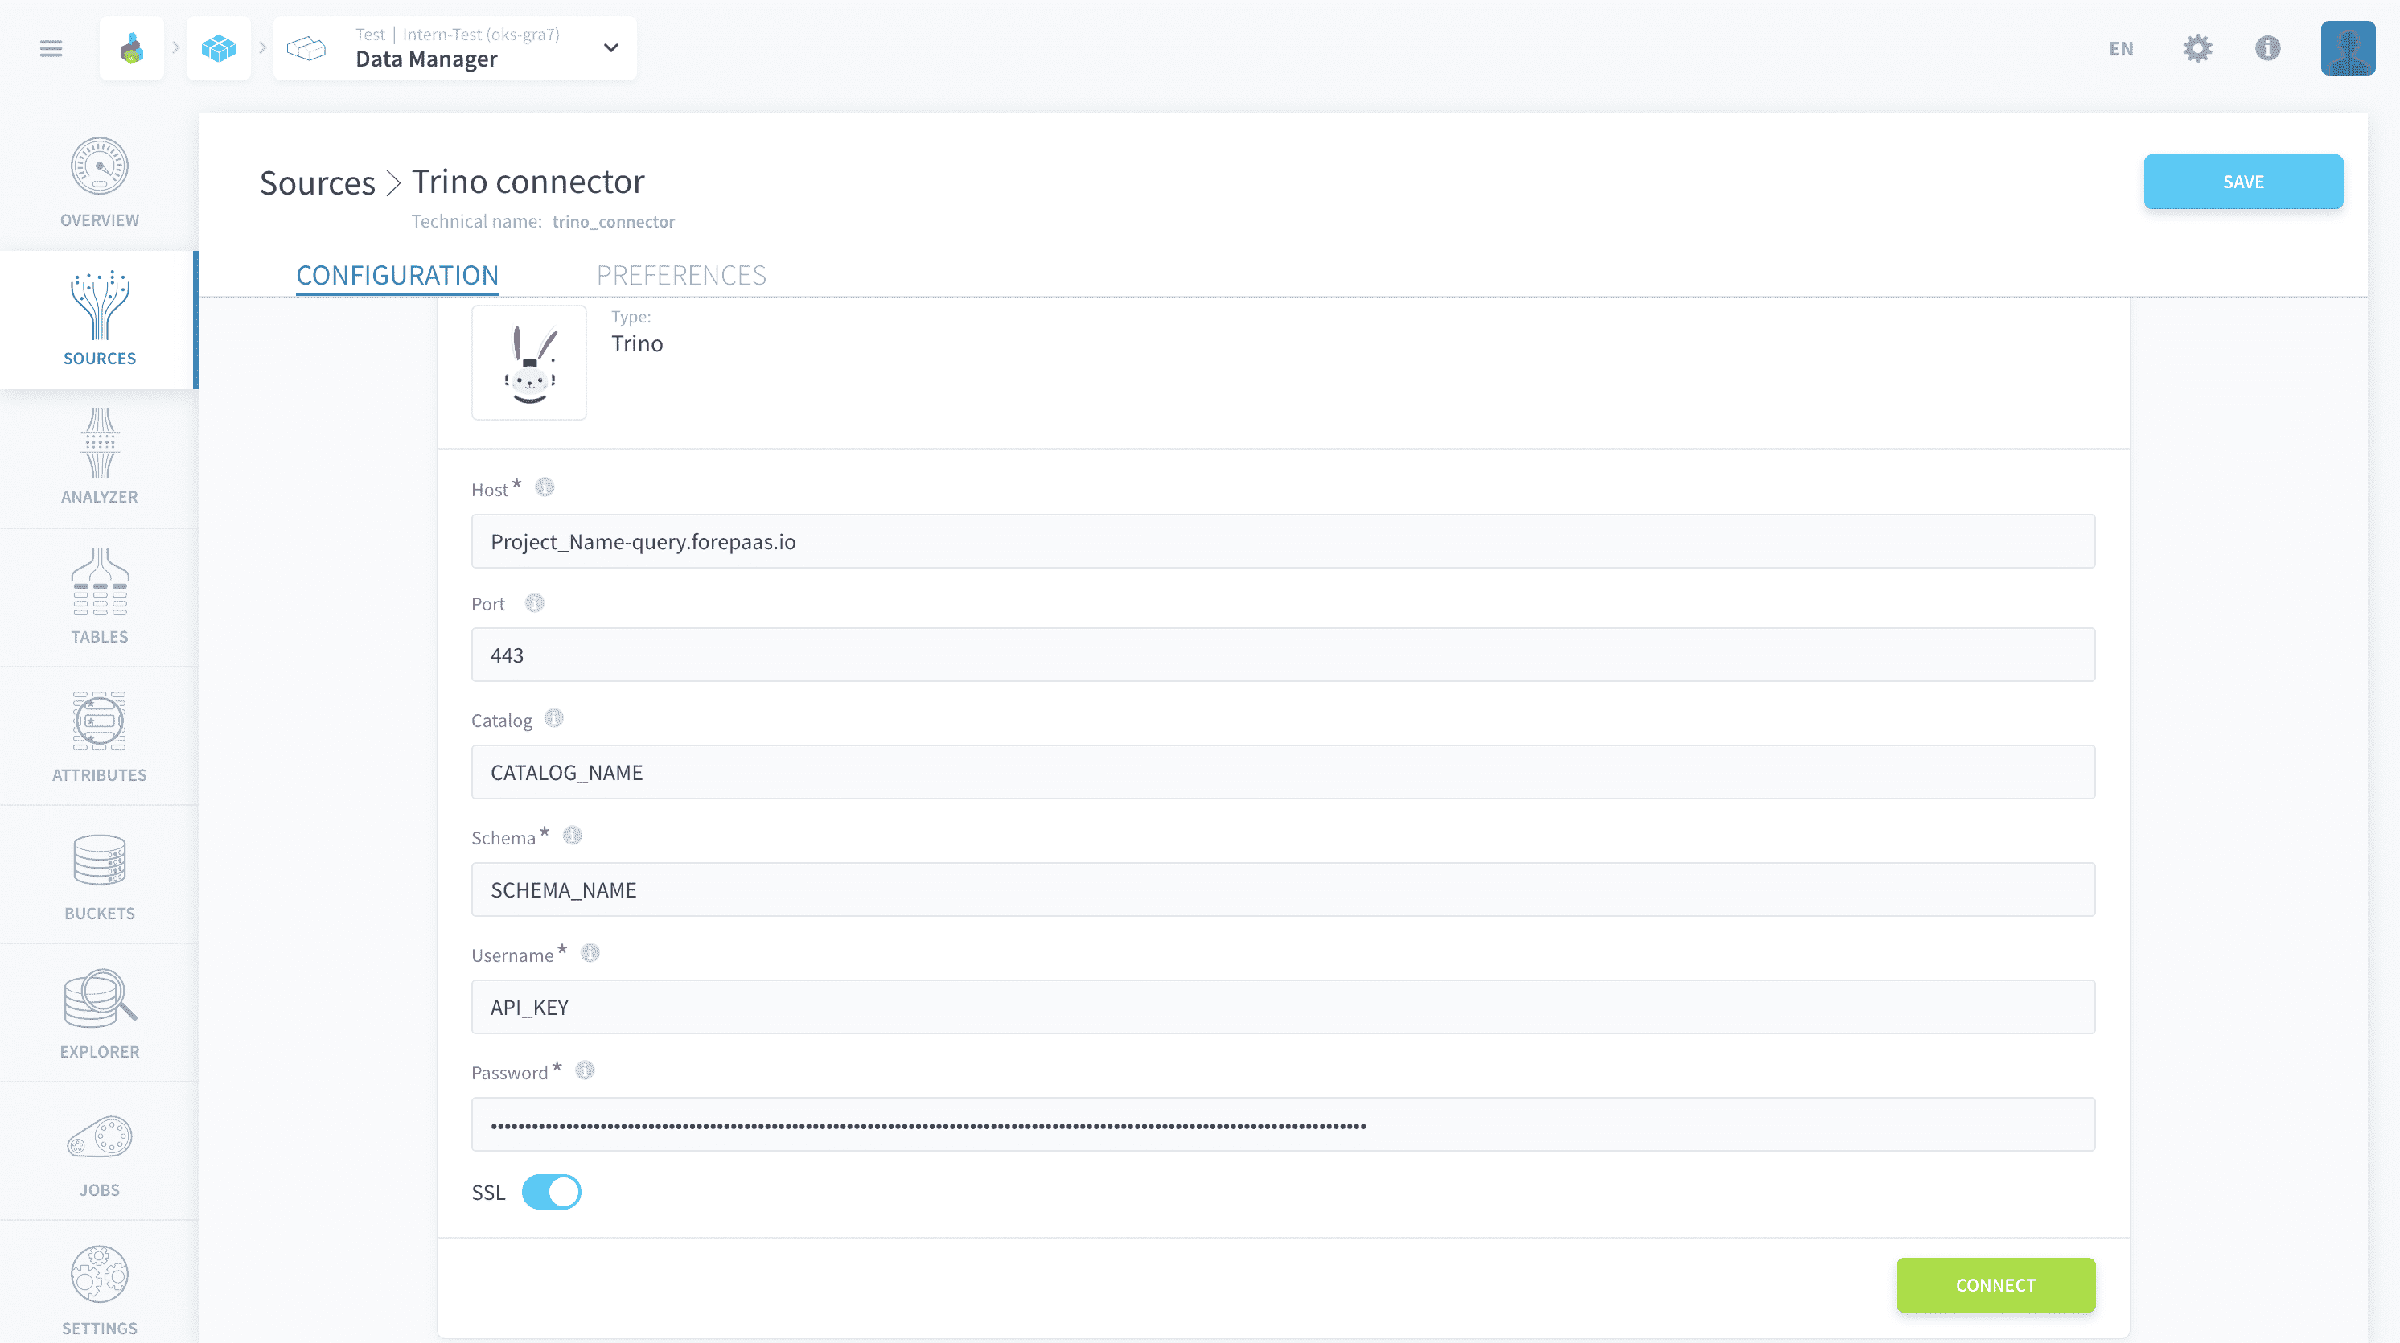
- Fill in the details as given below and click on connect
- Host: replace by your source Project_Name +
-query.eu.dataplatform.ovh.net - Port: 443
- Catalog: replace with your CATALOG_NAME
- Schema: replace with your SCHEMA_NAME
- Username: replace with API_KEY
- Password: replace with SECRET_KEY
- SSL: activated
- Once the Trino Connection has been successfully established, the list of available tables will be populated. Click on the box next to table name you desire to extract from the source and click create.
Using the extracted data
Once all the previous steps have been completed, you can visit the Analyzer tab within the Connectors to verify the extracted tables.
To use this extracted data you can follow step three of the Getting Started Tutorial.
Go further
If you need training or technical assistance to implement our solutions, contact your sales representative or click on this link to get a quote and ask our Professional Services experts for a custom analysis of your project.
Ask questions, give your feedback and interact directly with the team building the Data Platform on the dedicated Discord channel.
If you need support with your OVHcloud services, create a request in our Help Centre.
Join our community of users.