

Load raw source data into your warehouse with the Load action
This article is about actions that use Data Platform's proprietary Python data processing engine. To use Apache Spark clusters, see Load PySpark action
Objective
This article is about actions that use Data Platform's proprietary Python data processing engine. To use Apache Spark clusters, see Load PySpark action.
The Load action extracts raw data from sources and inserts it into primary tables in your data warehouse. It is usually the first step in any data processing system, necessary before running any other processes on data coming from connected sources.
In other terms, if you've set-up a connector through the Connectors, the Project has the information to connect to the source as well as its metadata, but won't contain the actual data until it is actually loaded using the Load action.
Configure a Load action
To create a new Load action, navigate to the Action tab of the Data Processing Engine (DPE), click on New Action and select the Load action.
Choose a source and destination
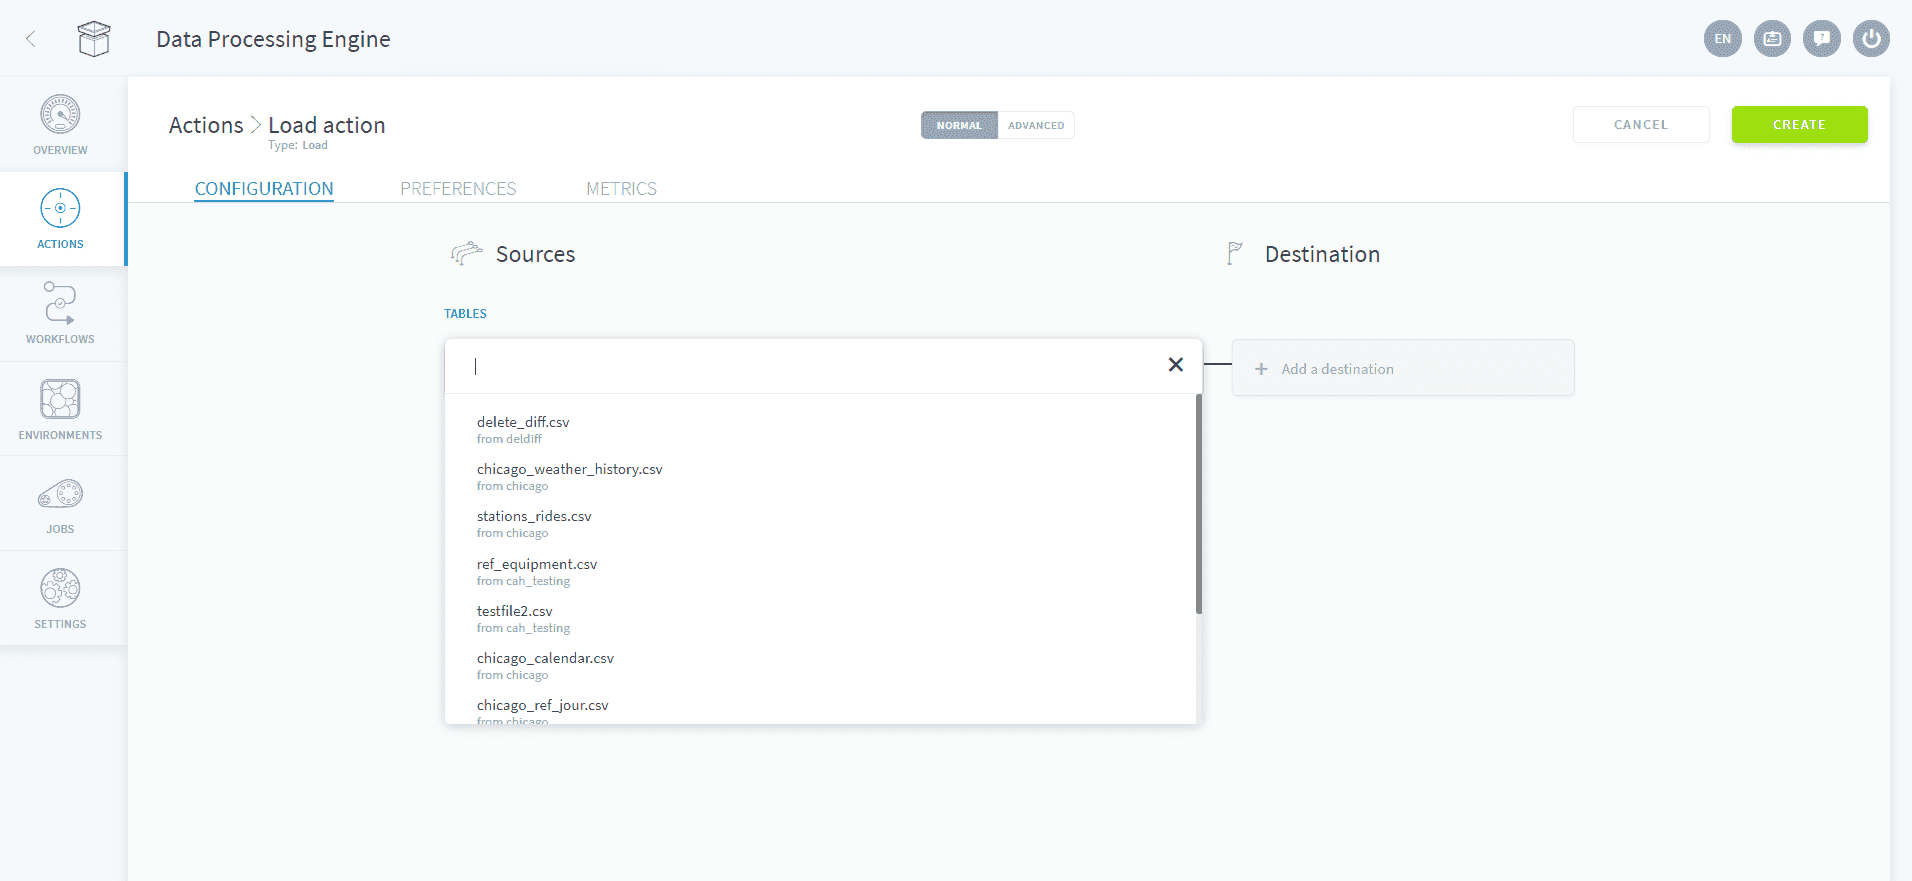
To set-up the Load action, start by selecting a source from the list that you have already set-up in the Sources tab of the Connectors.
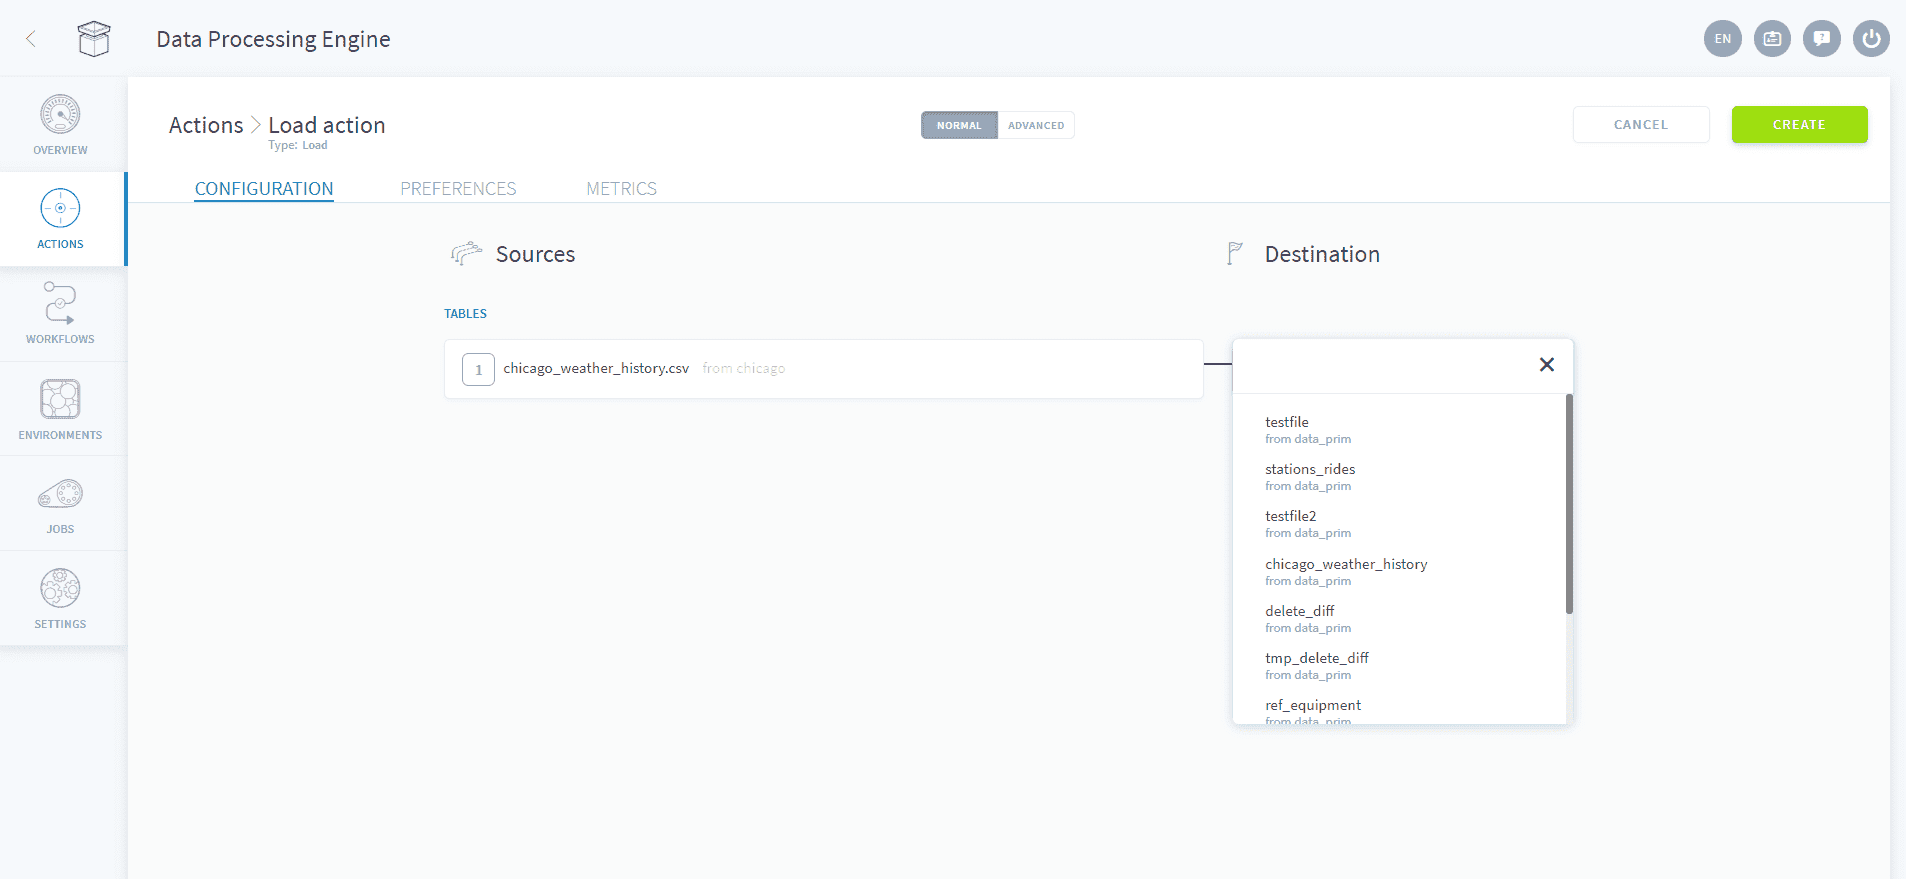
Then a destination table to send your data to. Similarly to the sources, the tables have to be configured ahead of time in the Tables tab of the Lakehouse Manager. Make sure you've built your data model otherwise the tables won't be accessible by other components in the platform.
Map attributes
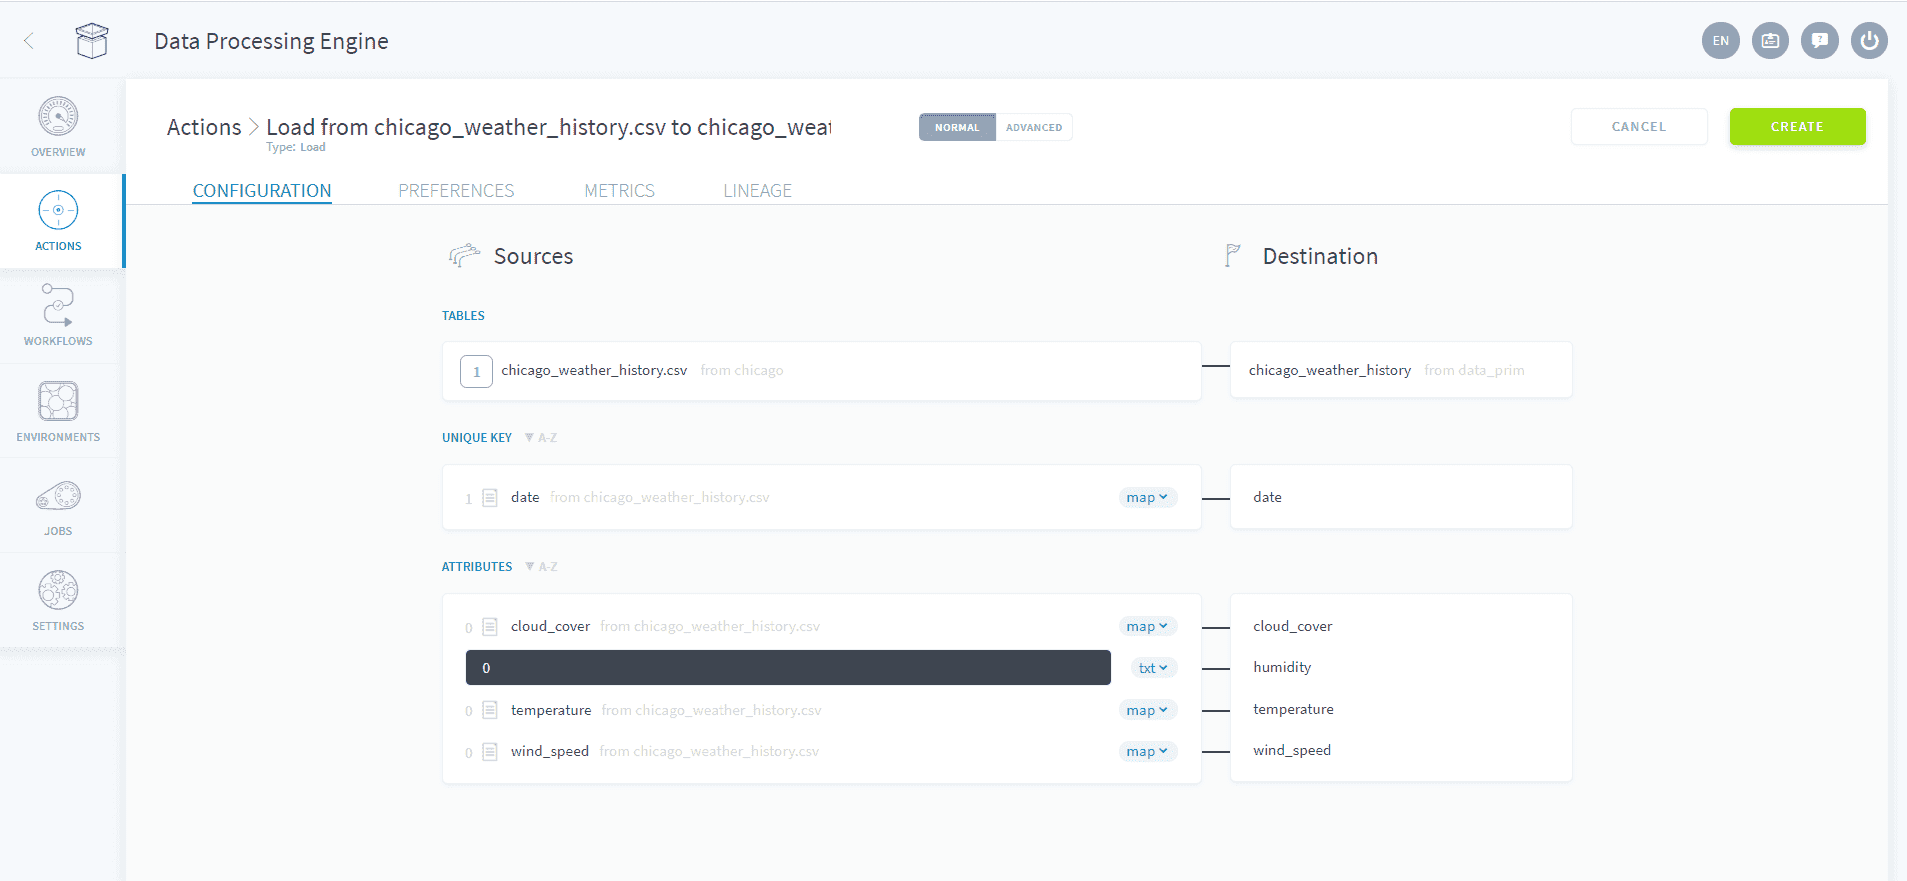
Once the source & destination have been selected, the system will automatically map the destination attributes of your destination table with the different columns that it has identified in the raw data source.
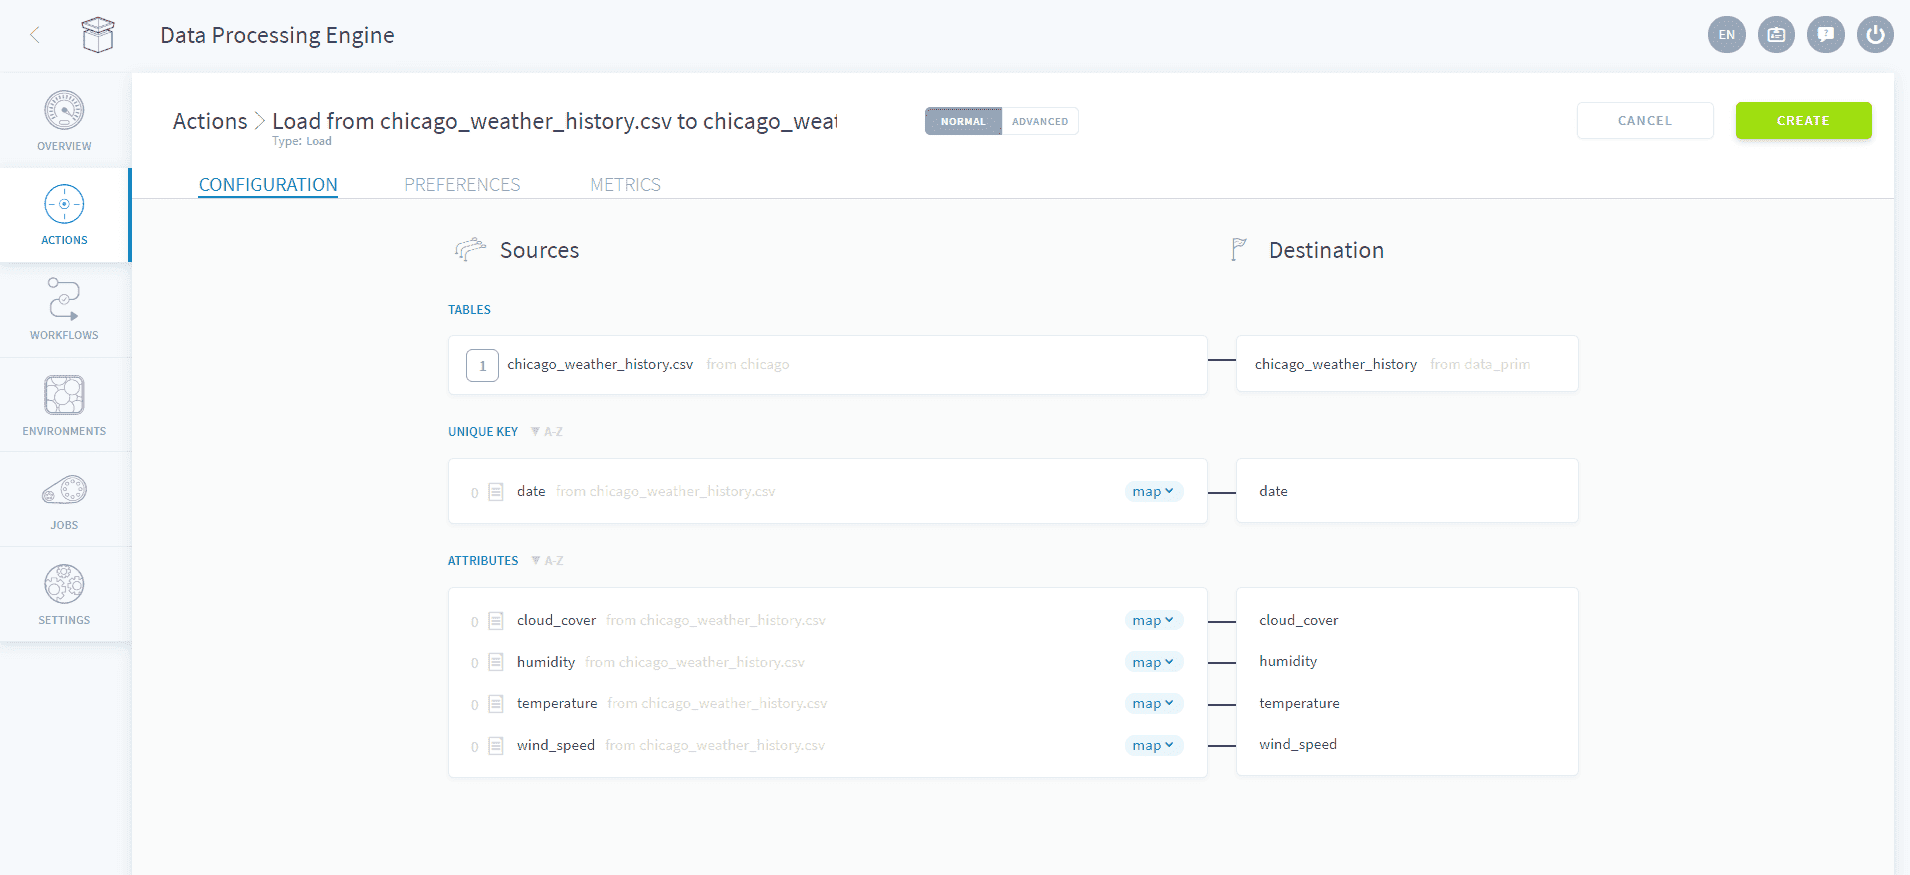
On the picture below, you can see that the date attribute has a a value of '1' beside the notepad icon. This indicates the number of data validation rules, also called blueprint rules, defined in the Lakehouse Manager, that will be automatically applied when loading the data. Blueprint rules allow users to quickly filter out invalid data like nulls / empty cells or reformat values such as date or currencies.
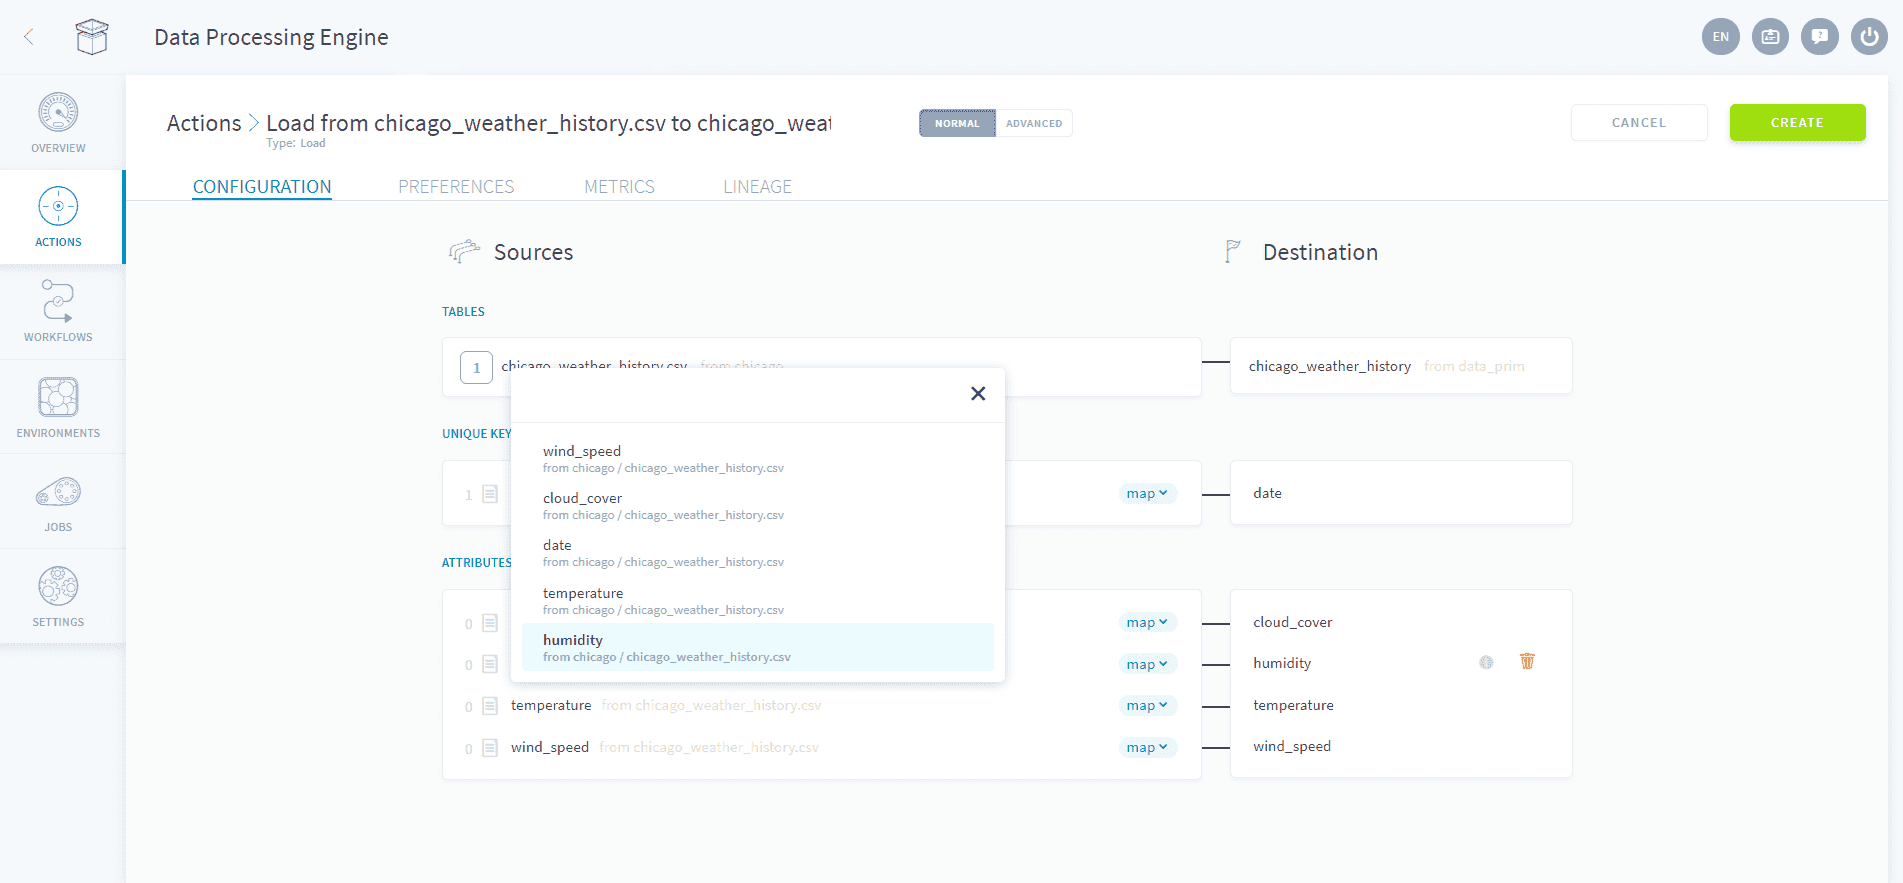
Note that you might want to insert raw text directly inside your destination table. This might come in handy for instance when you want to count the number of data points or tag a certain source with a label that will be later used in an aggregate table. To do that, select < txt > which will set the source attribute to a raw text input field.
Configure the action's preferences
Once you're satisfied with the mapping of your attributes, navigate to the preferences tab to configure the action settings.
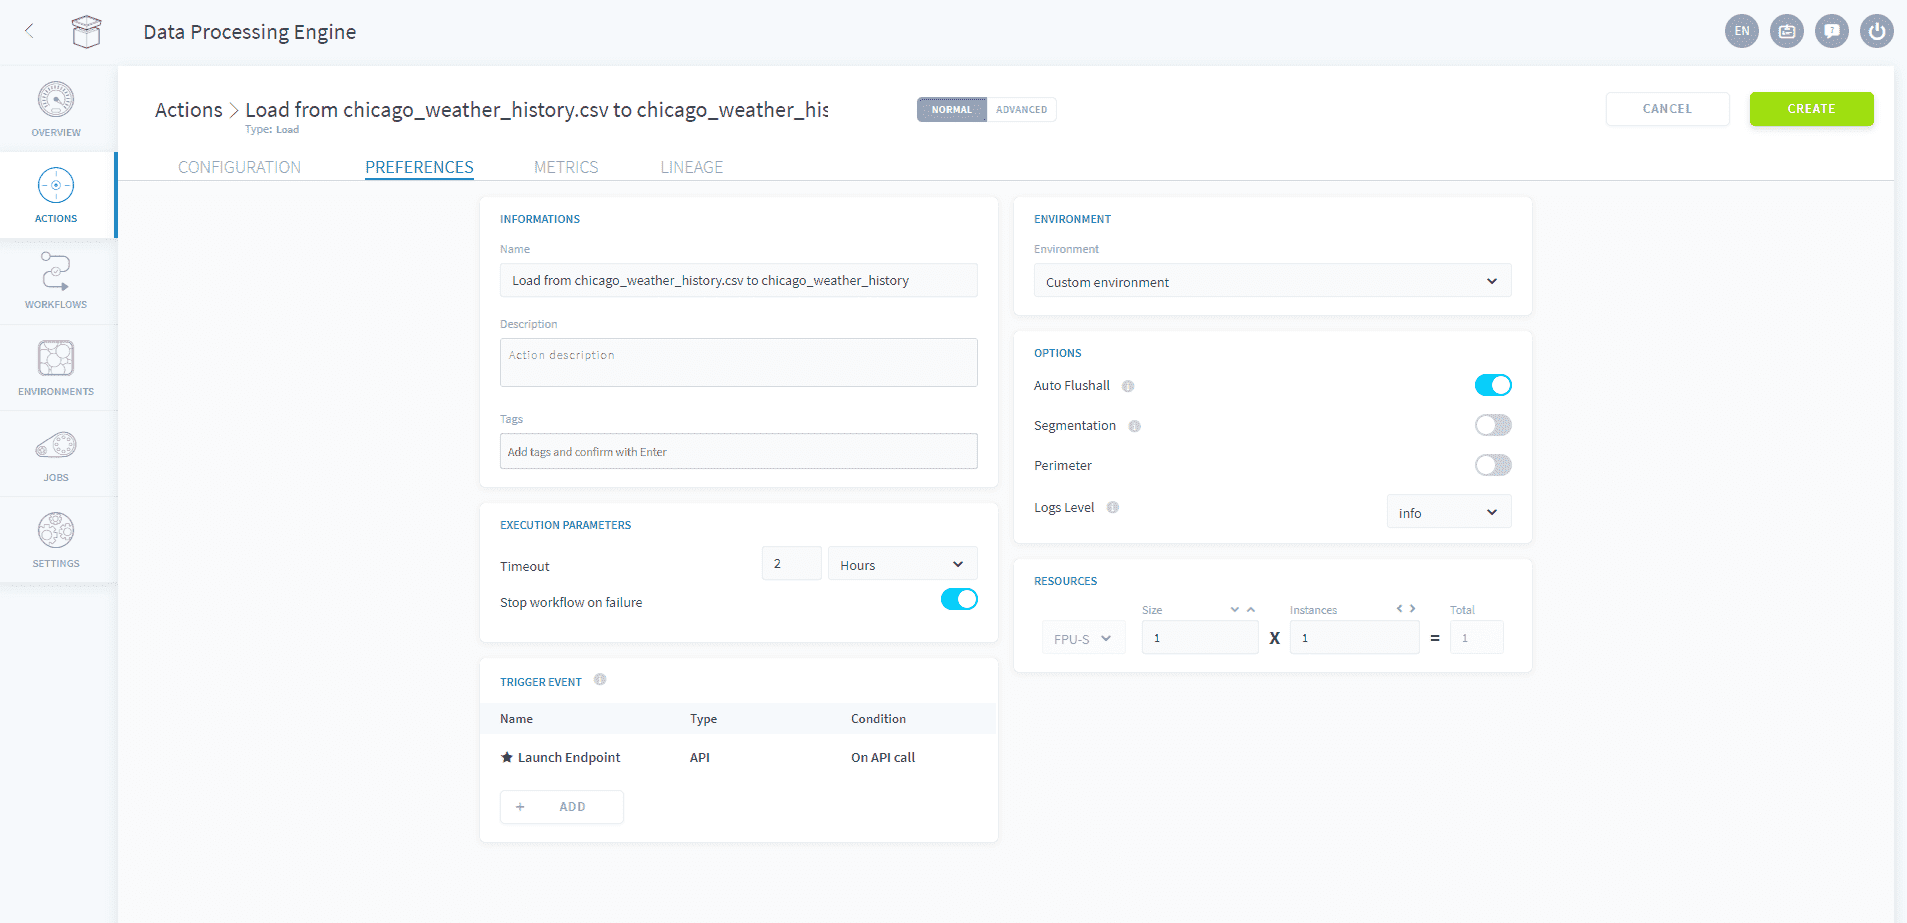
When you are done editing your action, click on Create to validate the action.
Advanced Mode
If you need to access the JSON configuration file of the action, you can activate the Advanced mode by clicking on Advanced at the top of the page.
Use the Advanced mode of a Load action
Go further
If you need training or technical assistance to implement our solutions, contact your sales representative or click on this link to get a quote and ask our Professional Services experts for a custom analysis of your project.
Ask questions, give your feedback and interact directly with the team building the Data Platform on the dedicated Discord channel.
If you need support with your OVHcloud services, create a request in our Help Centre.
Join our community of users.