

Stream data from Apache Kafka to the Platform
This tutorial demonstrates how to use the data from an Apache Kafka Broker in the platform
Objective
This tutorial demonstrates how to use the data from an Apache Kafka Broker in the platform.
The first section is dedicated to creating some test data on your Kafka server. If you already have messages on your Broker, you can skip this step.
Introduction
Requirements
To follow this tutorial, you need to have a Kafka Broker up-and-running. The sample code provided was written for a server that did not require any particular authentication (i.e. anyone with the IP address can read messages). If your Kafka server has its authentication configured differently, you need to adapt the code used here to deal with that.
Additionally, we recommend having done at least the first Getting Started tutorial before doing this one. Here we assume you are comfortable using Data Platform and familiar with the main components of the platform.
Concepts overview
Data Platform integrates to Apache Kafka through the Kafka Connector in the Connectors. This connector allows to retrieve data from one or more topics in the same server to Data Platform.
Typically, data is then ingested into Lakehouse Manager tables. One table will store data from one topic and each message in a topic becomes a line of data in the corresponding table.
About nested fields... currently Data Platform only supports JSON-formatted messages without nesting. Therefore only fields that are at the root level of the JSON representation are taken into account.
Once you've configured your connection to Kafka topics in Connectors and setup your Lakehouse Manager tables, you will need to load the data from the topics to the tables by launching a Load action using Data Processing Engine.
After loading the data, your messages will be automatically loaded into Lakehouse Manager tables as long as your action is running. Please note that your actions will be executed in Serverless execution mode by default, which has a timeout. That is why we recommend you to use the Always-up execution mode if you are using the Kafka Connector.
Now let's see how all of this works in practice!
Setting up test data (optional)
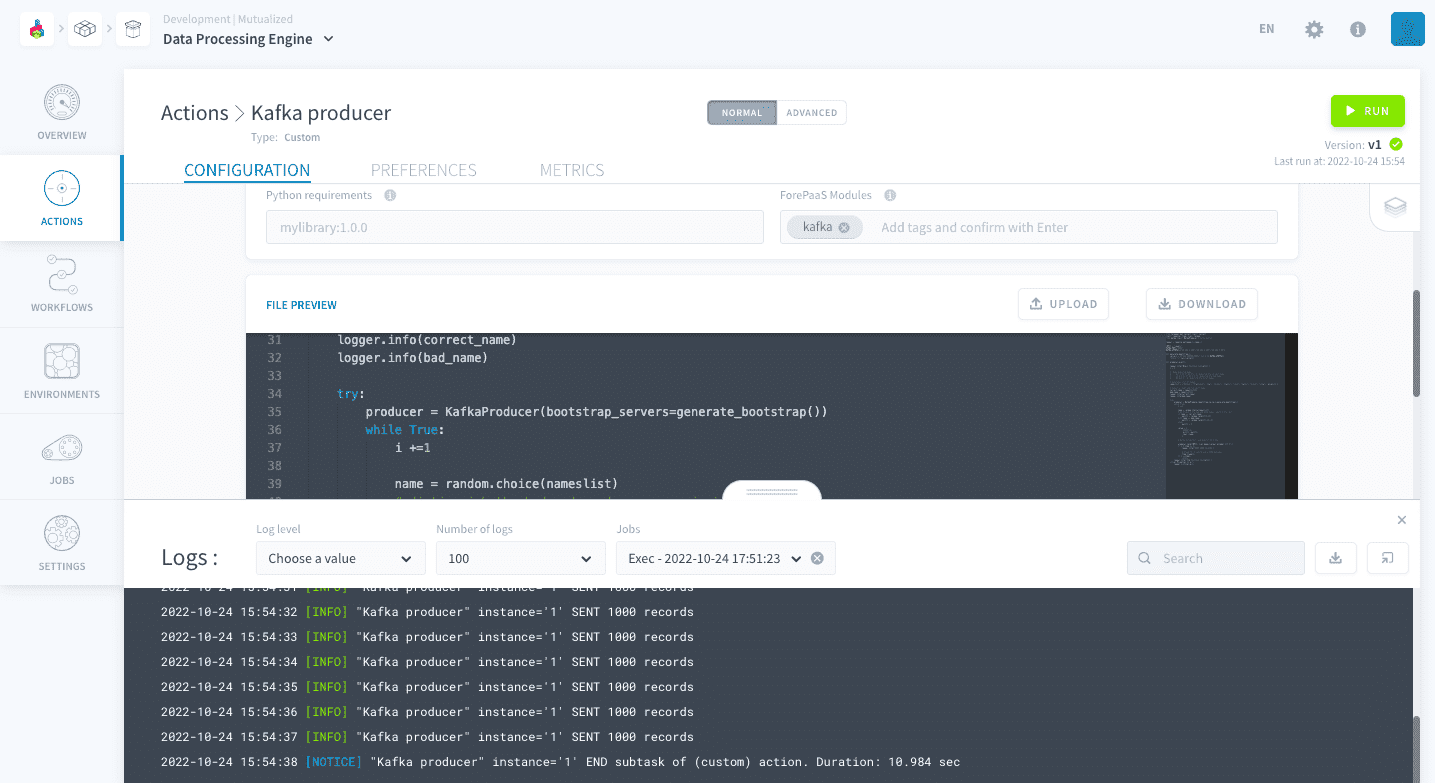
To send messages to your Kafka broker for test purposes, you can configure a Producer in Data Platform using a DPE Custom Action. Create a Custom Action in the Data Processing Engine, select start with a boilerplate and replace the boilerplate code by the one below (a simple name guessing game):
The code above represents a name guessing game, it will simply send a messages representing guesses. Each message contains an index, a name (the guess) and the points gained for the guess. Once 10 0000 messages have been sent, the action will stop and you should have some messages in your Broker.
Do not forget to add the kafka module to the Python dependencies of your Custom action.
Now, run the action to populate your topic with the test data and stop the action running once a few thousand records have been sent.
Connecting your Kafka server to Data Platform
Configure your Kafka connection
The first thing to do is configure your connection to a Kafka server and choose a topic to read data from. If you need help, you can check our dedicated Apache Kafka Connector article.
Configure your schema
Now that your connection and topic are properly configured, you are ready to access your messages. To do it, you need to go to the Analyzer tab and extract the metadata of the topic in your connection.
The connection will appear on the left sidebar and the topic will be displayed upon clicking on the connection. Select the topic and click on the Extract metadata button.
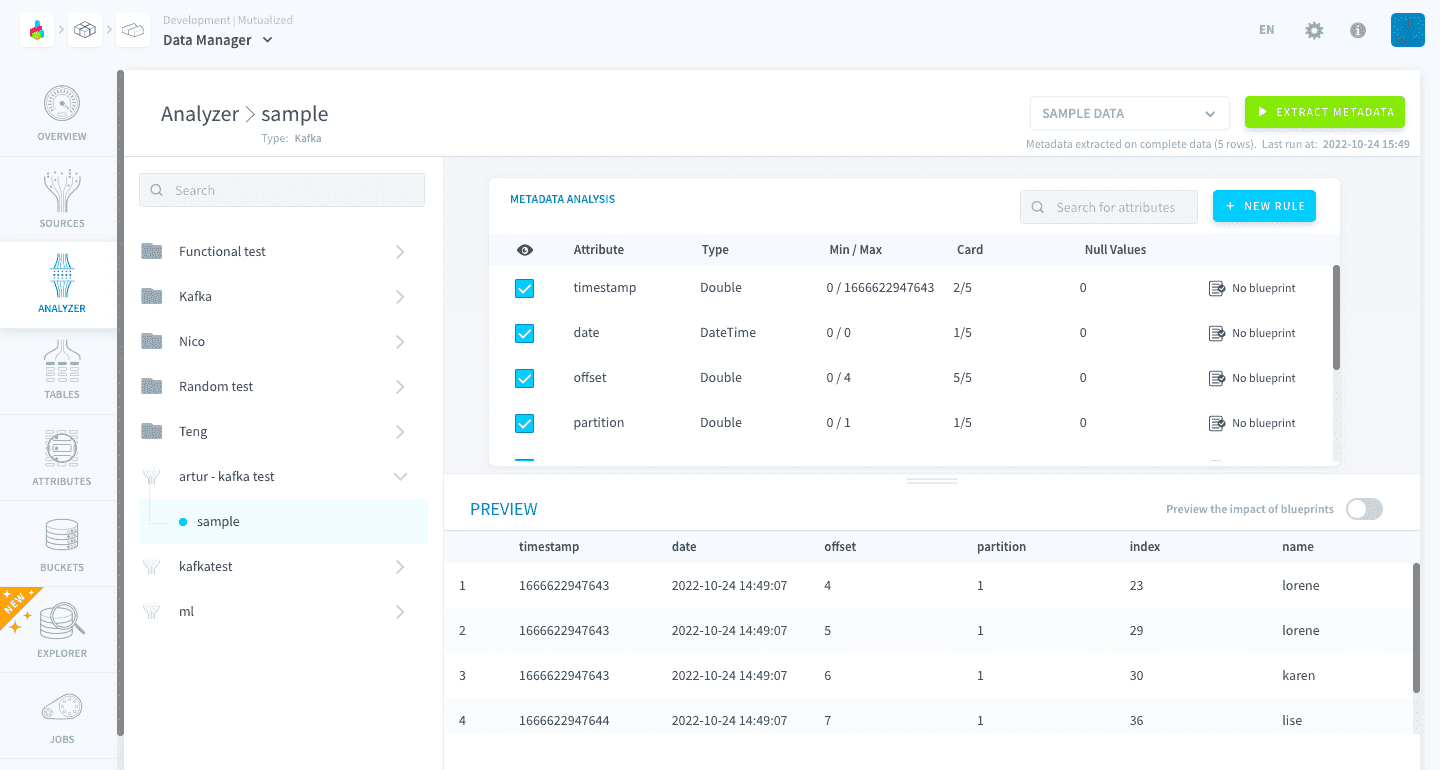
After the metadata extraction, the messages will appear in the preview panel where each line corresponds to a message. Check the boxes on the metadata panel to configure which fields of the message will be included when you use your message in Data Platform.
You may notice that there are additional fields in your message. The timestamp, date as well as the offset are given by the Broker and correspond to your messages arrival timestamp, arrival date and topic offset respectively. They can be useful for some use cases but, if you don't want to include them in your data Project, simply uncheck them in the Metadata panel and they will be ignored by the rest of the platform.
Create and build your table
Before loading your data into Data Platform, you need to create and build the table that will store it. If you are not familiar with these concepts you can check our Tables article. You will probably want to read the Create a new table and Build all tables sections.
Loading your data into Data Platform
Configuring the Load Action
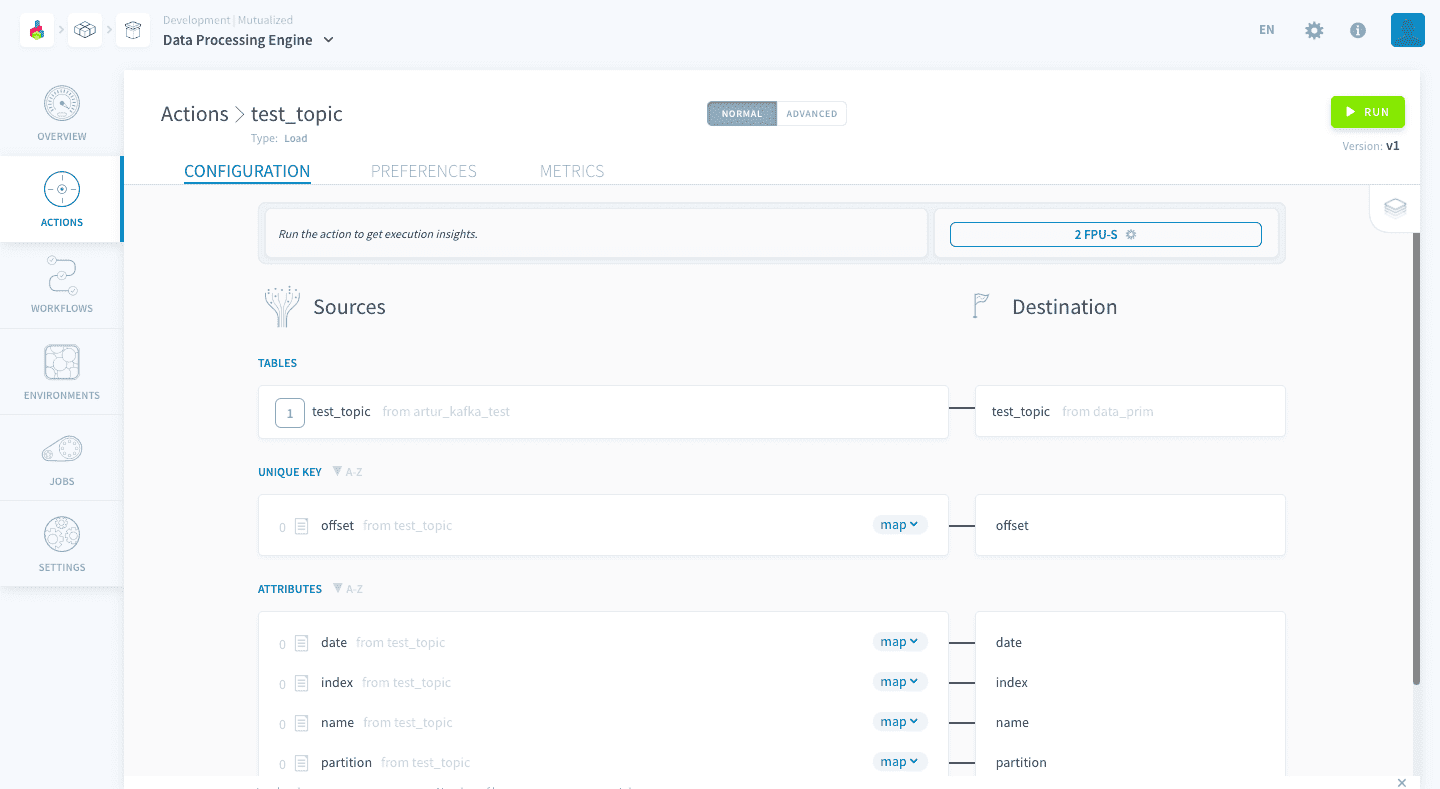
In comparison to other connectors, there are a few differences when creating a Load Action with a streaming source such as Apache Kafka.
To get started, select the table related to your topic as Source when configuring the action (if you already generated the action while creating the table then you will not need to select the table).
Execution modes
When running a Load Action connected to a Kafka source we strongly recommend you to select the Always-up execution mode.
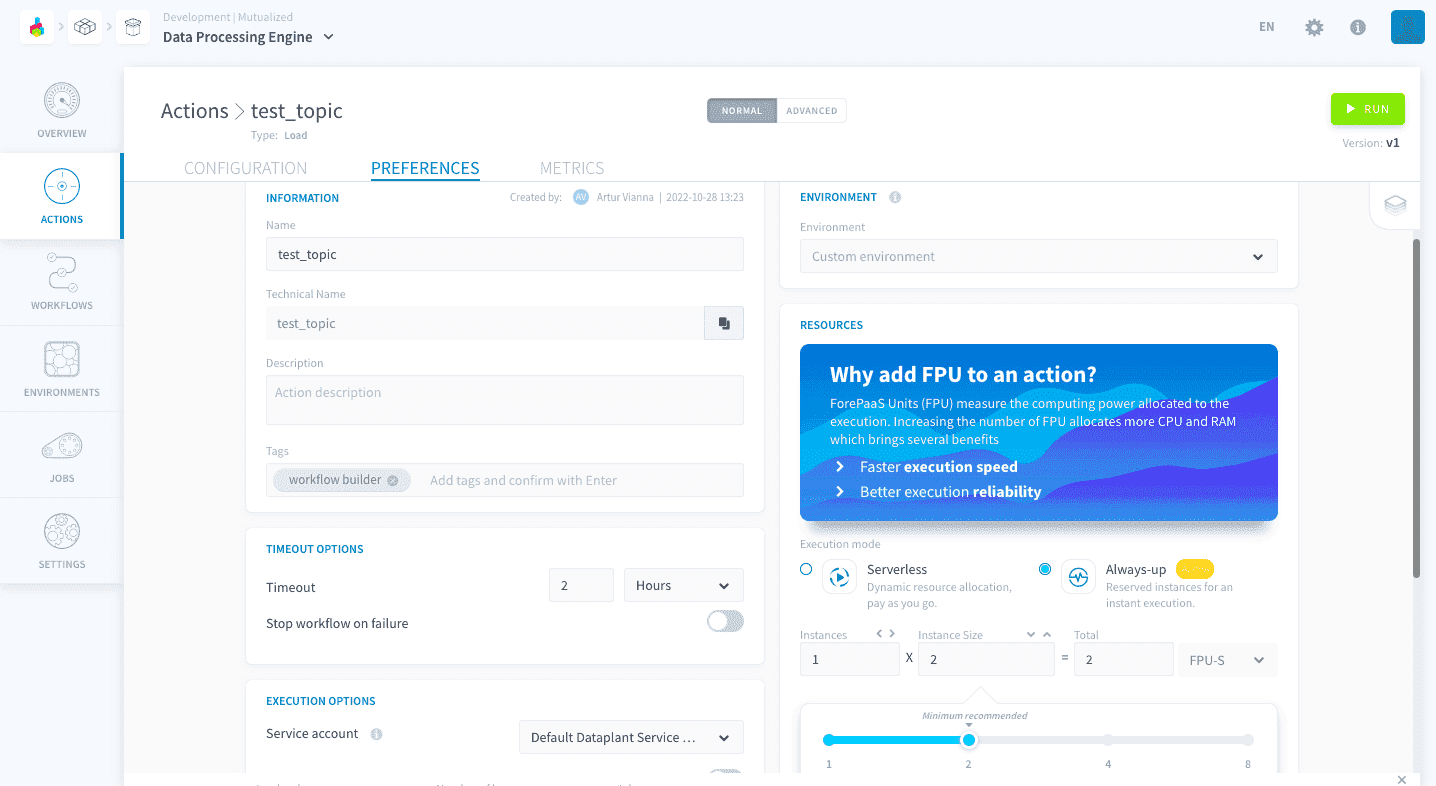
Regardless of the Execution Mode you use, your action will run until some data arrives. Once it does, it will be loaded into Data Platform.
If you are using the Serverless execution mode, the action will stop running once timeout is reached (by default 2 hours). Given that new data can arrive anytime in your Kafka Broker, this means that you need to re-run this action after it stopped if you want to keep feeding data from your Kafka to Data Platform. That is why we recommend the use of the Always-up execution mode, specially for production environments.
If you don't want to use the Always-up execution mode, you can alternatively set Time-based triggers to automatically run your action according to preset time interval.
Automatic segmentation
When using a Kafka connector, you can benefit from a faster execution time by using the Automatic Segmentation feature. This option is available in the Preferences of your action, use it for heavy workloads!
Custom offset
One other option available to you is to start reading your messages from a custom offset instead of configuring your topics to reading from the earliest or latest message.
To override the Latest or Earliest offset policy you configured on your topic and start reading messages from a defined offset you have to use the Actions' Advanced mode. Simply add a field inside the paras.load_from field as the following example (starts reading from offset 7):
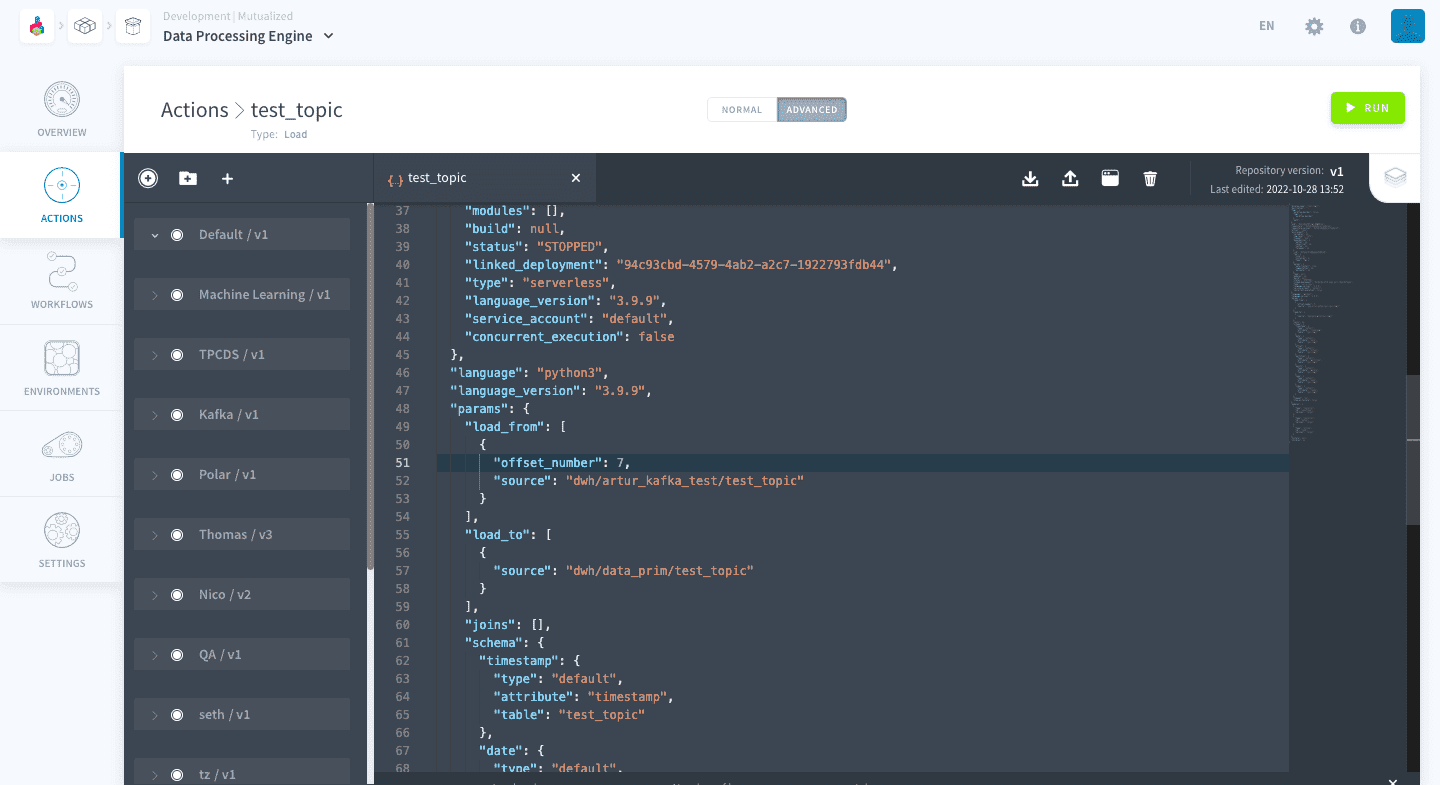
Note that this will override the Latest or Earliest offset policy you configured on your topic.
Technical considerations
Another consideration you should be aware of is that, if you are on Earliest mode and you change your destination table after reading the earliest messages, upon a running the Load action again, all messages in the topic will be read again.
This happens because the offset of the last message consumed by Data Platform is stored in the metadata of the destination table of the Data Platform database. If you use a new destination table, the offset will start back from the earliest.
Go further
If you need training or technical assistance to implement our solutions, contact your sales representative or click on this link to get a quote and ask our Professional Services experts for a custom analysis of your project.
Ask questions, give your feedback and interact directly with the team building the Data Platform on the dedicated Discord channel.
If you need support with your OVHcloud services, create a request in our Help Centre.
Join our community of users.